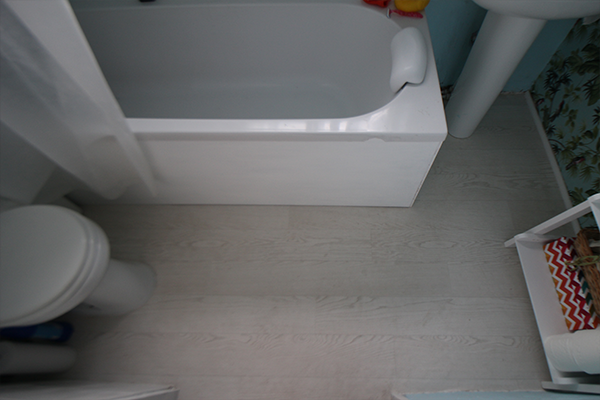
I recently fitted vinyl flooring in my bathroom to give the room a new lease of life. When I’ve thought of vinyl flooring in the past, I’ve thought of 70s dated lino. However nowadays there’s such a huge range of vinyl, from wood effect to tile effect, that it’s difficult to tell some apart from the real thing. Vinyl is also a great choice for a bathroom because of the moisture in the room. I went for a white wood floor effect and personally think it’s a much better choice for a bathroom than real wood, which can cause issues when it comes into contact with water.
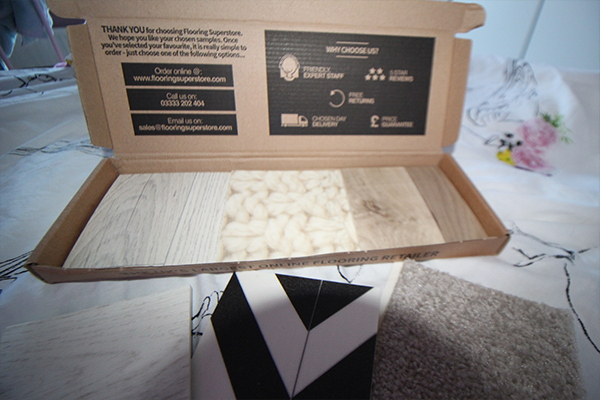
I shopped around a bit and found a company online, Flooring Superstore, which has a huge range of flooring at the best prices that I found. They do free samples, which makes buying online much easier. Just pick up to 6 samples and they’ll post them out to you for free. The right amount of my chosen vinyl came to £38. Bargain!
Measuring your floor
To measure your floor for vinyl, you’ll need to measure it at a few different points. You might be surprised that your room isn’t quite square and you don’t want to order it based on measurements at one side of the room only to find that it’s not quite wide enough to cover the floor on the other side of the room. To combat this, use the longest and widest measurements that you take of the room to order the right amount of flooring. Make sure you buy flooring that is slightly larger than these dimensions; remember you can always trim it down to size, but you can’t make it bigger than it is!
Preparing the floor
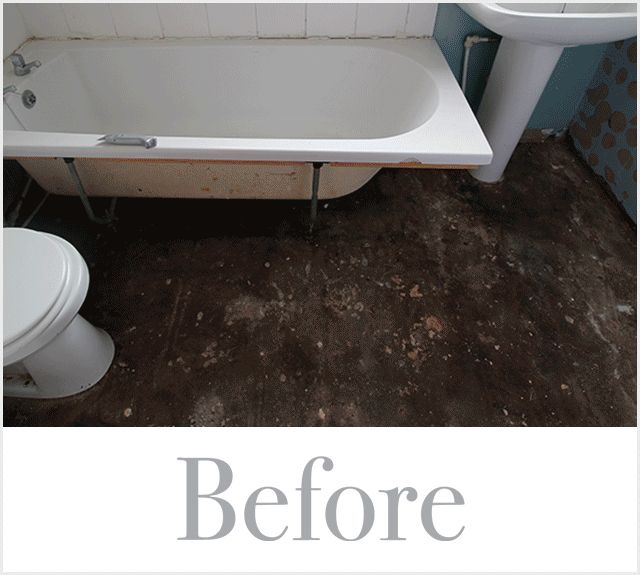
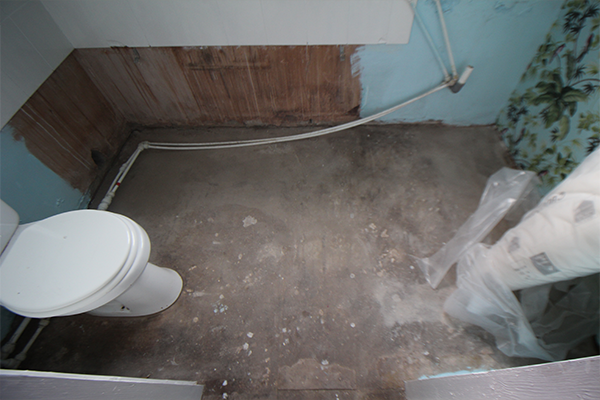
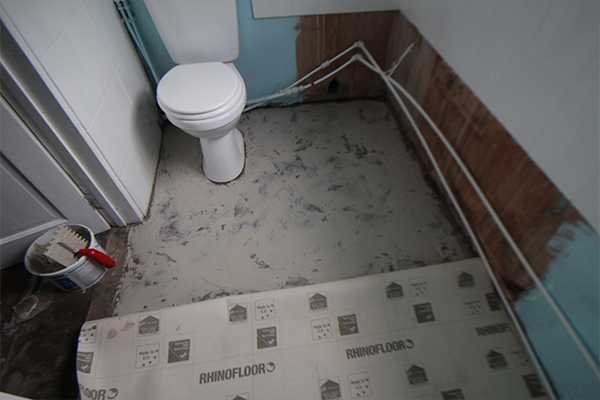
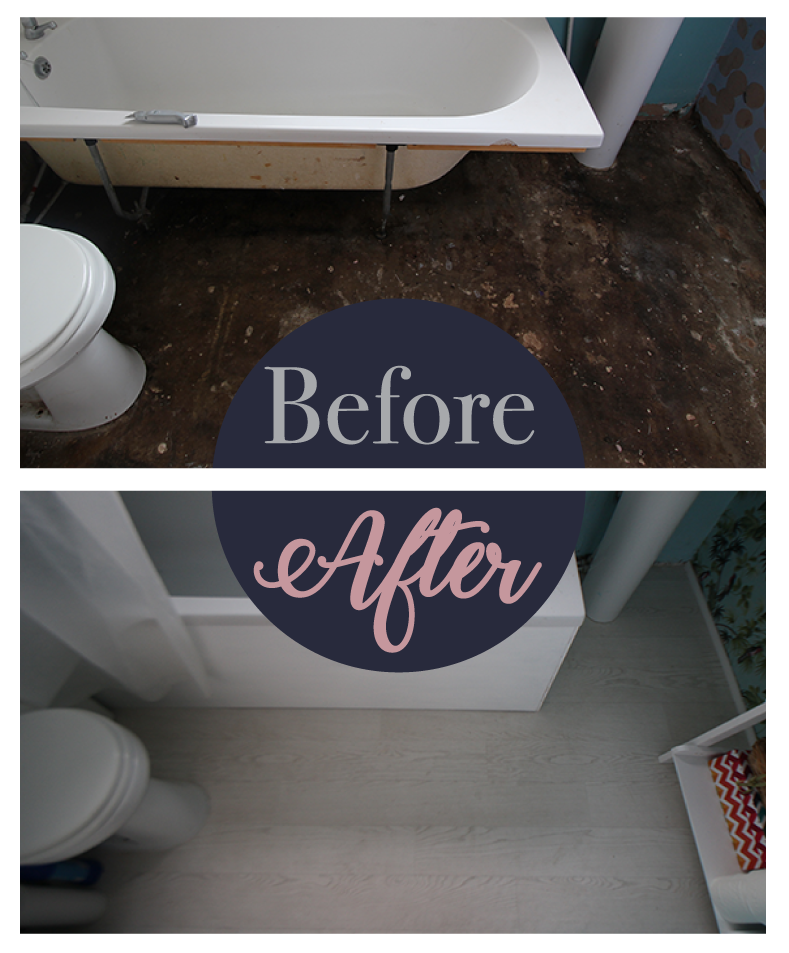
You’ll need to remove everything (within reason) from the room. Obviously you’ll leave the toilet there. I removed the bath and handbasin but that’s just because I was refitting them. You should be able to leave them there and fit the floor around them in the same way that you will the toilet.
Once you’ve removed everything, you’ll need to sweep and/or vacuum the whole floor. You want it to be as clean as possible before you start. Any things that are left on the floor may pierce through you’re flooring once you’ve laid it, so make sure you get it all up to start with.
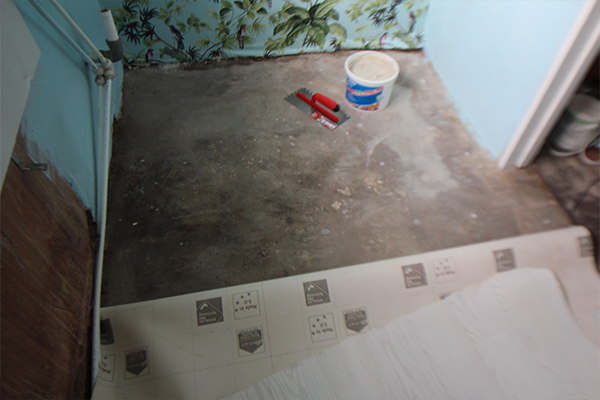
Damp concrete
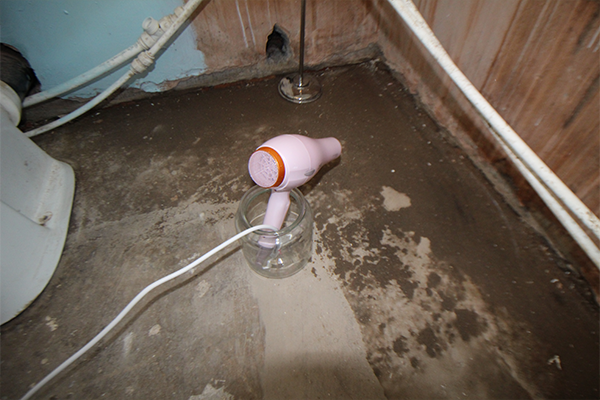
One thing that I had to contend with, which hopefully you won’t have to, was a damp concrete floor. I was laying my vinyl flooring on concrete and the concrete was damp due to an ongoing leak from the bath. I used a hairdryer to dry it off, but this only dried the surface and the damp rose up to the top once I moved the hairdryer.
This put a temporary stop to fitting the floor because you need to make sure the surface you’re laying it on is dry or you’ll encounter all sorts of problems down the line. For one thing your vinyl flooring will start to rot. You’ll also have a persistent smell of damp and mould and it can also cause structural problems with your house because the vinyl is not breathable, which means you’re sealing the damp into your floor with no way for it to escape.
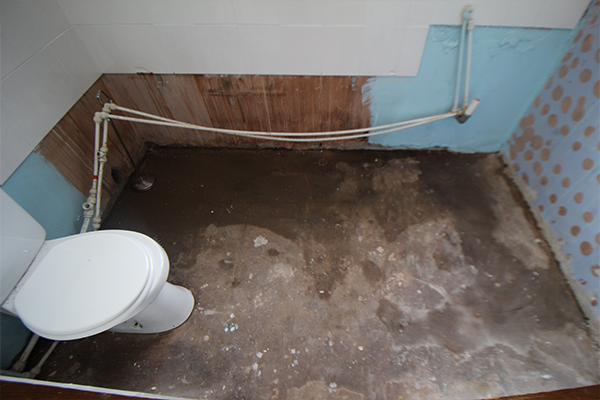
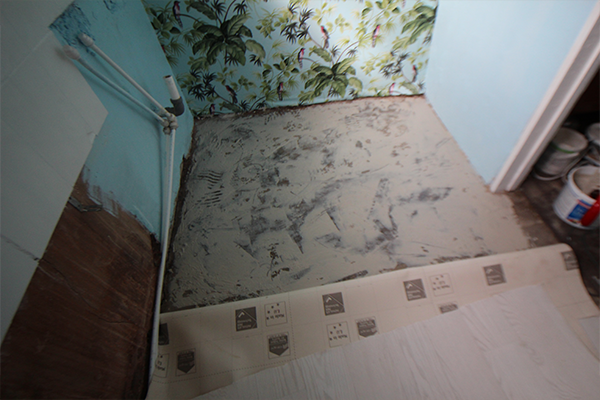
Checking for damp concrete
On my floor, it was obvious where there was damp because you could see it against the dry concrete because the damp parts were darker. If it’s not so obvious on your floor and you feel that you may have a problem with damp, you can test for it by cutting a large square of plastic sheeting, laying it flat on the floor and duct taping it all around the edges. Leave this for a couple of days before pulling it up and check underneath for any signs of moisture. If it’s dry, you should be good to go and be able to fit your flooring. If it’s got moisture on the sheet, you will need to take steps to get rid of the damp before fitting your flooring.
Drying a damp concrete floor
Note: you can skip this step if your floor isn’t damp!
If your floor is just wet on the surface, you can leave it to dry or use a heater or hairdryer to quicken the drying process. If like me, you have damp that’s permeated through the concrete floor, you’ll need to take further action to dry it out before you get to fitting your floor. You can get this done professionally but it can be really expensive. I opted to do it myself. I closed the window and the door of the bathroom and ran a dehumidifier until it had extracted all the moisture from the floor. I bought a Vax Dehumidifier direct from their website (this was the cheapest place by far for this model after shopping around). It cost £120 including speedy free delivery and the £10 discount you get when you sign up to their newsletter. The same model was £200 in Argos so I was happy. It’s got a clothes drying setting so I was confident that I’d get regular use out of it after taking care of the floor. Annoyingly, when I was writing this blog post and reviewed my invoice, it appears that although I bought a 16L model, I was actually sent a cheaper 10L model, so do beware if you’re purchasing from Vax.
I set the dehumidifier to run with the bathroom window and door closed (this is important to get the best results) and within about 3 days it had sucked all the moisture out of the floor. You can also help it along by using a heater alongside the dehumidifier.
Laying the floor
Once the floor was clean and dry, I was finally able to fit the vinyl flooring! Hopefully you won’t have any problems with damp and will be able to get to this step much quicker than I did. You’ll need to unroll the flooring and lay it out as flat as you can.
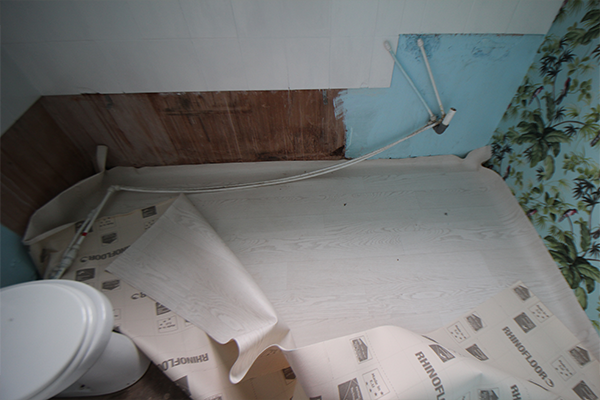
As my vinyl had a wood floor effect, I lined up the edge of the “wooden floor” with the wall and door frame so it would be straight. If your walls are straight you can fit the vinyl alongside two perpendicular edges of the floor, without having to trim any away away where the floors meet the walls. Unfortunately for me, none of my walls are straight, so I had excess flooring at every edge. Your vinyl will be slightly too big for the room, so turn the edges up towards the walls.
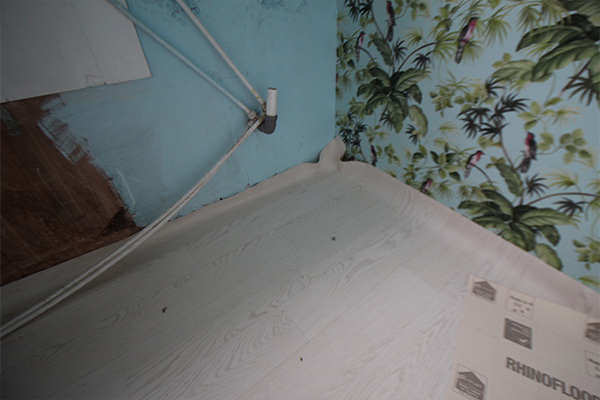
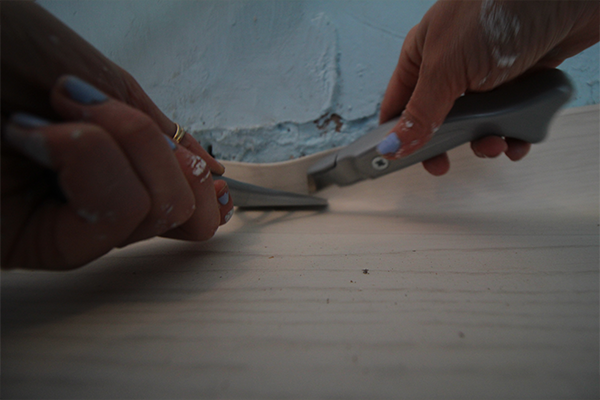
Once you’re happy that the flooring is in position, you can start to trim away the excess at the edges. Use a stanley knife with a sharp fresh blade for this. You’re always better off trimming a little a a time if you’re unsure of this step: you can always trim away more if you need to, but there’s very little you can do if you cut too much away.
Cutting around the toilet and other obstacles
It can seem tricky to cut around obstacles such as the toilet, but it’s easier than you think. Before you start, I’d always recommend giving the toilet a good clean as having your head close to it is going to be unavoidable I’m afraid. Lay down your vinyl as flat as possible down to the front of the toilet (or handbasin or whatever else you’re fitting the vinyl around). Find where the flooring will touch the very centre front of the toilet.
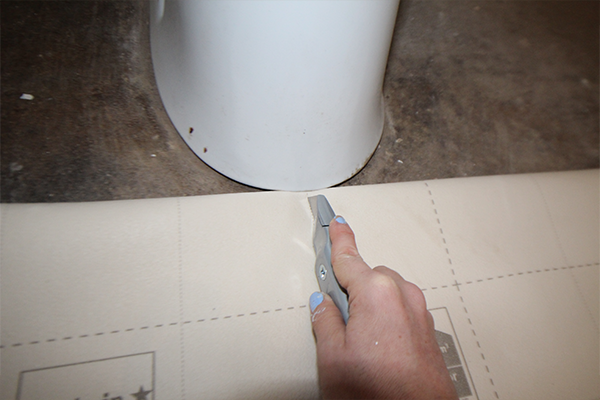
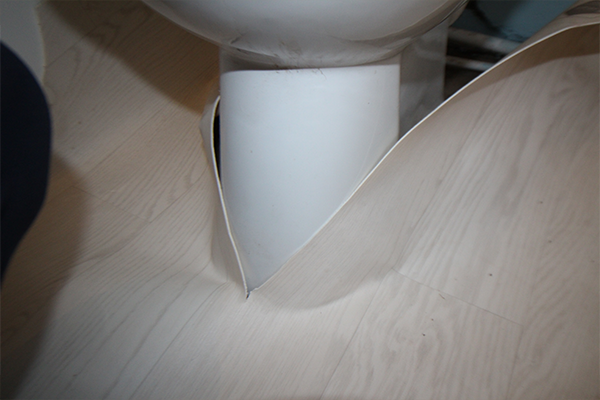
Use your knife to cut a straight line from this point, out towards the edge of the flooring (the part which will be behind the toilet). You’ll then be able to lay the vinyl a little flatter, around the sides of the toilet. Once you’ve done this, you can start slicing upwards to make the vinyl lay flatter around the side of the toilet. Do this in increments. It’s easy to do if you do a little at a time. If you make cuts that are too big, you may end up cutting away bits of flooring that you need.
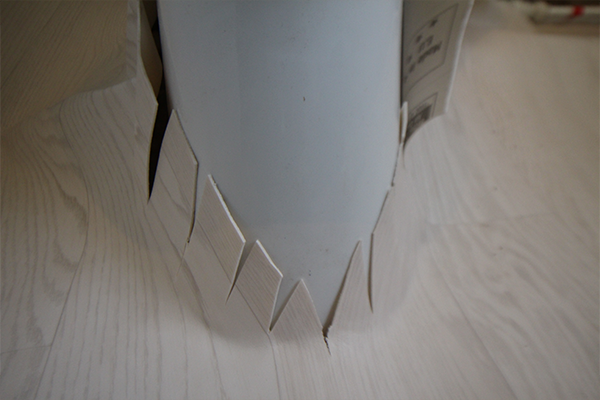
As you cut upwards, you’ll be able to flatten the flooring more and more so that it fits around the toilet. Once you’ve cut it so that it sits flat on the floor, you’ll be able to cut away the parts you’ve sliced, around the bottom of the toilet.
Around the back of the toilet, the flooring will lie flat and you can match up the two sides where you cut the straight line to start with.
Gluing down your vinyl flooring
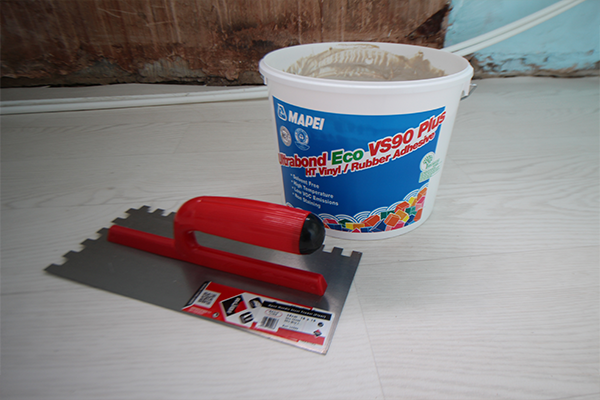
After you’ve trimmed your vinyl to size and are happy with its position, you need to glue it down to the floor underneath. I used Mapei Ultrabond Eco VS90 for this. I bought it from Screwfix for £21.99.
Lift up and pull back half of your flooring and then work at the far edge, back towards the middle of the floor where you’ve folded the vinyl over.
Use a trowel (mine was about £3.50 from Screwfix) to smoothen the adhesive onto the floor beneath the vinyl. Once you’ve covered the surface of the floor and smoothened it out, you can unroll the vinyl flooring back onto it.
Start at the centre of the vinyl, and use your hands to smoothen it out towards the edges to ensure there are no air bubbles or bumps. Once you’ve glued that half down, pull back the other half of the vinyl and repeat the steps above to glue the rest of the flooring down.
Sealing the edges
Once you’ve fitted your flooring and glued it down, your last step will be to seal the edges. This may not always be necessary, depending on what room you’re fitting your vinyl in. Because mine is in the bathroom, it was necessary to seal the edges to ensure that I don’t get water damage from any spilled water. This is a really easy step. Simply get a water-proof silicone (such as All Purpose Silicone Sealant which I got from Wilko for £4), use your knife to slice off the nozzle to make a small hole. Then use a gun to draw a line of silicone all around the edges of the vinyl flooring. Don’t worry too much if you make a bit of a mess; you can wipe away any bits that get where they shouldn’t be with a damp cloth.
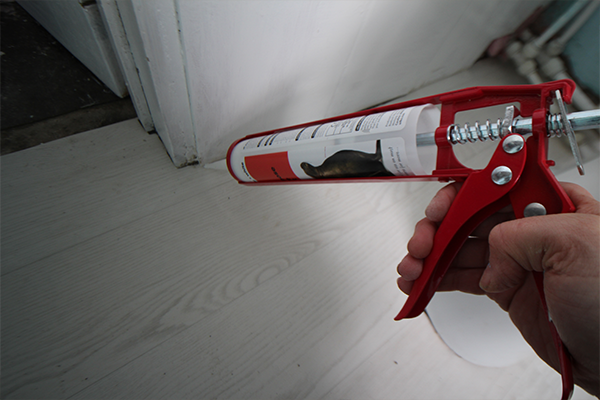
I found that because the walls in my bathroom aren’t quite smooth and straight, where I cut the vinyl at the edges looked a little messy because I couldn’t just cut it in a straight line. However, the silicone sealant left a really neat line which masked all of this and left a lovely finish.

My top tips for using sealant:
- Wear disposable gloves. Sealant is really sticky and messy and a pain to get off your hands. If you wear disposable gloves when you use it you cut out a lot of hassle.
- Use masking tape. If you want to get a really neat line of sealant with minimal clean-up, use masking tape to mask off a line above and below the area you’re sealing (so in this case, just before the edge of the vinyl flooring and just above the bottom of the wall). Then all you need to do is fill in the gap between the two strips of masking tape, use a wet finger to rub along the line you’ve made with the sealant and then remove the masking tape. It leaves a really nice clean line and is so easy. I didn’t actually do this when sealing my floor, but did later when sealing my bath and it’s so much easier and neater than doing it without masking tape.
Once you’ve fitted your sealant, you’re done! You’ll need to leave it about 36 hours to fully dry to try not to use the room or do anything to create a mess in there as you don’t want any dust, etc. to stick to your sealant.

Time taken: 2 hours (it took me a lot longer because of the damp problem in my bathroom, but excluding the time it took to correct this, it only took a couple of hours to fit, trim, glue and seal the vinyl floor
Cost: about £50 (the flooring was £38, the adhesive was £22 but I only used part of it and the rest will be going to good use in the kitchen soon)
Difficulty: 4.5/10 (the trickiest parts were cutting around the toilet and sealing, but these were more fiddly than difficult.
Amazing job can’t wait to see it.