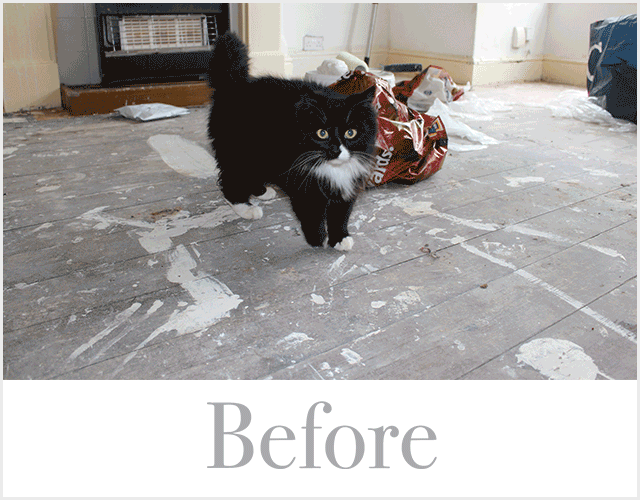
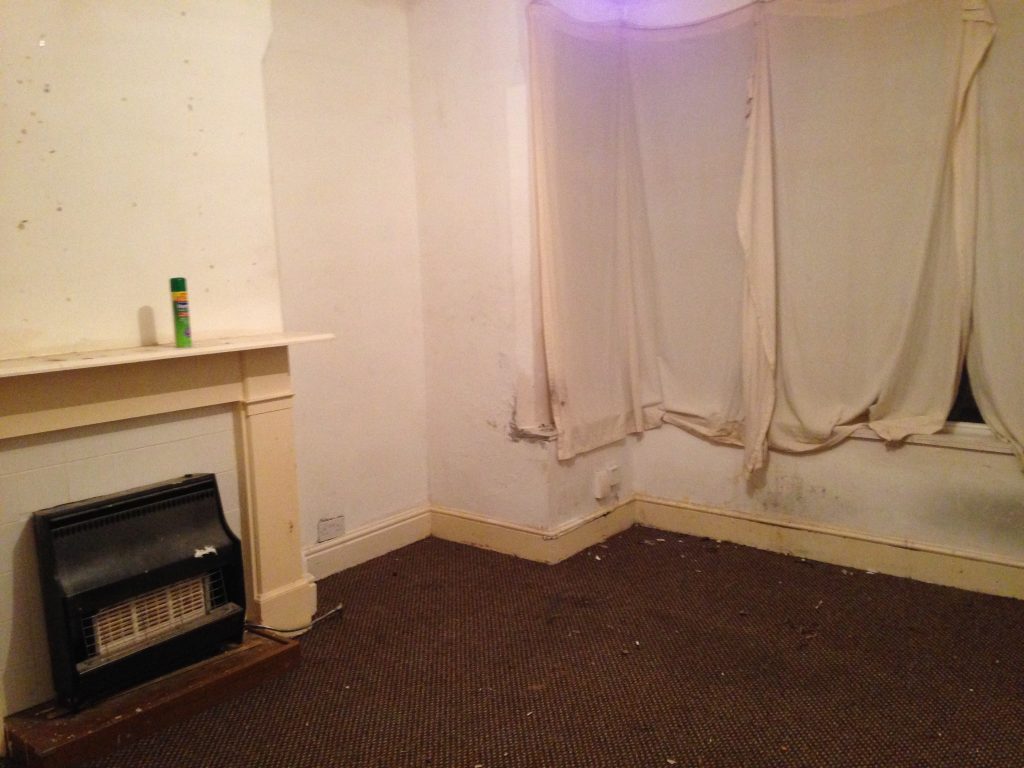
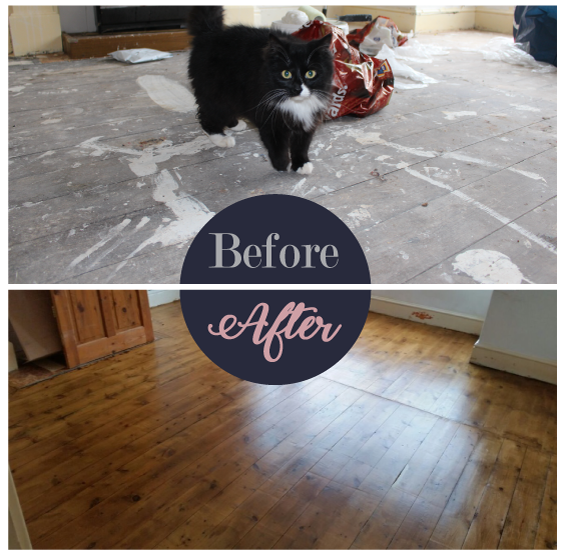
So after getting my keys to the house, the first thing I needed to do was pull up the carpets. Cat shit walked into the carpet wasn’t really the look I was going for so they had to go. Fortunately, like a lot of things in the house as it turned out, they hadn’t been fitted very well so it wasn’t too much of a mission to pull them up.
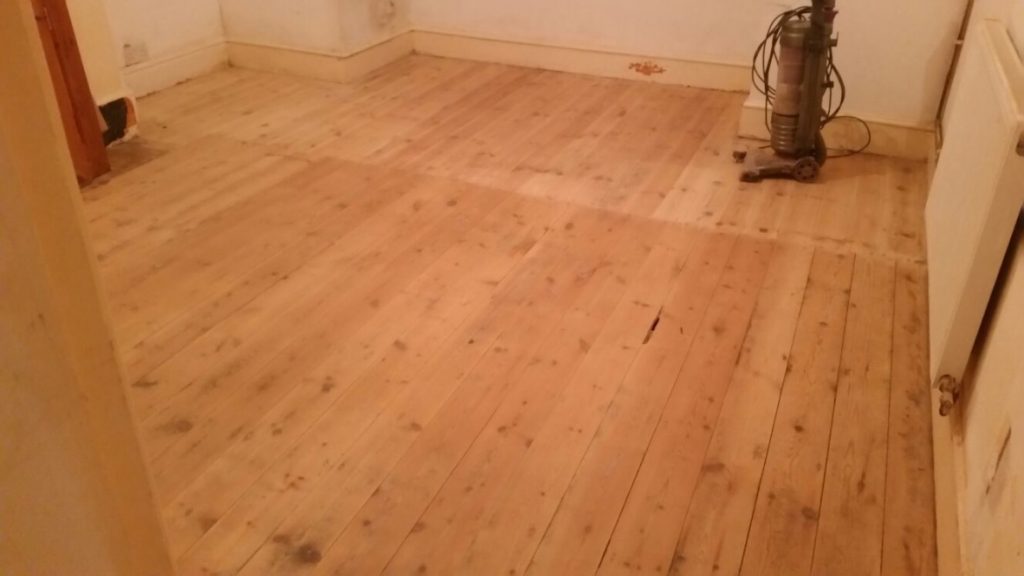
Underneath the carpets was the house’s original wood flooring, in surprisingly good condition. It was covered in paint splatters but didn’t seem to have much damage. As I’ve got a dog, I wasn’t too keen on putting down more carpet and decided instead to go down the route of cleaning up and varnishing the wood floor to make a feature of it.

As I hadn’t moved any of my things into the house yet, the floors were the best place to start because there was nothing in the way and no furniture to move or work my way around.
This bit is where I have to admit that although this blog is all about how I’m doing up the house by myself, sanding down the floors was actually done by my dad and my boyfriend’s parents. When I first got the keys, they were quite shocked by the state of the house so they volunteered their services. As there was so much cleaning and painting to do initially, I was happy to have someone to help.
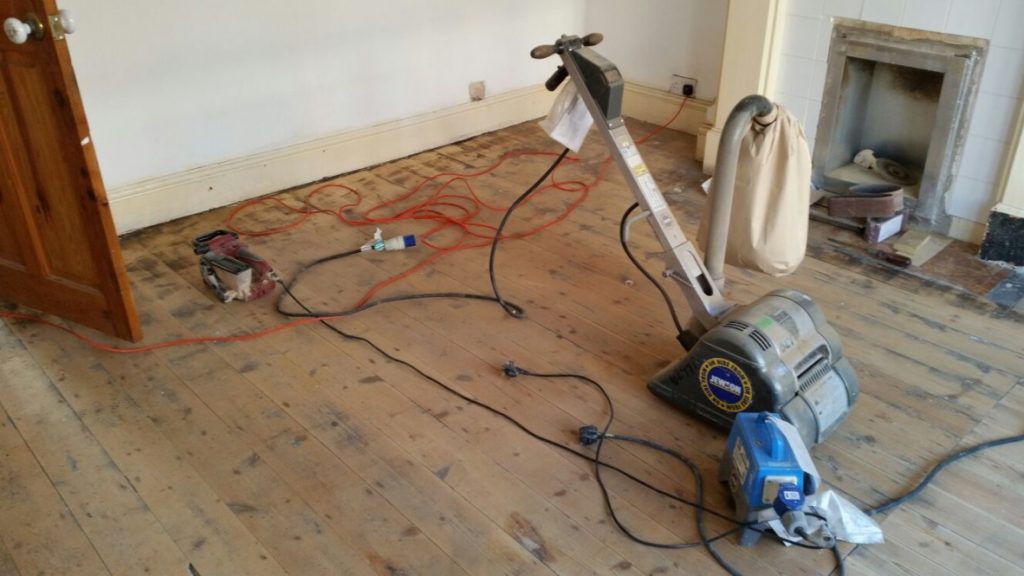
Sanding the Floors
I did a bit of shopping around and found that Jewson was the best place to go to rent a floor sander. They do a special offer where you get a discount if you rent a floor and belt sander together and they also offered to drop them both off at my house for free. You need to use multiple sanding sheets but they’ll sell you loads of sheets and then refund you for any you didn’t use when you return the sander, which means you don’t have to go back for more mid-job and also that you’re not stuck with loads of sheets you don’t need when you’re done.
In terms of prepping the floors before sanding, the most important thing to do is making sure there are no exposed nails as these will rip right through the sand paper. The best thing to do is to either hammer them right in if possible, or pull them out.
Sanding the floors of pretty much the whole house took about 3 days in total. We used the big sander for the centre of the floors and the belt sander to go around the edges. Sanding floors raises a whole load of dust so I was lucky I hadn’t moved anything in to the house yet at this stage! Be prepared to have every surface in the house covered in dust and for the dust to spend a considerable amount of time up in the air. Dust masks are a must! Between them, my Dad and my boyfriend’s parents sanded every room twice (and wanted to do each one a third time before I told them enough was enough – I was scared it was never going to end and I’d never actually get moved in!).
If you need to, use a wood filler to fill in any holes in the wood. We used Ronseal Natural Wood Filler and mixed in some of the dust we’d raised from the floor to ensure a good colour match. When it’s dried, it’s time to sand the floor again to get a nice smooth finish.
Don’t expect to start varnishing as soon as you’ve finished sanding – the dust stays in the air for so long that you need to leave it at least overnight to settle so that you can clean up and prep for varnishing/painting. We found at this point that the best thing to do was call it a day and go to the pub.
Preparing the Floors Before Varnishing
Once the dust had settled, it was time to get into the cycle of vacuuming, emptying the vacuum cleaner, vacuuming, emptying the vacuum cleaner… I’m sure you get the drill. The cleaner you can get the surface before you put down any varnish the better, so it’s always worth giving it one last vacuum after you think it’s clean enough.
The last thing you need to do is prep the floor for staining/varnishing by wiping down the part you’re about to work on with a clean cloth and some white spirit.
Staining/Painting/Varnishing the Floors
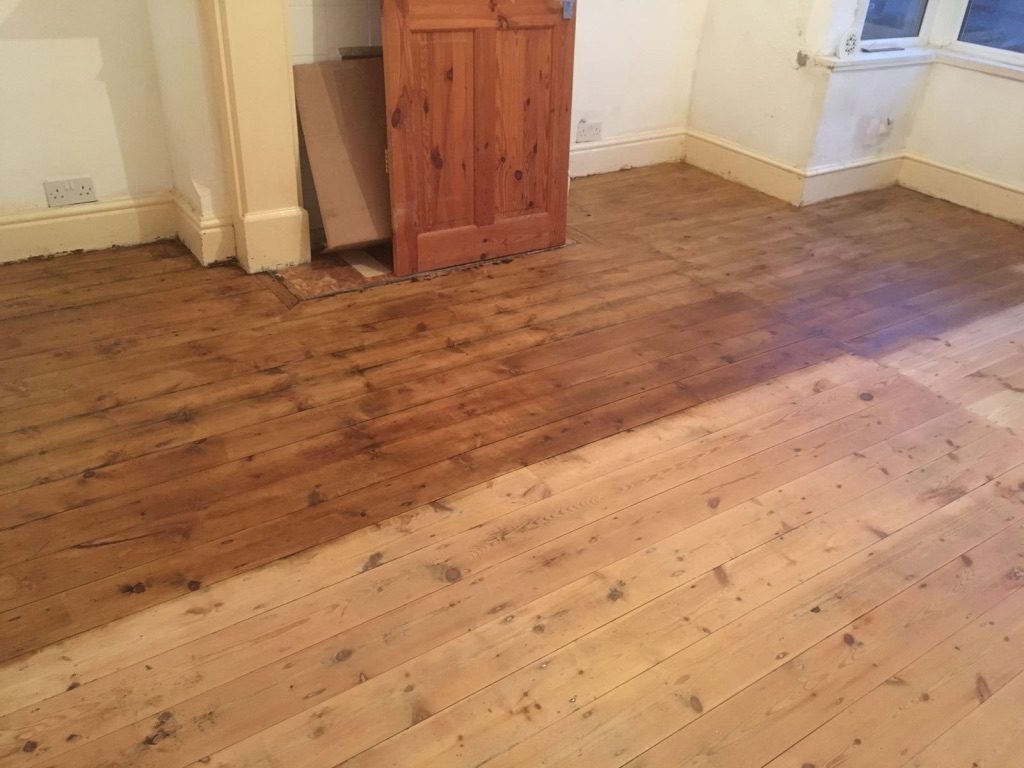
Finally it was time to actually start varnishing the floors! I wanted quite a dark oak look downstairs in the living room/dining room so I went with Ronseal Diamond Hard Satin Floor Varnish in Dark Oak. I only bought 2.5l (about £40 from B&Q) because I wasn’t sure how it would take to my floors, but as it turned out, this was the perfect amount to do one coat in both rooms and the little bit of hallway in between. The colour after one coat was perfect so I didn’t want to do any more coats on top and make it darker yet, so instead I bought 5l of clear varnish (about £62) to do the next two coats.

It may be obvious, but when staining or varnishing floors, make sure you start in the very far corner of the room and work your way towards the door… you don’t want to finish varnishing to find yourself trapped in the corner!
I used a 3″ paint brush and used a kneeling pad and worked my way along the floor. It didn’t take quite as long as expected: about 40 minutes per room and it dried quite quickly so after finishing one coat and having a cup of tea, it was about time to go back and do another coat.

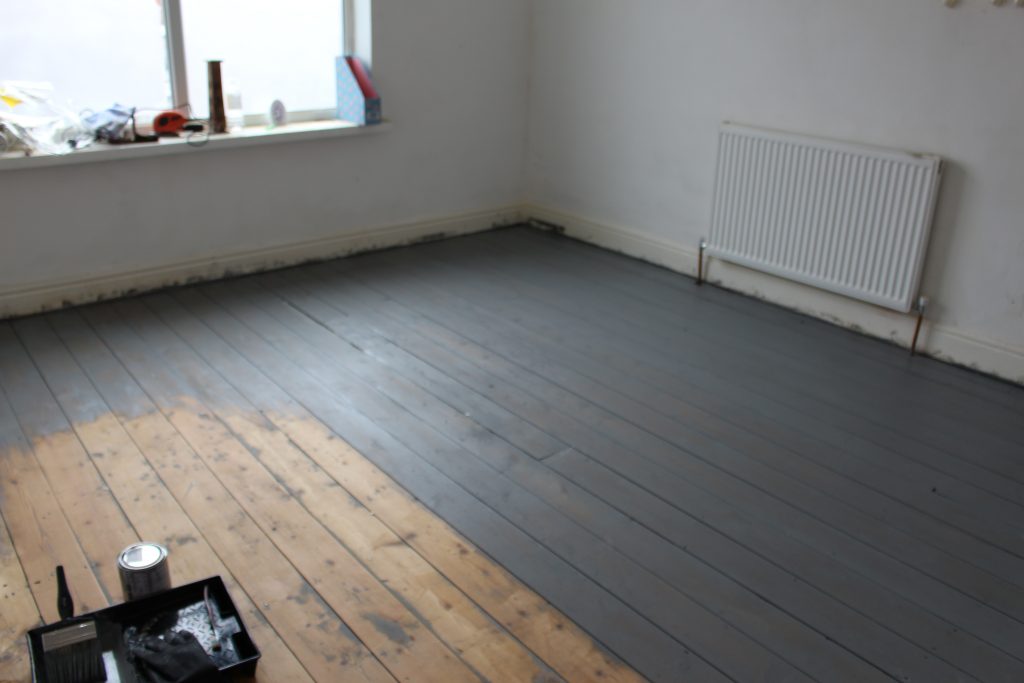
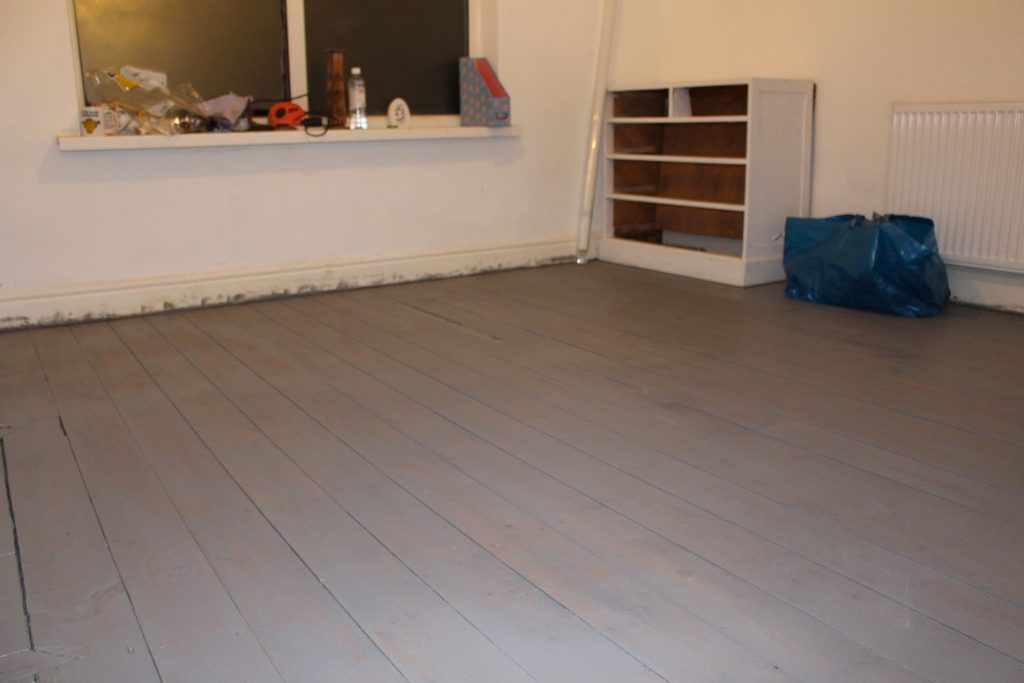
Upstairs in the bedroom, I decided to paint the floors a slightly lighter shade of grey than they were originally. For this, I used Ronseal Diamond Hard Floor Paint in Slate colour. I got 750ml from B&Q for about £15.

I found that in doing the first coat, if I used the brush to really spread the paint thin, it caused the wood grain to peep through, which I really liked, so this is the effect I went for. One 750ml tin was just enough to do the whole room and it was a little more hard work than downstairs because rubbing the paint so hard to show the wood grain (again with a 3″ brush) worked up a bit of a sweat.
After all the floors had had their final coats of varnish, my back and knees were a bit achey so I found that the best thing to do was again to go to the pub to recover.
After Varnishing the Floors
Once you’ve finished varnishing, it will dry within about an hour, but you really don’t want to be walking on it for about three days. I didn’t really have this luxury because I needed to get all of my things moved into the house so a day or two after finishing, I put some dust sheets down and moved my things in. Although most people will advise you not to do this for three days, I was very careful putting down any furniture or boxes and now, two months later, there’s no damage whatsoever to the floor that I can see.
Difficulty: 4/10
Cost: £200
Amazing work Karla! I love the finish on both floors! Tell us what’s next!
Thanks a million! 🙂 The next big job is tackling the kitchen, but I’m nearly finished revamping the front door so that will be a blog post soon!