I think when doing up a house, or indeed taking on any big project, it’s easy to assume you can’t do something just because you haven’t done it before or have no experience in doing it. These jobs are normally the ones that you pay over the odds for somebody else to do for you, meanwhile getting no satisfaction from doing it yourself and remaining completely unaware that you could have done it.
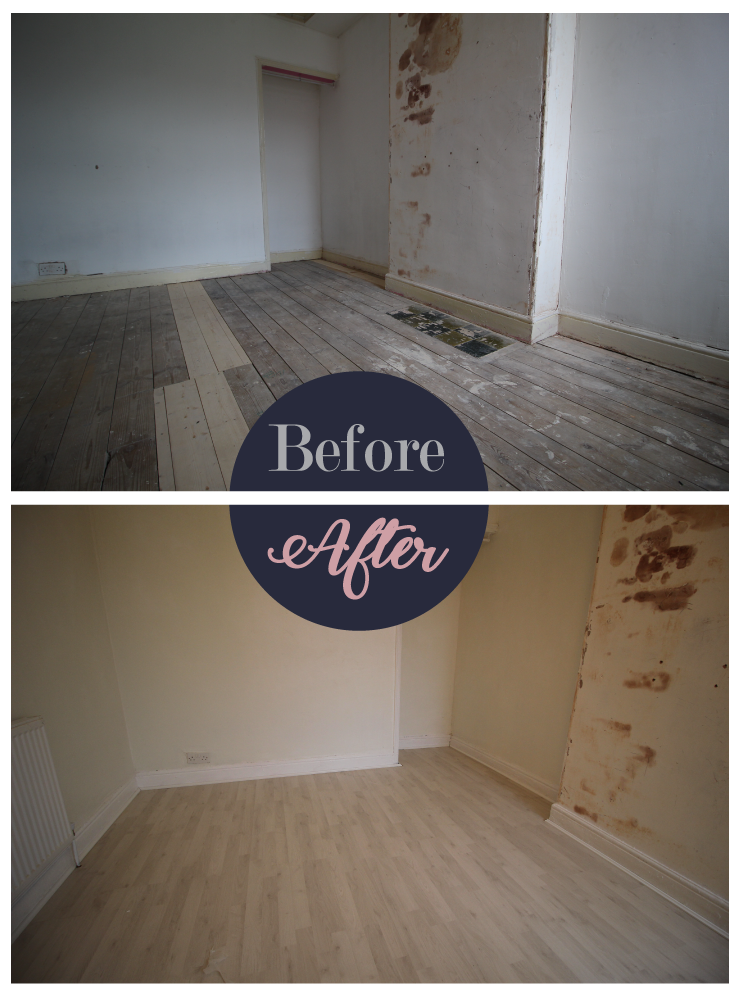
I’ve always been overly stubborn and convinced that I can do anything I set my mind to. This is how I ended up fitting a laminate floor for the first time all by myself a few weeks ago. It’s turned out to be one of my favourite jobs I’ve taken on in the house so far.
Sourcing the laminate flooring
My search for flooring was as simple as Googling “buy laminate floor” or something to that effect. A company called Discount Flooring Depot came up top through AdWords so I had a look. Their prices were really good, with most items being priced under the RRP and they do three free samples with free postage so I popped a few samples in my basket and they arrived in the post a couple of days later. When the samples and I’d decided which one I liked best, I ordered the flooring online.
Buying the right amount
When buying laminate flooring, it comes in pack sizes that very depending on where you buy them. The important thing to remember is that you always need about 10% wastage, because there will be parts that you’ll cut off and not use. If you buy your laminate flooring from Discount Flooring Depot, you just need to put in the length and width of your room and it will tell you how many packs of laminate flooring you need.
If you’re not buying it through them and want to calculate it manually, you simply measure the room in square metres (measure in metres the room’s width and the length and then multiply these numbers by each other), then add 10% wastage to this number. The pack of laminate will have on it how many square metres of flooring it will cover, so to find out how many packs you need, simply divide the number you’ve calculated by the number of square metres the pack will cover and then round this number up to the nearest whole number to make sure you’ve got enough (for example, if you calculate that you need 8.5 packs, you need to round this up to 9).
What else do I need?
There are a couple of things to bear in mind when fitting a laminate floor:
- Your floor will expand and contract once it’s been fitted depending on the heat of the room, so you need to leave a gap around the outskirts of the room to allow for this. You’ll need to buy beading (or scotia) to cover this. This is basically big long strips that you attach to your skirting boards to hide the edges of the laminate flooring. You’ll need as many metres of beading as skirting boards in the room.
- In order for your floor to be level and well insulated, you need to put down underlay first. There are various types depending on what surface you’re laying it on: concrete or wood, whether you’ve got underfloor heating, etc. I was laying mine on a wooden floor with no underfloor heating so went for a foam underlay.
My order
I bought 5 packs of the laminate flooring that I’d chosen as well as a DIY bundle of underlay and beading. I got everything from Discount Floor Depot to make things easier and everything: the flooring, underlay and beading, including £35 delivery, came to just under £170.
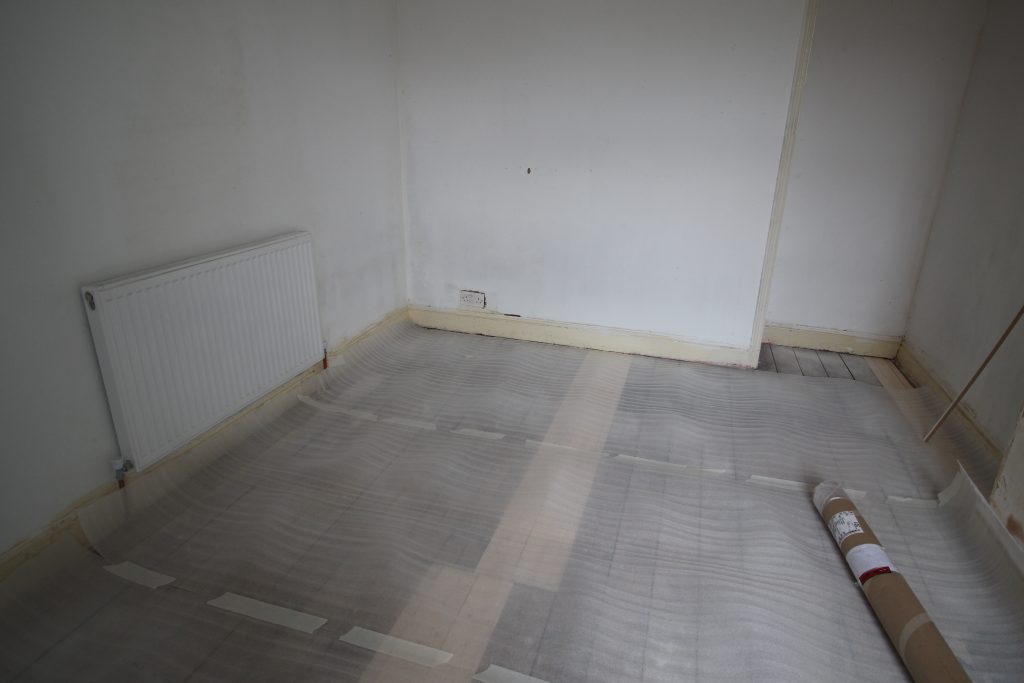
Before you start
Before you start, you need to lay the underlay packs on the floor in the room they’re being fitted in for about 48 hours. This is so they can acclimatise to the temperature of the room.
While you’re waiting for the time to pass, it’s a good opportunity to make sure you have everything else you need. You’ll need something to cut the laminate with (I used a jigsaw), a set square, masking tape and a pencil.
Fitting the underlay
Make sure everything is out of the room before you start. Then give the room a quick vacuum and you’re ready to go! The underlay I bought was made of foam and came in a big roll. Fitting it briefly entails rolling it out flat on the floor and using masking tape to stick it down and connect it where it joins to itself. This part takes just a few minutes and then you’re ready to get on with fitting the laminate floor!
Fitting the laminate floor
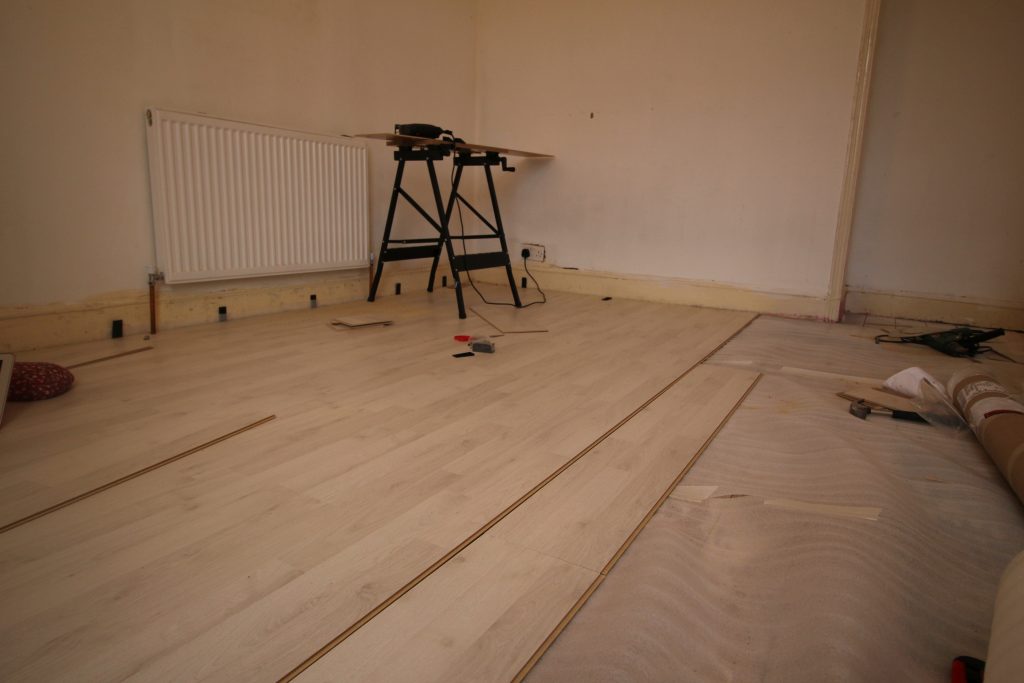
Start at the longest straight wall and work always from one side to the other. I chose left to right. Lay down your flooring, slotting them together as you go. Make sure you leave a gap between the flooring and the wall/skirting board. How big of a gap depends on what flooring you use (it will tell you on the box) but in general it’s about 1cm. You can buy a pack of spacers, which are little plastic wedges to help you leave an expansion gap. I got mine from B&Q for about £1.50.
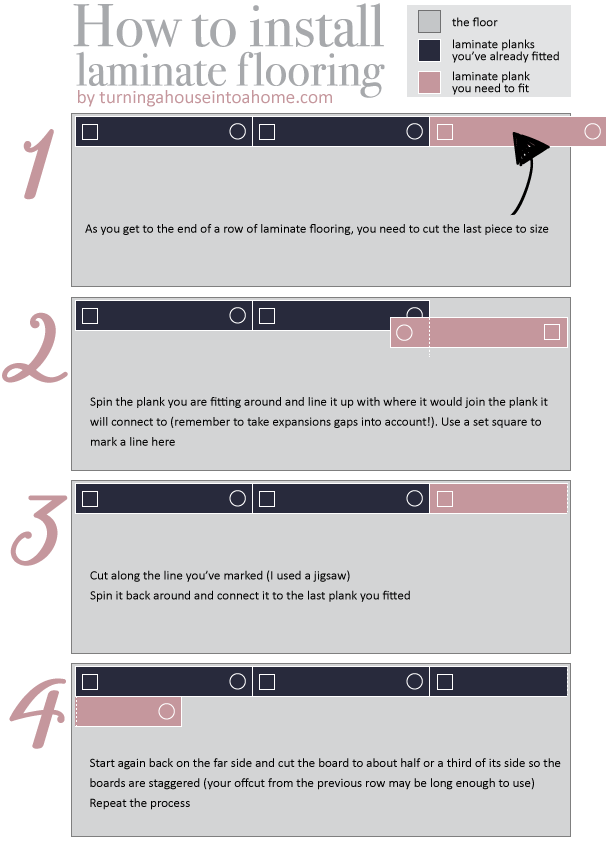
When you get to the far wall, you’ll need to cut the last board to make it fit. Spin it around and mark where it lines up with the last board you fitted. Mark a line here using a set square and then cut along it (I used a jigsaw). Once you’ve cut the plank to size, you can spin it back around and install it by fitting it to the last board you laid.
You can then go back to the far side and start on your next row, working in the same direction as before. One thing to bear in mind is that you will need to stagger the boards to give greater stability. So, for example, if your last row started with a full, uncut board, you’ll need to cut the first board of your next row so that it’s about half the length. The offcut from the last board on the row you’ve just finished may be big enough to use, which will save you from cutting another board. You will have rough edges where you’ve cut the planks but don’t worry – your beading will cover these so you’ll never see them. When starting or finishing a new row, remember to take your expansion space into account and use a spacer if needed!
I’ve created the following 4 step guide to illustrate how to make sure your planks fit perfectly:
Once you get the hang of fitting the boards, the process is pretty easy and you just need to continue until the whole floor is filled. The boards that I used easily clipped together: you just need to lay them where you want them to slot into place, lift up the long edge that’s facing away from the rest of the laminate floor, give it a push towards the rest of the laminate and lay it back down flat. Some instructions say you need a mallet but I didn’t need one for the floor I chose. I also didn’t need to use any glue to stick the planks together.
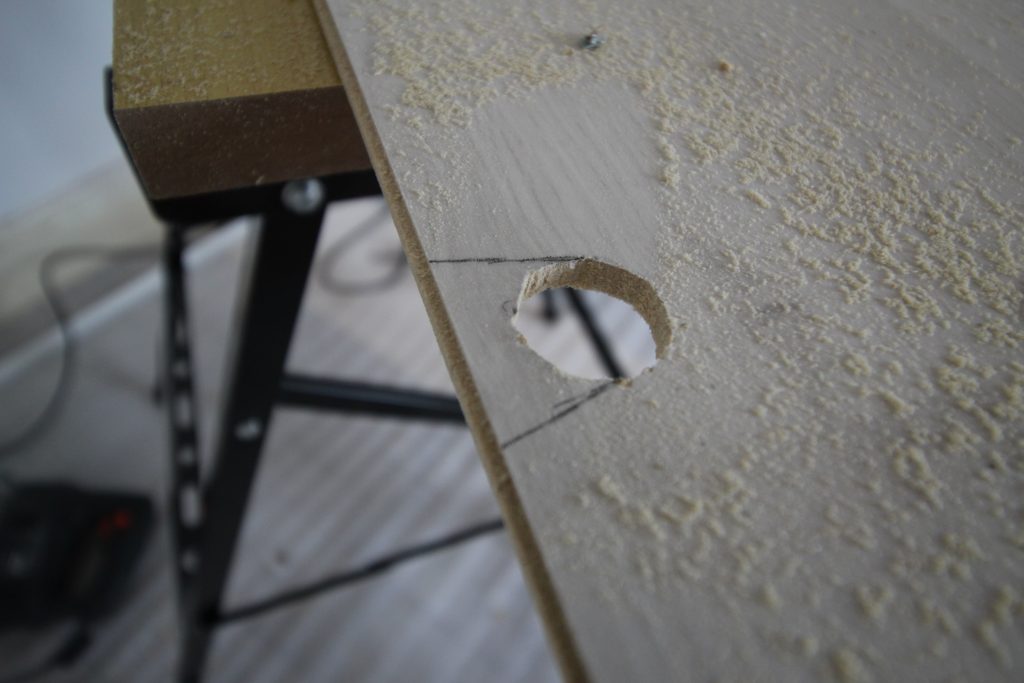
Cutting around radiators
One thing you will need to do is cut a hole for the floor to fit around radiator pipes, where the pipes come out of the floor. It’s as simple as getting a wood drill bit that’s just slightly bigger than the pipe you’re cutting around. Line up the plank with the radiator to judge where you need to drill. Drill your hole and then use a jigsaw to cut to the edge of the hole at an angle from either side. This will enable you to fit the board around the radiator pipe and also give you a neat little piece of laminate that you can glue down behind the pipe to cover the gap.
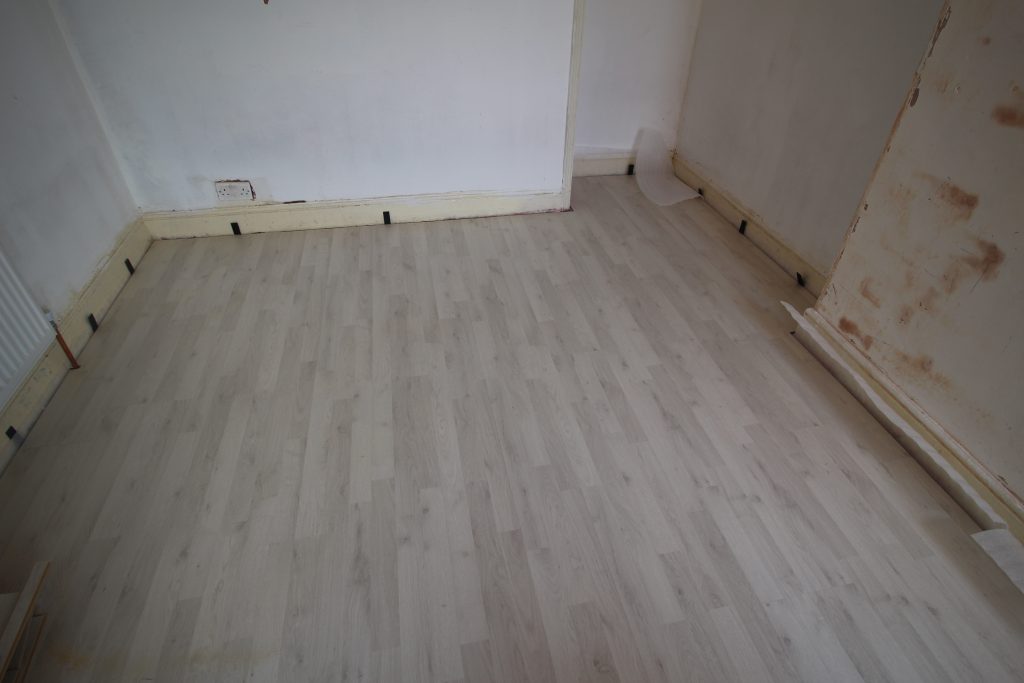
Finishing the floor
Once you follow the steps above and repeat the process until you reach the far side of the room, you’ll have to cut the laminate boards lengthways to fit them and complete the job. This is the trickiest part but you really pick up speed and get the hang of things once you’ve done a few rows so it should be easy a piece of cake by the time you get to it. Like you did with the planks when you needed to cut them shorter, turn them around to mark with a pencil where you need to cut and then slot them together as you should be used to by now.
Then you’ve fitted a laminate floor! See, I told you it was easy! From start to finish, this part took me a day, so I rewarded myself with an evening off to enjoy a pizza and some gin. You should too – treat yourself! One thing I wasn’t anticipating was the pain in my thighs for the next couple of days, but the satisfaction of having installed a laminate floor all by myself with no prior experience far outweighed the pain.
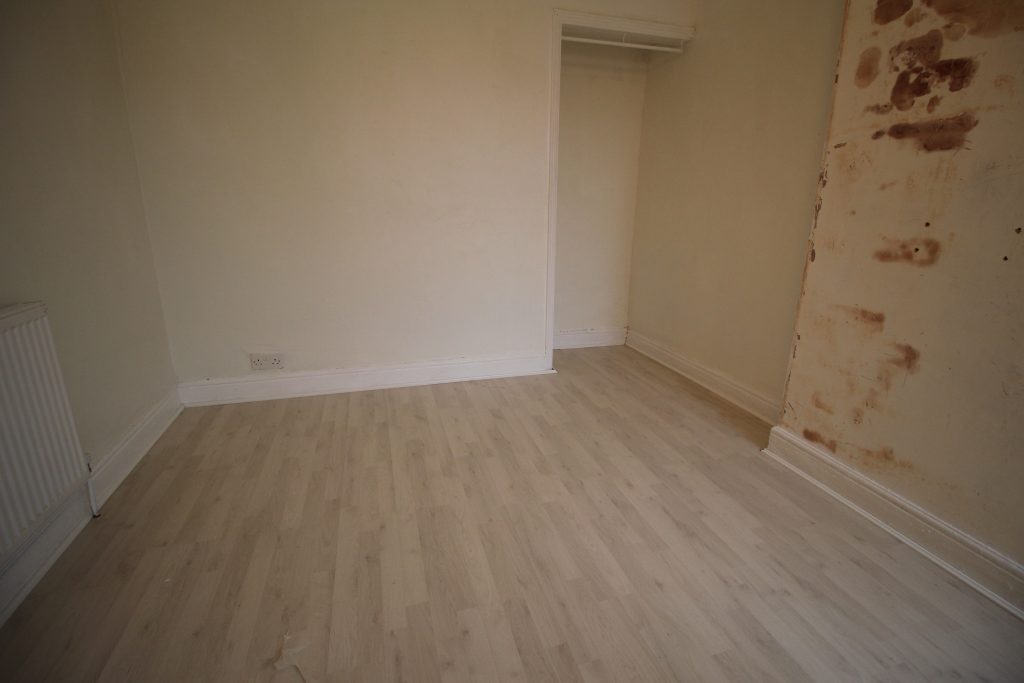
Fitting the Beading Scotia
The following weekend I set about fitting the beading. This should be easier for most people, but for me it was a bit of a hassle because of the state of my skirting boards. The beading is a long strip of wood that goes around the edge of your floor and attaches to the skirting board, to:
- allow the floor to expand and contract as the temperature changes
- hide the expansion gap you’ve left around the edges of the floor
- hide the rough edges where you’ve cut the boards to fit your floor so expertly
Unfortunately for me, there was a rather dodgy-looking paint job on my skirting boards so I had to strip and repaint these before fitting my beading. You shouldn’t have to do this unless, like me, you bought your house from a cowboy.
Fitting the beading is really easy. There are two ways you can attach it:
- Wood glue
- Pin gun (which is like a staple gun but instead of staples, shoots little headless nails)
I don’t have a pin gun so opted for wood glue. The only drawback I can find with this is that you need to leave time for it to dry. I bought an angle cutter from B&Q for about £11. This basically cut the beading at a 45 degree angle so I could fit it together in the corners of the room. Put the wood glue on the part that will fit against the skirting board and hold it in place. Grab some heavy items (I used cookbooks) and push them up against the beading to hold it in place whilst the wood glue dries.
Hey presto, you’ve installed and beautifully finished a laminate floor all by yourself – good job, go get yourself a glass of wine!
Time taken: 1 weekend
Cost: <£200
Difficulty level: 6
Well done, very helpful descriptions. I hope you enjoy your office
[…] above the floor and used wood glue to glue down scotia (or beading) that was left over from fitting my laminate floor. If you don’t happen to just have some scotia just knocking around, you can get some from a […]