Summer’s nearly here (woohoo!) and with that, there are so many more reasons to hang out in the garden. If you don’t have an outdoor tap, it can be a real pain to clean in the garden, water plants, even fill pets’ water bowls. I fitted a garden tap yesterday. Before that I needed to attach a hose to the kitchen tap and run it out the window – not ideal! The outdoor tap took just half an hour to fit and is going to get so much use. Read on to follow the steps.
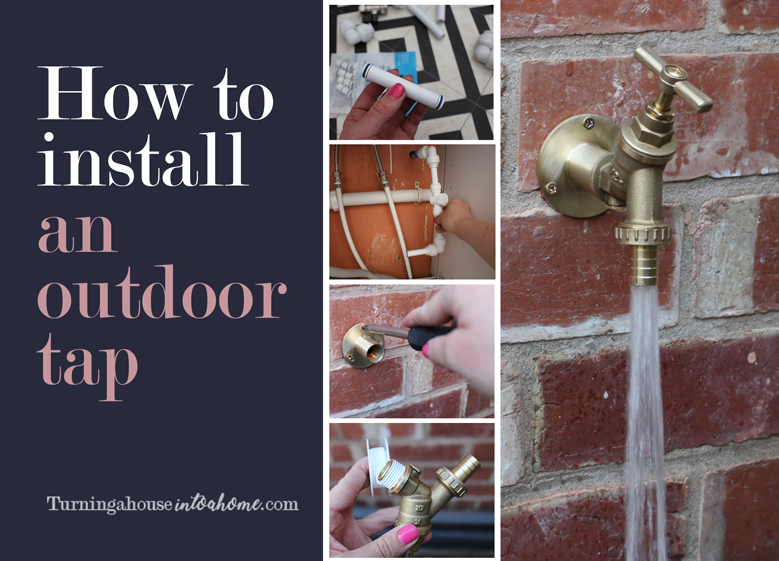
You can buy an outdoor tap kit from most DIY stores, which has everything you need to get your garden tap plumbed in. All you do is drill a hole, attach the tap, and screw the connector onto your pipe, which cuts the pipe and attaches your new pipe to the mains… easy! However, you can only use one of these kits if you have copper pipes. Unfortunately, my water pipes are plastic so I had to find a different way of connecting my tap. It’s worth noting that you can still use this method if you have copper water pipes!
There are a couple of regulations that you need to take into account when fitting your outdoor tap:
- your tap must have a double check valve. This basically ensures that the water supplied to the outside tap doesn’t make its way back into your inside water mains
- You must fit an isolation valve. This means that you will be able to shut off the water supply to your new tap, whilst still having water supply to the rest of your house.
What I used
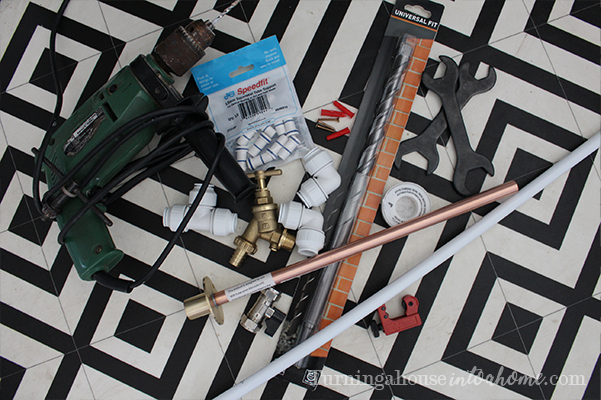
Here’s what I used to fit my outdoor tap:
- A drill and a 20mm drill bit (it doesn’t need to be 20mm exactly, but the pipe that needs to pass through the wall is 15mm wide so make sure it’s bigger than that)
- An outdoor tap! I bought one with a double check valve already built in to save time and space. Mine was £7.89 from Screwfix
- A hose union backplate (mine was £5.79 from Screwfix)
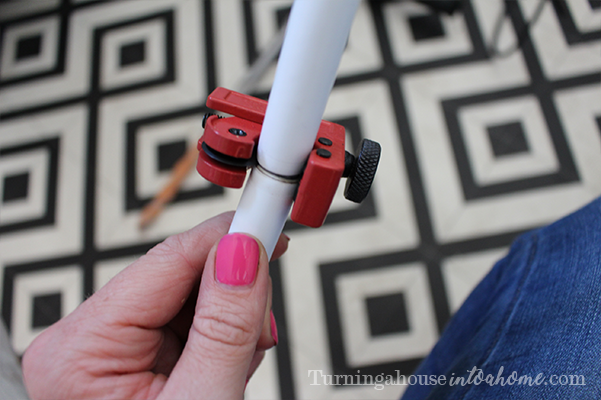
- A length of 15mm pipe and a pipe cutter
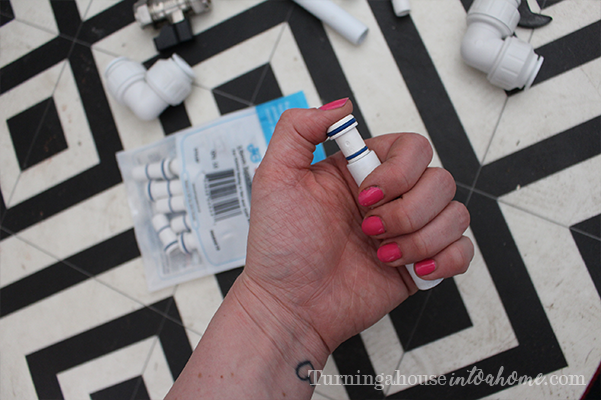
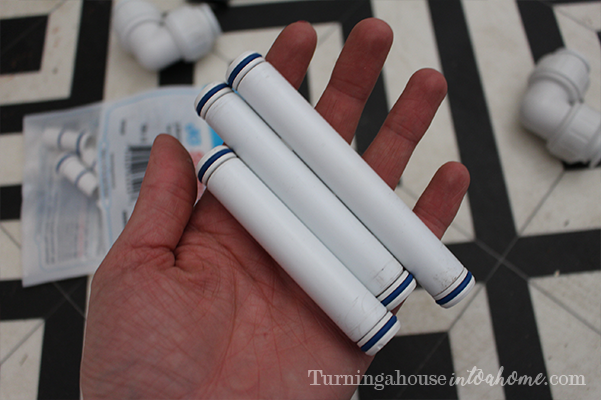
- 15mm pipe connectors (I used a T shaped Speedfit connector and two elbow connectors) and pipe inserts if you’re using plastic pipe
- An isolation valve
- PTFE tape
- Some silicone sealant
Drill a hole
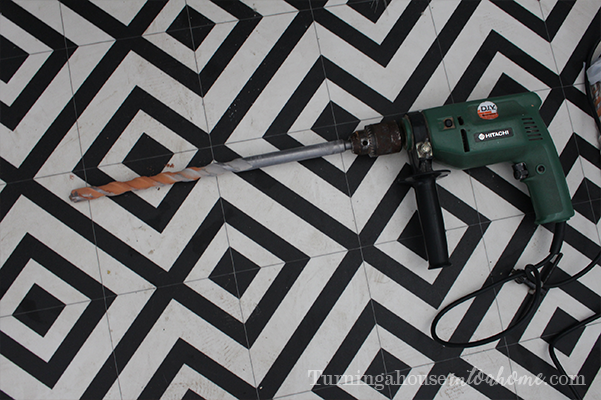
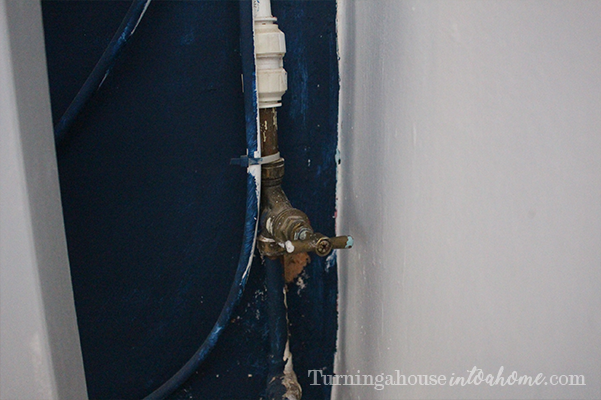
Start by assessing where you want the tap to go. Ideally it should be on the outside of a wall that had a cold water pipe on the inside. I fitted mine on the outside of my kitchen, and connected it to the pipes under my kitchen sink. Take a good look at the pipes and whatever is on the wall outside. Pick where your tap is going to go, but make sure that there’s nothing in the way on the other side of the wall… the last thing you want to do is drill through a pipe!
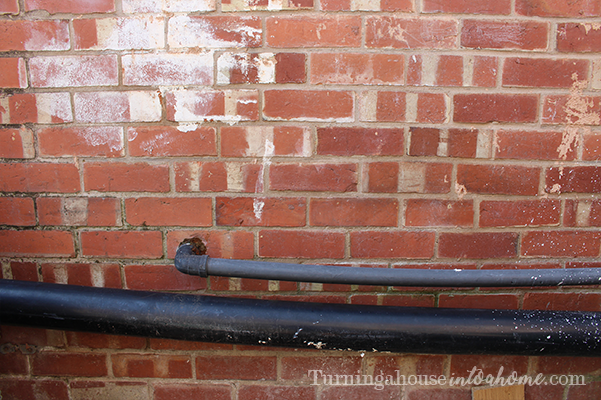
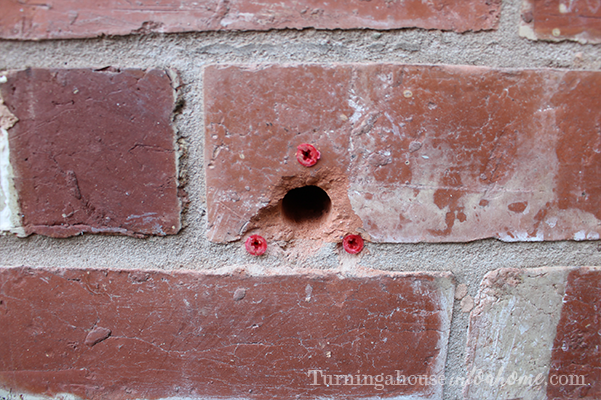
Once you’ve chosen where to fit your tap, you can drill through the wall. You’ll get a slightly neater finish if you drill from the outside in, but because I had so little space to work with, I drilled from the inside, under my kitchen sink, so I would be sure not to drill through any pipes. Use your drill on hammer mode to drill through the wall. If you want, you can drill a slightly smaller pilot hole first, to make it easier, but this isn’t necessary.
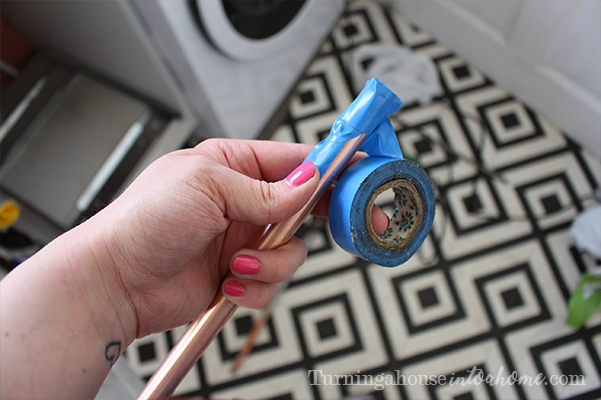
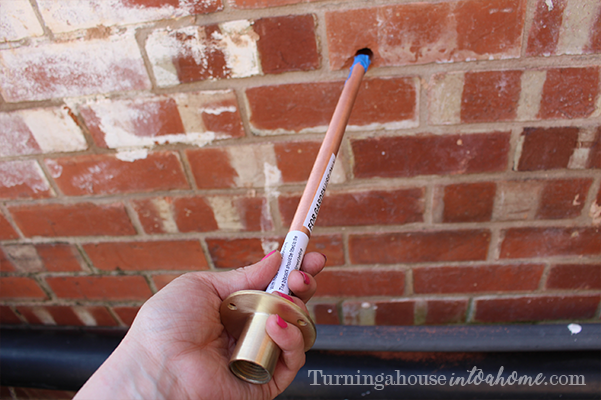
Before you put your hose union through the wall from the outside, cover the end of the pipe with tape. This will stop any dust or debris from getting into the pipe and into your water system.
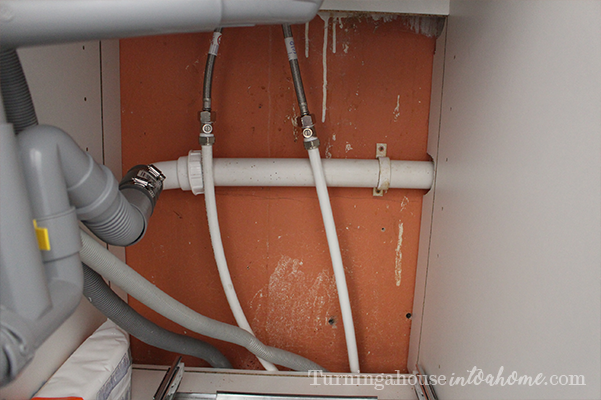
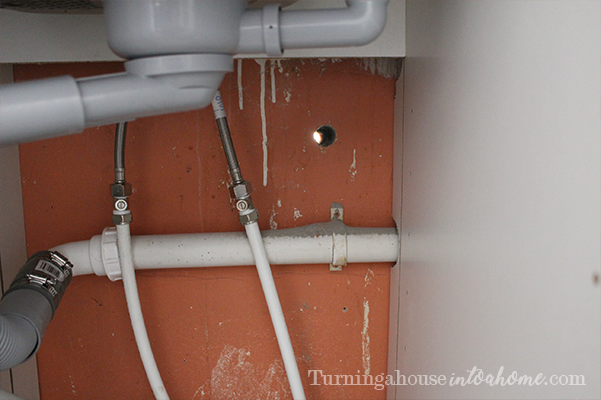
When you’ve put the pipe through the wall, take a look at your pipework on the inside and figure out how you’re going to connect your pipe. You need to make sure you’re connecting your tap to a cold water pipe. If you’re not sure which is the cold pipe, you can run the hot tap for a minute. The hot pipe will get warm and the cold one will stay cold.
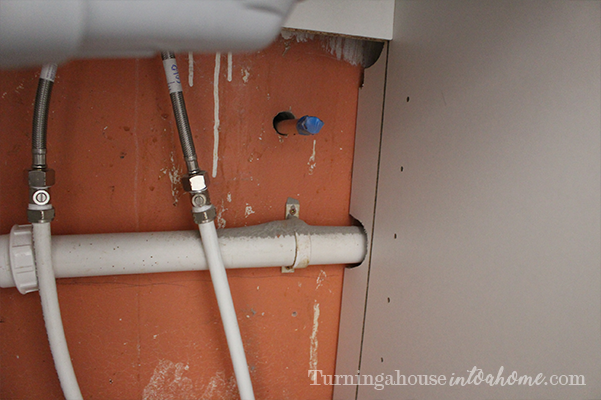
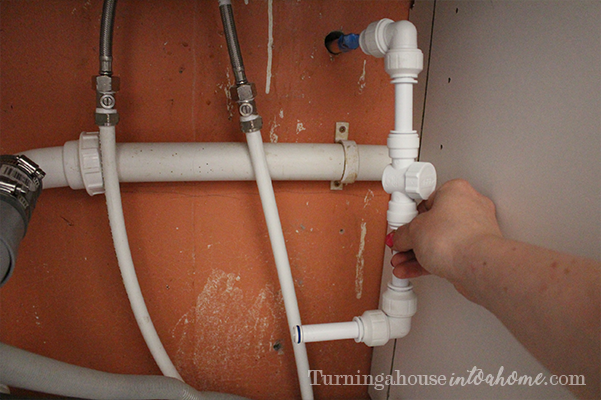
Cut a few lengths of pipe. I cut three: one to come out from the cold pipe, one to feed up to the isolation valve and one to carry up to connect to the hose union.
Connect your pipes
Plan how your pipes are going to fit together.
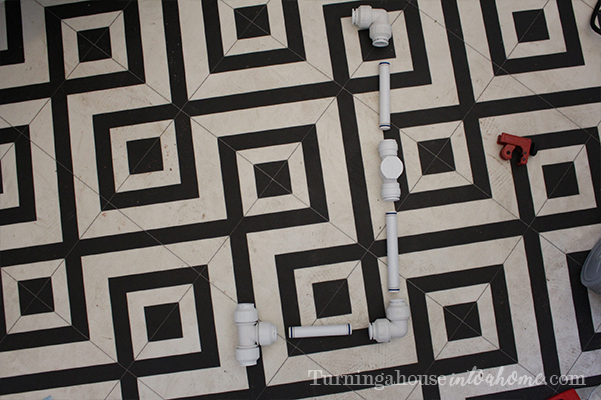
If you’re using plastic pipes, it’s really important that you use pipe inserts! You don’t need them if you’re using copper pipe. Just pop an insert into every end of the pipe that you use.
Connect all of the parts together. I used JG Speedfit fittings because they’re so quick and easy to use – you just have to push the pipes into the connectors until they click and that’s it! Give them a quick tug to make sure they’ve connected properly. It saves a lot of time faffing around with spanners! Don’t connect the pipes onto your hose union yet. Hold up the new pipes you’ve connected so you can judge where to cut into your existing pipes.
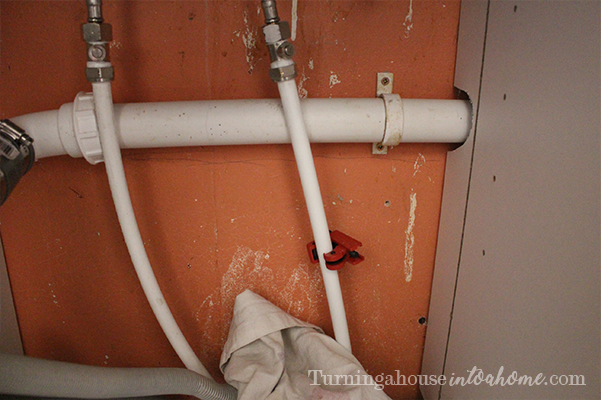
Now it’s time to turn off the water supply to the pipes you’re working on. Find your stopcock and twist it into the off position. Now run the tap to get any water out of it and ensure that the water has been turned off.
When you know where you want to cut, use your pipe cutters to cut through your cold water pipe, but be sure you have a rag or towel to hand because some water will come out! Once you’ve cut into it, you’ll want to cut off another centimetre or so of it, to leave space for the connector. If your pipes are plastic, remember to fit pipe inserts before you put them into your connector. Click these two bit of pipe into place.
Attach your outdoor tap
Now it’s time to attach your hose union back plate to the wall and connect your tap. I connected my tap first and then held it in place on the wall so I could mark the holes.

Drill where you’ve marked the holes and pop in some rawlplugs.
Before you attach the back plate to the wall, squeeze some silicone into the hole in the wall, all the way around the hose union pipe.
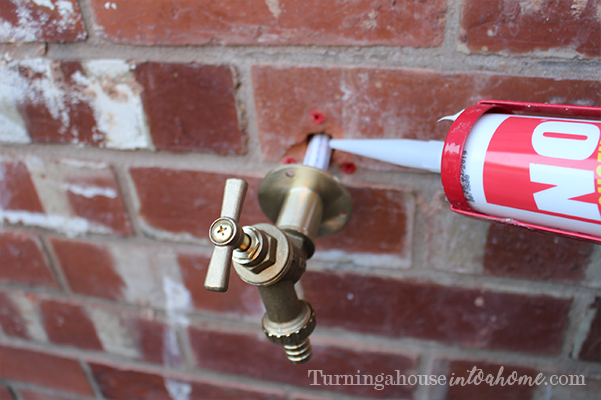
Now you can screw the backplate into place. Make sure you use screws suitable for outdoor use!
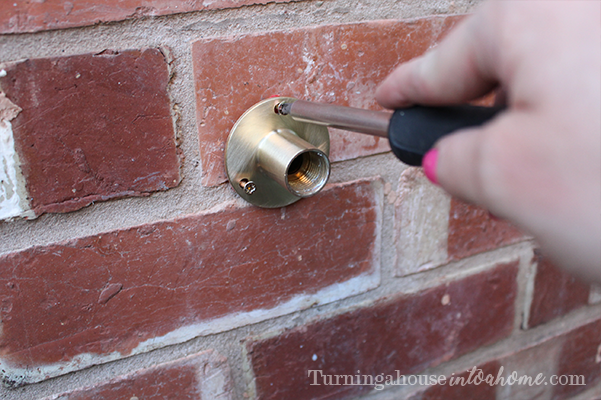
Before you attach the tap onto the back plate, wrap some PTFE tape around the threads of the tap to ensure you get a really nice tight and waterproof seal.

Connect the tap
Now that your tap is attached, you can go back inside and remove the tape off the end of the hose union pipe. The only thing left to do at this point is to attach the pipes you fitted together onto this end that’s coming through the wall. Do this exactly how you attached the rest of the pipes: just push it on until you feel it click, then give it a tug to make sure it’s attached securely.
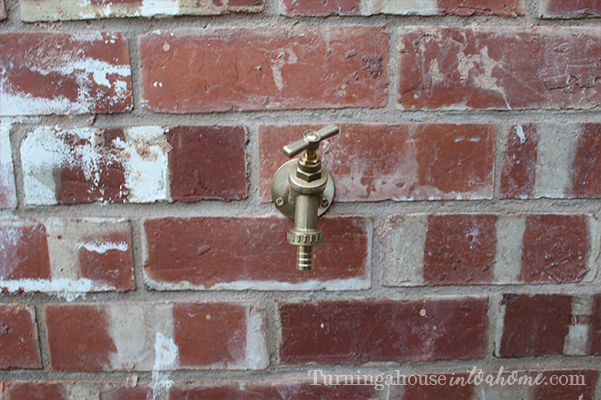
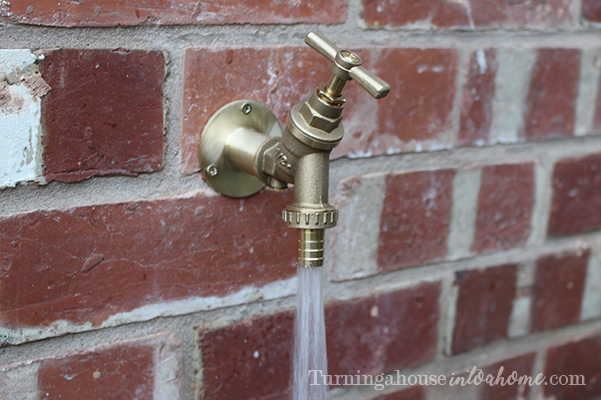
Once you’ve done all of this, the only thing that’s left to do is turn your water supply back on by twisting your stopcock back into the on position, then try out your new garden tap!
Time taken: 30 minutes
Cost: £23
Difficulty: 5/10
Be First to Comment