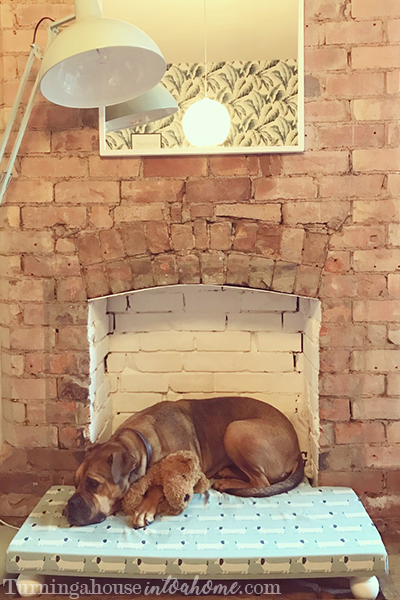
Those of you who have read Turning a House into a Home before may recall the fireplace dog bed that I made for Ted. The original one was in the living room and it turned out to be really handy. One of the problems with having a big dog is all of the space that they take up! Ted also sheds like a b*tch so I have a strict no sofa rule. His fireplace dog bed gave him his own space where he could shed away to his heart’s content, and without the need for a big dog bed taking up loads of space in the living room.
Read on to find out how you can make one for yourself!
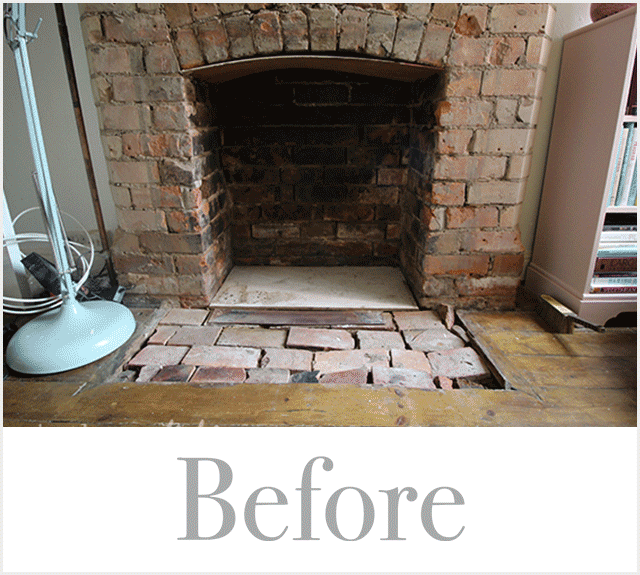
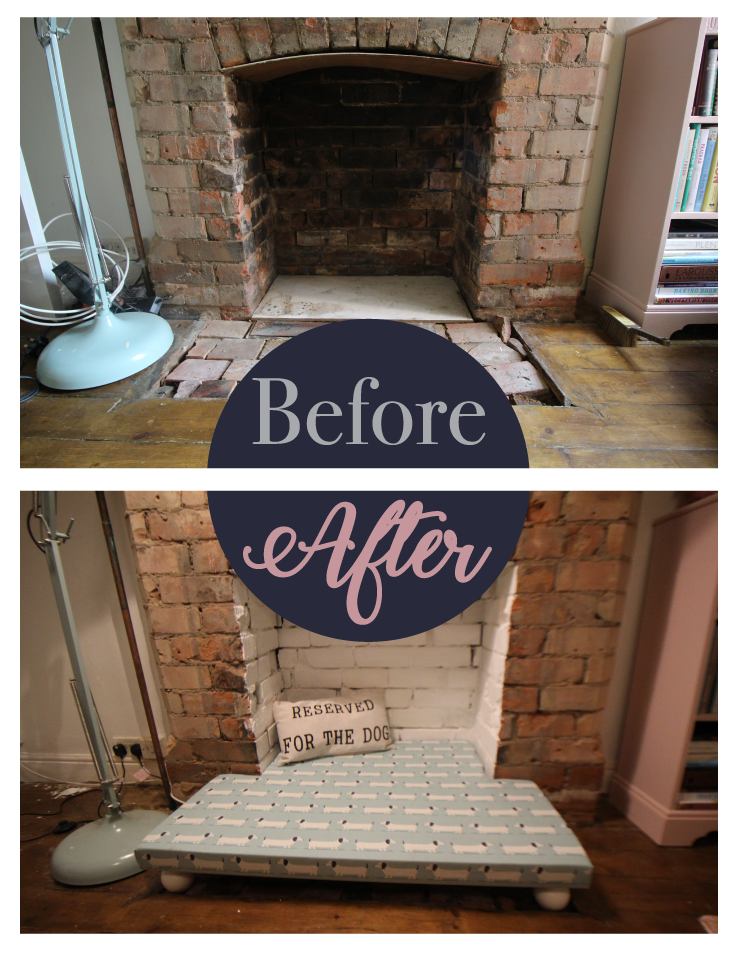
When I first moved into the house, there was only one fireplace. The dining room had a really ugly wall made of sheets of wood, with visible screws sticking out. I hated it and so I pulled it down. Well, I say I pulled it down… I started to pull it down, got bored and left it to my lovely boyfriend Nick to do. Long story short, we found another fireplace behind it! I left Nick to chip away at the damaged plaster and was left with a beautiful exposed brick chimney breast and a much bigger feel to the room.
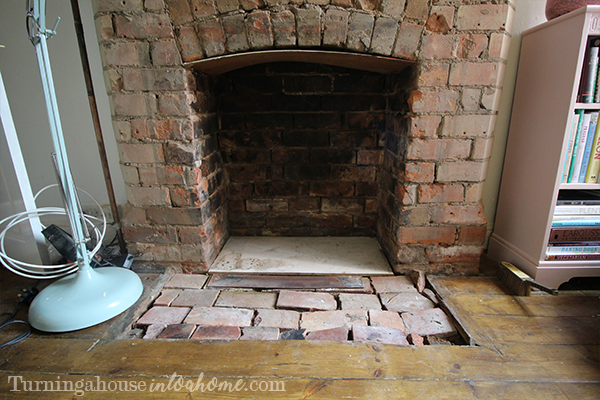
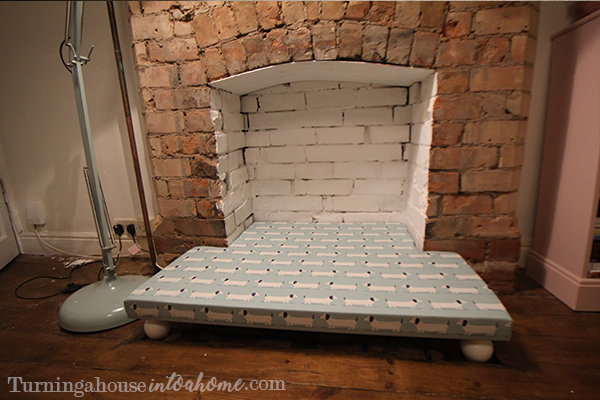
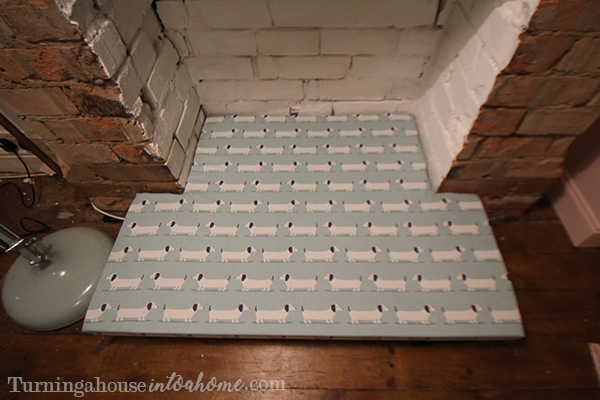
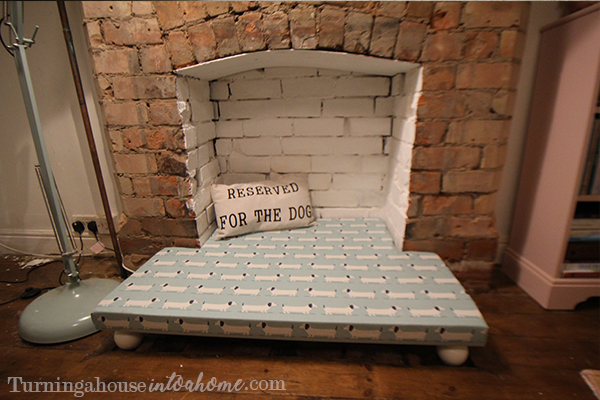
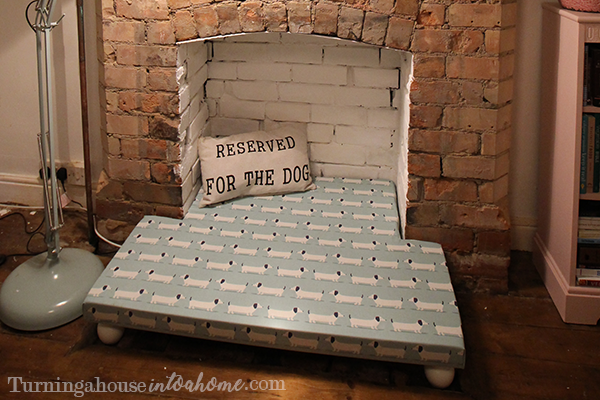
As the dining room is where Ted spends most of his time, I decided to make him another cosy fireplace dog bed in that room. I like a challenge so went with a slightly different style and technique than the living room dog bed.
How to make a fireplace dog bed
To make this dog bed, you’ll need the following:
- a sheet of wood
- a jigsaw
- a staple gun
- furniture feet
- upholstery fabric
- foam/padding
- a drill
Step 1: Sourcing everything you need
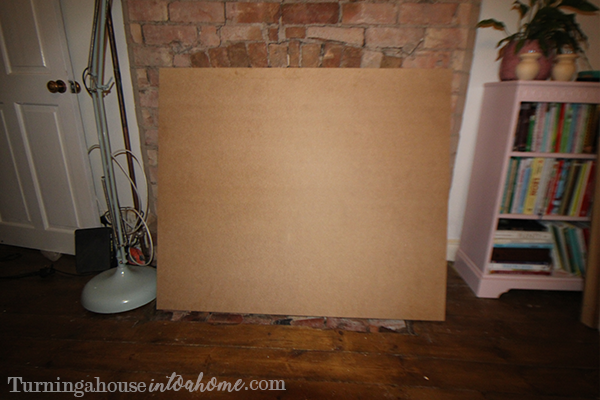
Measure the space you want to fill as a starting point, so you know how big everything you need to buy should be. I did a rough sketch of the space and took measurements at a number of different points.
I bought the wood for the base of the dog bed from B&Q. They sell really big sheets of wood and will cut them down to size for you. However, they also have a bargain bin where they sell offcuts of wood that other people have left behind. I would highly recommend that you get your wood from here as you can save up to £30. I bought an offcut that was the perfect size and only £2! Make sure it’s thick and sturdy enough to hold the weight of your dog.
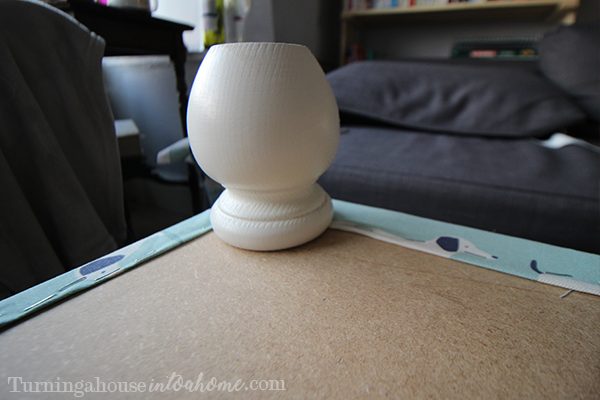
I bought the feet to elevate my dog bed from a seller on eBay who sells all sorts of furniture attachments. The set of 4 feet that I bought cost £11.20.
I shopped around for quite a while before settling on a source for my foam padding. This can be quite costly and I wanted to make sure I got the best possible value for money. I eventually bought it from Emma’s Foam on eBay for £12.99.
My fabric was another eBay purchase, from Metropolis Interiors for £8.50. You can get fabric for much cheaper elsewhere but I fell in love with the sausage dog print and had to have it! Make sure you buy enough fabric to cover the top of the bed and go down the sides (the thickness of the board and the foam together) and have about an inch left on each side to go around the bottom.
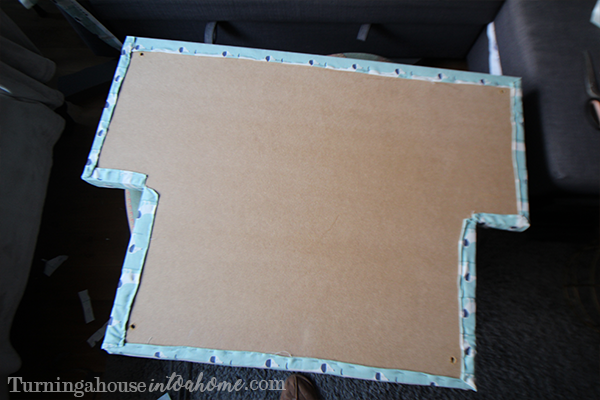
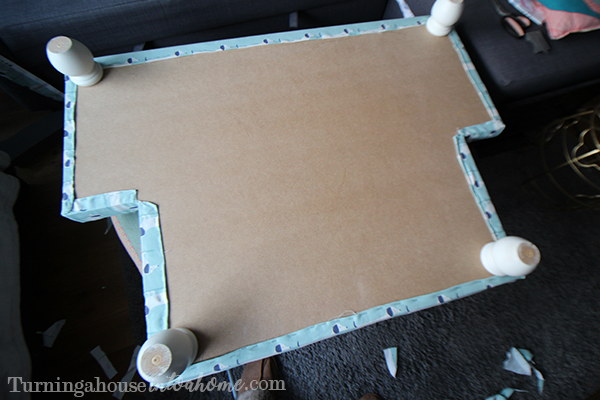
Step 2: Cutting your base
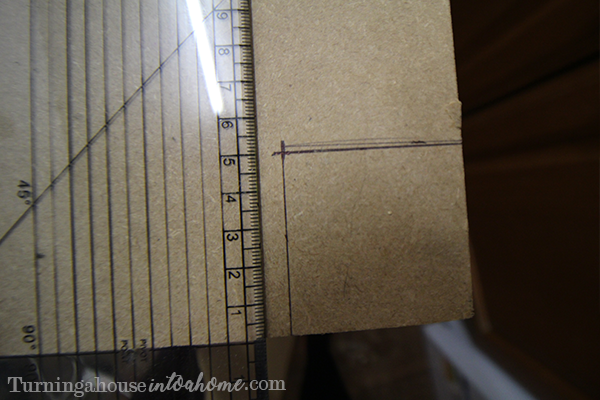
Start by drawing a rough sketch of the shape you want to cut your dog bed to. Then take down various measurements. The more measurements you take, the better your dog bed will fit the space. You may be surprised to find that a measurement from front to back on one side is completely different to the other side.

Once you’ve taken your measurements, use a pencil to draw the shape onto the sheet of wood that you bought for the base. Then it’s time to cut it out! Use a jigsaw to cut along the line you’ve just drawn. Make sure you wear protective eye goggles! If you haven’t used a jigsaw before, don’t be scared to. If you can use a pair of scissors, you can use a jigsaw. It’s really not as scary as some people think!
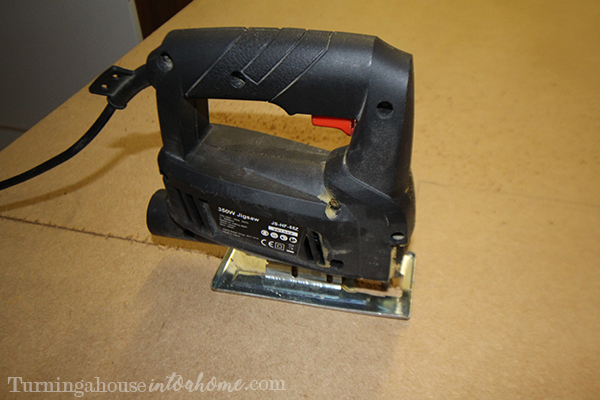
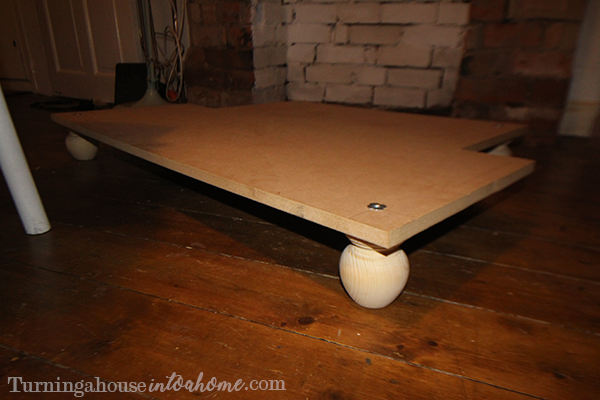
When you’ve cut your base out, fit it into the space in the fireplace to make sure it fits. Use the jigsaw to cut away any excess if you find that the base is too big for the space.
Step 3: Positioning the feet
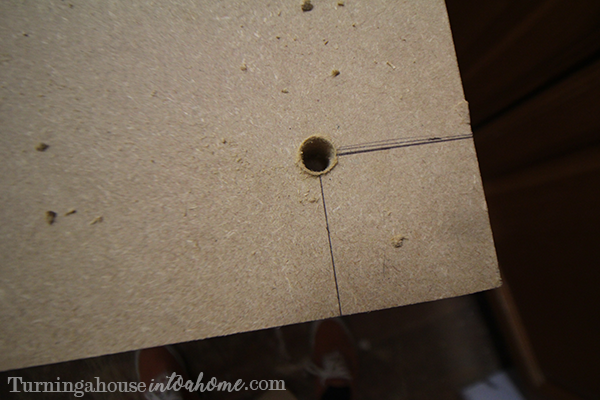
Once you’re happy with the size and shape of your base, you can go about positioning the feet. I measured from the edge to the screw in the centre of the foot (about 4cm).
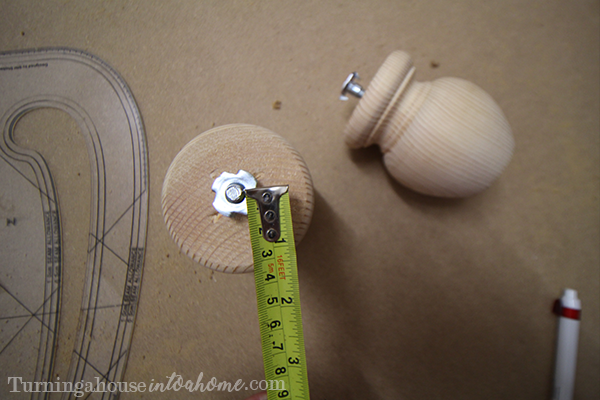
On the wooded base, I then measured from the edge slightly longer than that measurement (5cm). Where the lines met was where I drilled to fit the feet.
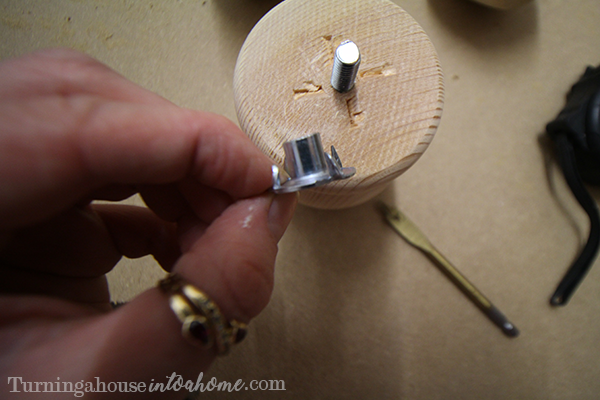
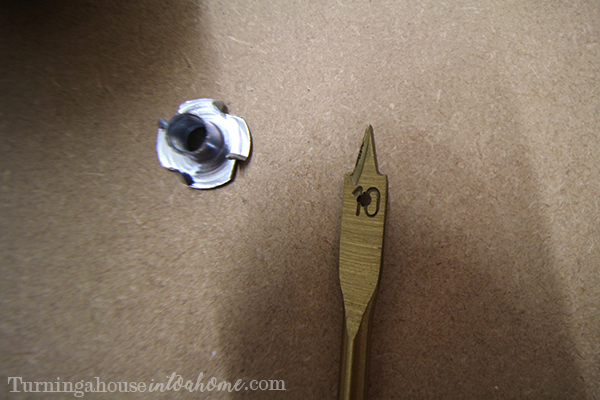
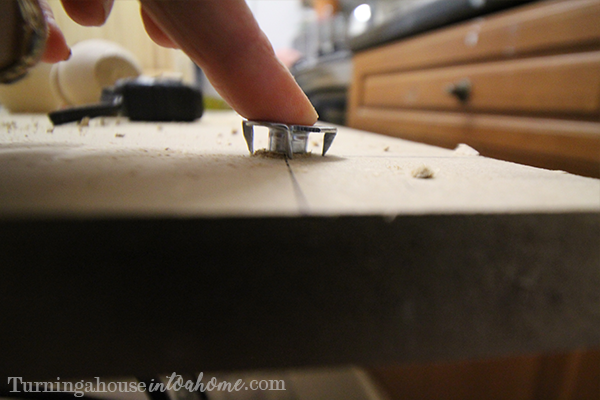
The feet that I bought were really easy to use. you drill a hole, hammer the screw part into place on one side and then screw the foot on from the other side. I measured how wide the screw was and then used a drill bit slightly larger than this to drill a hole for it to go through.
TOP TIP: You may find that drill bits in different sizes are quite pricey in big hardware stores. Save money by having a look in your local independent hardware store. My local one within walking distance of my house has a big tub of different sized drill bits, at £1 each
Make sure you don’t drill a hole that’s too big or you won’t have anywhere to hammer the gripper nails into. Once you’ve drilled the hole, place the screw bit into it on the top side of the dog bed base and hammer it in.
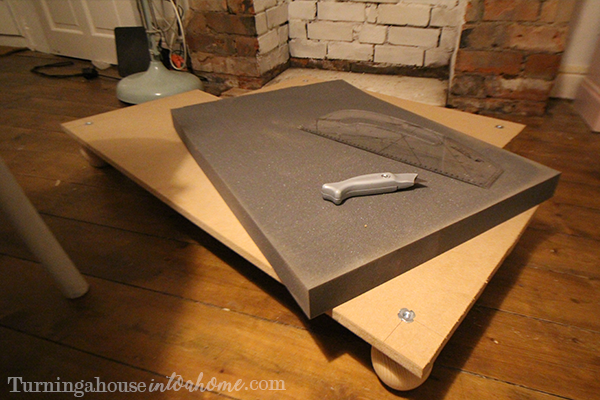
Step 4: the foam padding
The foam padding that I bought came in one long piece. I laid it across the base of the dog bed and used a knife to cut it down to size. Once it was the right size, I used spray mount to hold it in place. This part isn’t strictly necessary but makes the next steps a little bit easier.

Step 5: Preparing the fabric
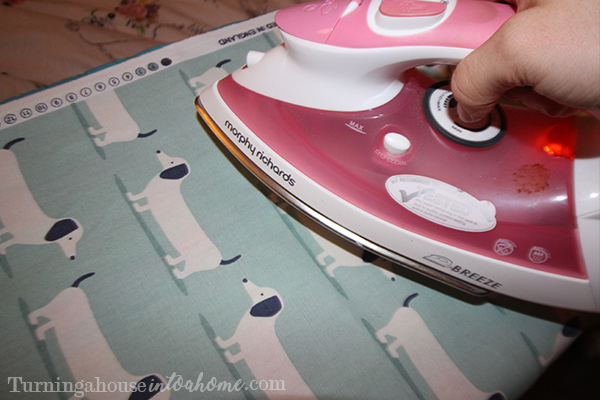
Next up, it was time to attach the fabric to the dog bed. Get your fabric out and give it an iron to make it nice and flat and easy to work with.
Then position it over the top of the foam you’ve attached to the base. I straightened it out and positioned it so that I’d have a line of sausage dogs going across the front of the bed. Smoothen the fabric out and fold it around the corners to see how it will fit.
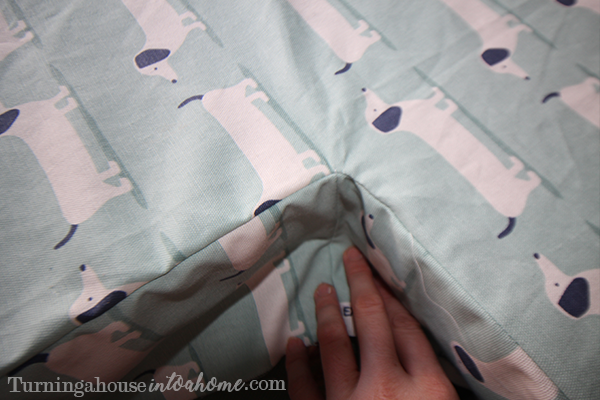
Step 6: Fitting internal corners
Note: you can skip this step if your design doesn’t have any internal corners. (If your bed is just a simple rectangle, it will only have external corners so you can skip this step).
If you have internal corners, sewing these will give you the best fit and finish. I used a sewing machine but you can also do it by hand. Make a straight cut around the internal corner 1cm out from where the foam ends.
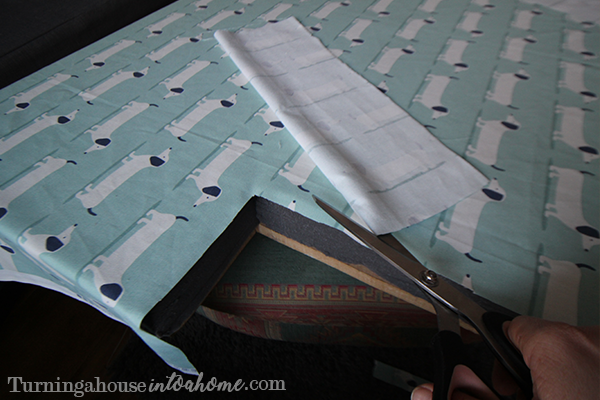
Get your offcut of fabric. If needs to be long enough to go all around the exposed sides in the corner. If not, you can sew two bits together to make a straight strip. Make sure the fabric is wide enough to cover the exposed side and tuck around underneath the bed to get stapled into place.

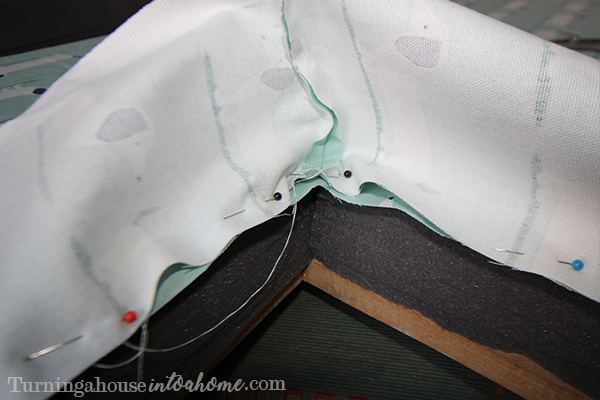
Pin the strip of fabric alongside the saw edge of the exposed corner of the bed. Pin it in place so that the “right sides” or front sides of the fabric are facing each other. Then sew it on, 1cm from the fabric’s edge.
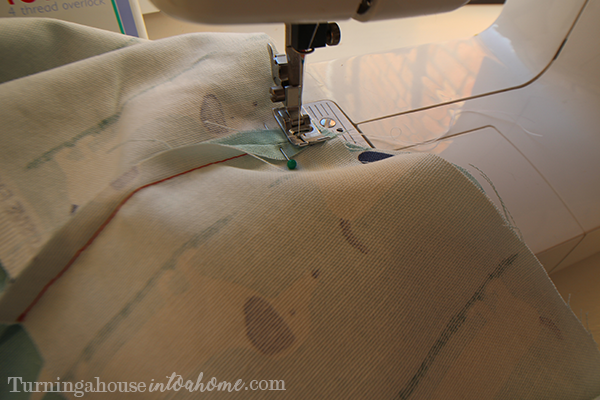
Once you’ve done any sewing that you need to do, put your fabric back into position. It should give you a nice clean fit around the internal corners.
Step 7: Attaching the fabric
Then use your staple gun to hold the fabric in place on the underside of the bed.
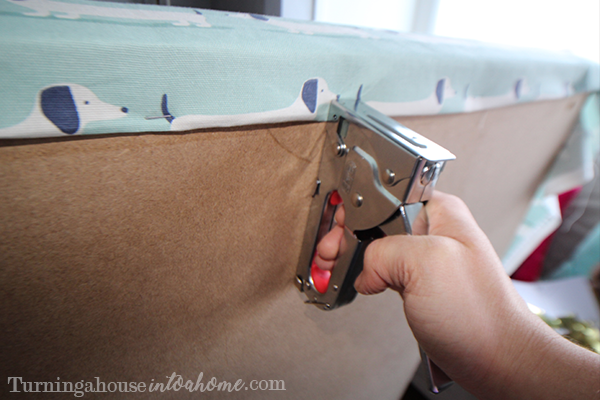
I put a couple of staples in the corner and one in the middle to start with. Do this in all corners first and then make your way around the rest with the staple gun. Where you’ve cut the fabric, fold the raw edge underneath itself before you staple it to get a nice clean finish and protect it from fraying. Make sure you don’t cover the holes you’ve drilled for the feet with the fabric!

When it comes to attaching the fabric at the corners, just fold the fabric over itself neatly and staple it in place.
You don’t need to worry about what the underside looks like because you won’t see it once the bed is in use.
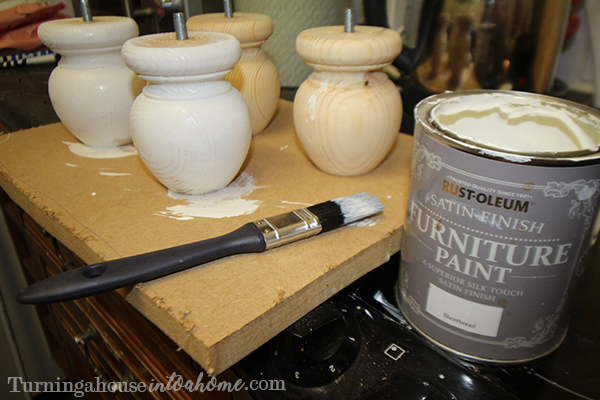
Step 8: Attaching the feet
Once you’ve covered the bed with the fabric, the only thing left to do is attach the feet! This is the easiest part of all because you’ve already drilled the holes and attached the screws. So now all you need to do is screw the feet into place and you’re done! I gave my feet a coat of paint before attaching them. I used Rustoleum Satin Finish Furniture Paint in Shortbread, which I already had from the living room fireplace.
Step 9: Finishing touches!
At this point, your dog bed is done! All that’s left to do it put it into place. But first it’s the perfect time to do some finishing touches. I cleaned the bricks inside the fireplace and painted them white to brighten it up. I used a thin bit of wood to stop draughts from coming down the chimney. It just happened to be the right size and the bricks on either size held it in place. I just drilled a hole and put a screw in the very front of the fireplace to stop it from sagging.
Another way that you can make the fireplace draught-free is to fill a plastic bag with old pillows and shove it up the chimney as I did in this post. It’s worth checking out to see how you can put in some easy discreet lighting too.
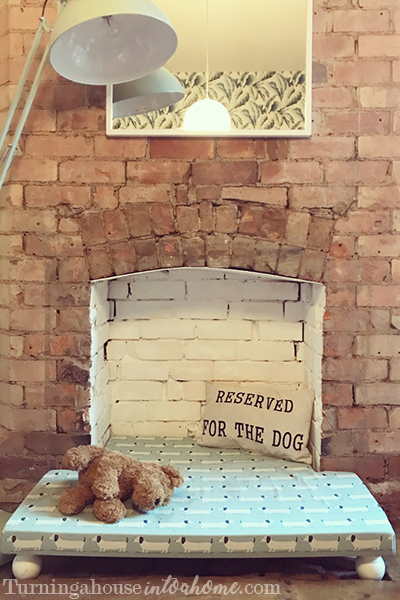
Once you’ve put your dog bed in place in the fireplace, you can make it a little cosier with some cushions and blankets and then you’re done!
Difficulty: 3/10
Cost: <£35
Time taken: 3 hours
Thanks for reading. If you decide to have a go at making your own fireplace dog bed, please share some pictures, I’d love to see!
Karla
Turning a House into a Home
Be First to Comment