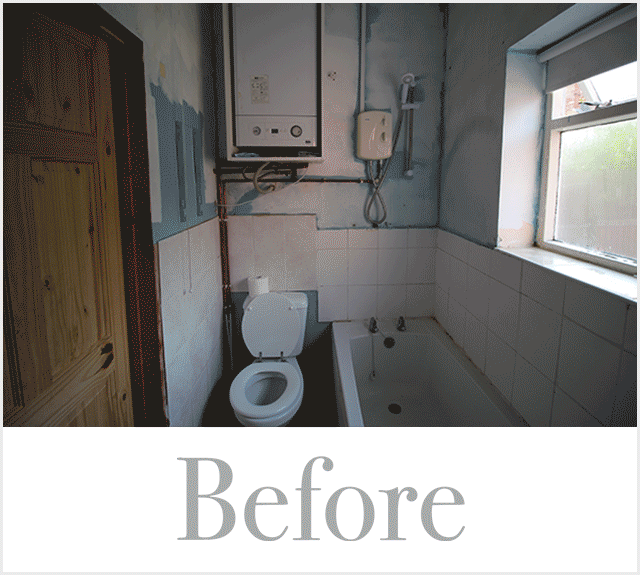
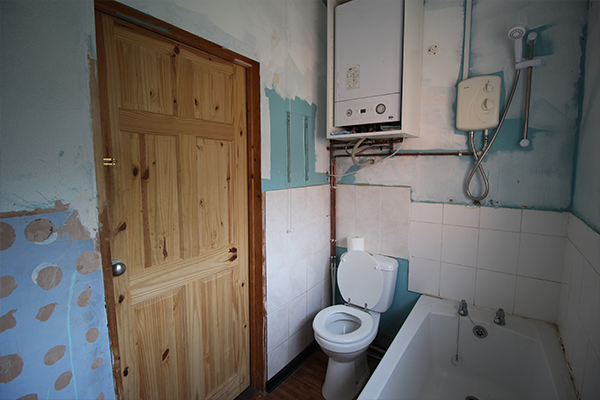
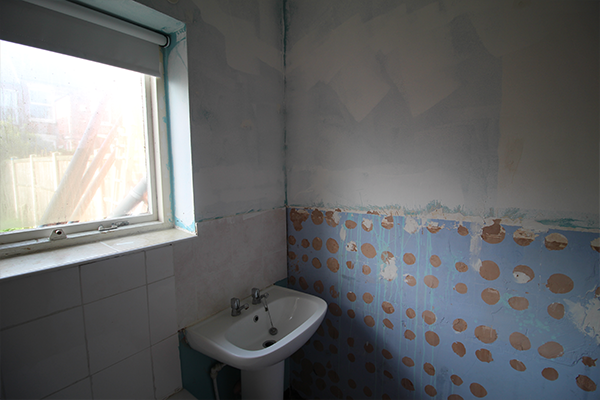
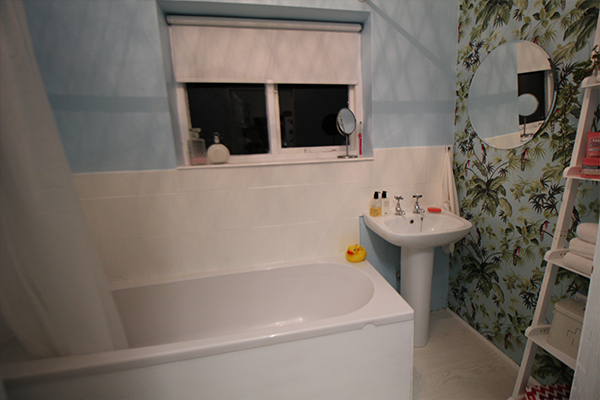
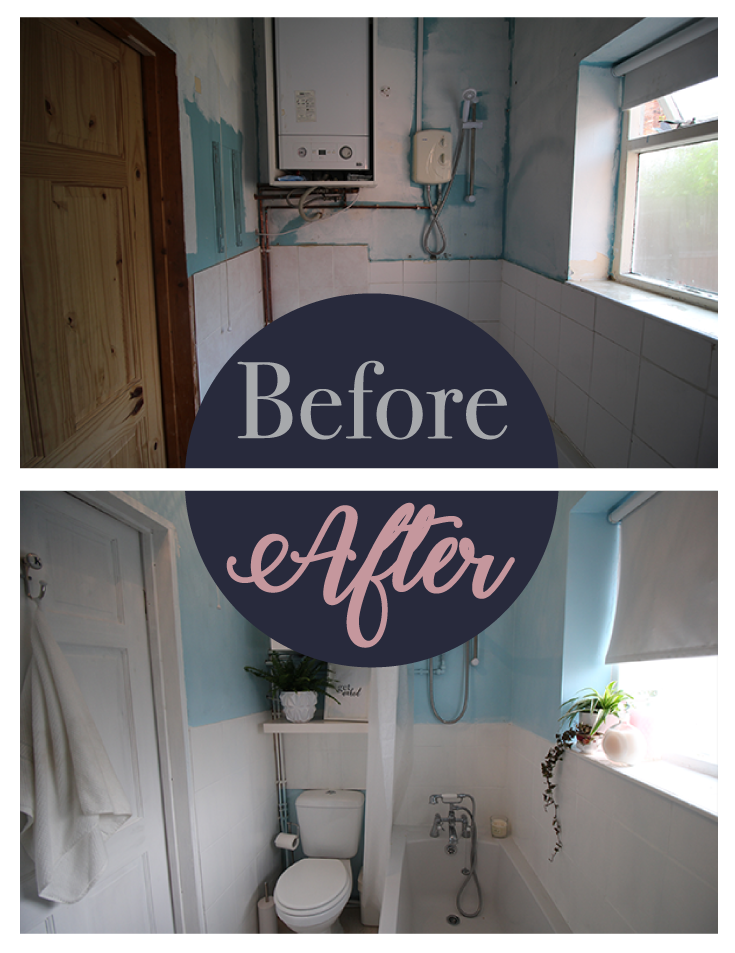
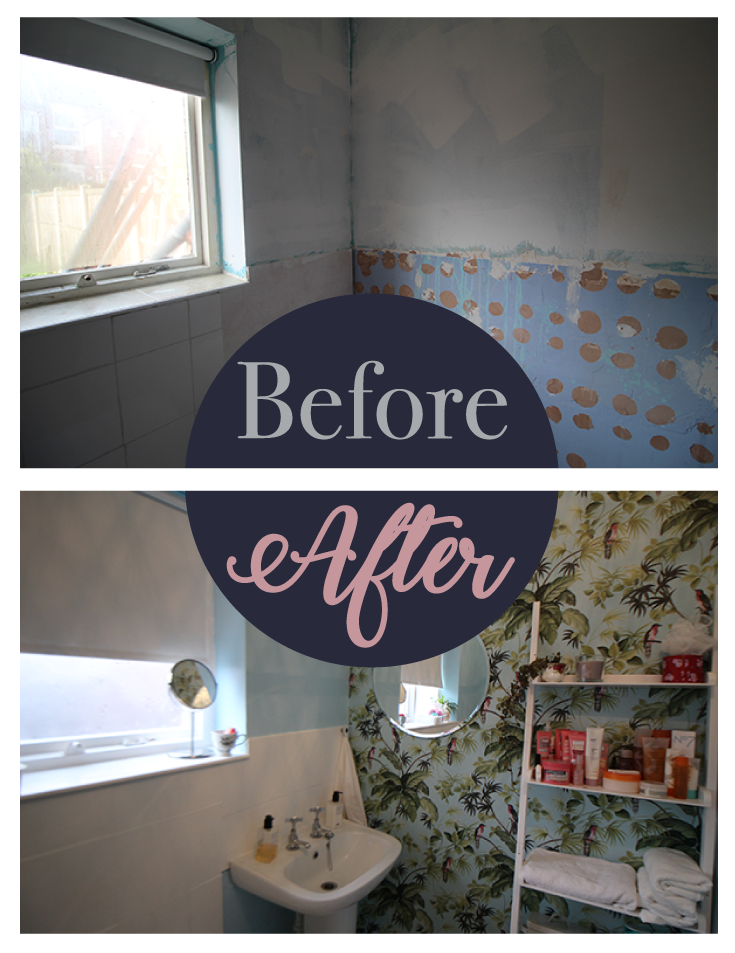
Until recently, my bathroom left a lot to be desired. It had really poorly-fitted vinyl flooring, two different types of mis-matched tiles on the walls, a leaking bath, a cold tap that was poured hot water… basically more wrong with it than right. Over the space of two weekends and on a tight budget, I completely revamped the bathroom from top to bottom. Read on to see how.
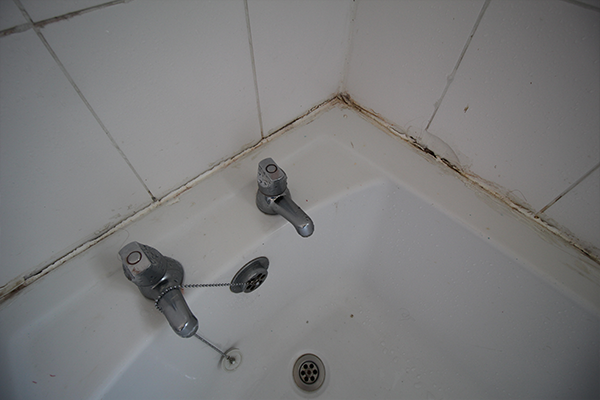
I started by ripping almost everything out. Although the previous owner had sealed the bath, they hadn’t actually anchored it to the wall, which meant that as soon as you stepped in it, it moved away from the wall, ripping the sealant and letting water in behind the bath. Not good. I decided it was better to start from scratch.
The handbasin on the other hand was attached to the wall… using expanding foam that you normally use to fill holes (I honestly don’t know what the old owner was thinking!). The handbasin was also tilted backwards so far that every time you used it, water splashed onto the back of it and stayed there. The water then went stagnant and smelly and horrible.
So anyway, out came the bath and the handbasin. Before you remove anything that’s attached to a water source, make sure you turn off the water! Follow the water pipes from the bathroom taps until you find a tap attached to a pipe. This is your stopcock, which will turn off the water supply to those taps. Twist the stopcock into the off position (clockwise!). Then try to run the bathroom taps to make sure the water supply to them has been turned off. Once you’re happy that there’s no water supply to the bathroom taps, you’re free to detach them and remove your bath/handbasin. Before you do this, make a note of which pipe is for hot water and which is for cold. This will make it a lot less hassle to plumb any new taps in.
Fitting the new vinyl floor
I’ve already written a post on fitting the new vinyl floor, which you can find here. The most important thing to remember is that because it’s being fitted in a bathroom, which has lots of moisture, you will need to seal the edges of the floor with silicone sealant. There are lots of handy hints and tips on the bathroom vinyl floor blog post.

Painting the walls
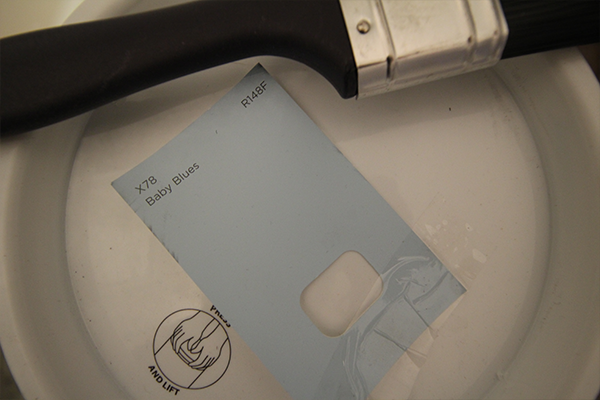
There are lots of different types of paint, from matte to gloss and everything in between. I bought Valspar Bathroom Paint for the bathroom because it’s mould and mildew resistant and you can have pretty much any colour you can imagine mixed for you.
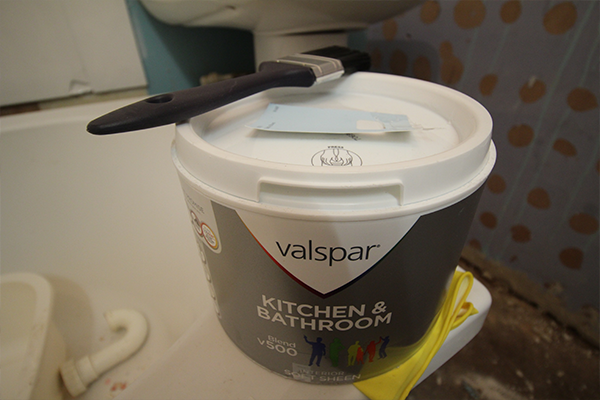
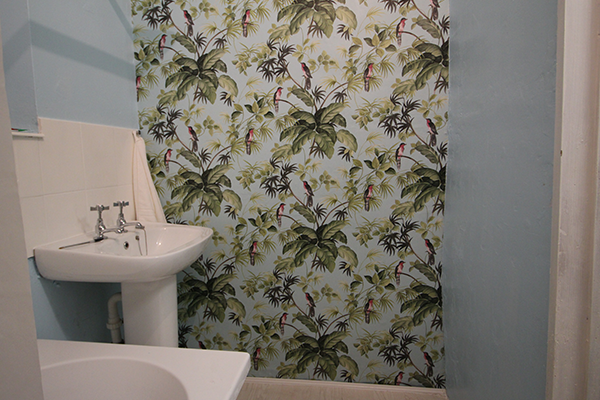
I had already bought some wallpaper for a feature wall in the bathroom so I matched my paint colour to this.
Valspar paint is available at B&Q and 2.5L was £27. I used a brush to apply it because my bathroom is quite small so I couldn’t be bothered to faff around with a roller and a tray. The paint went on okay but after it had dried, I put masking tape on some parts so I could I paint the door and the masking tape peeled off the paint. Not what I’d expect from paint that cost almost £30! Apart from the parts that peeled, the rest of the paint seems to be wearing okay about a month in.
Bathroom feature wall
I created a wallpapered feature wall on one of the bathroom walls. I’ve created a separate blog post on this, which you can read here. It’s worth checking out if you want to know how to hang paste the paper wallpaper or if you need to know what special steps you need to take if you’re hanging wallpaper in a bathroom.
Painting tiles
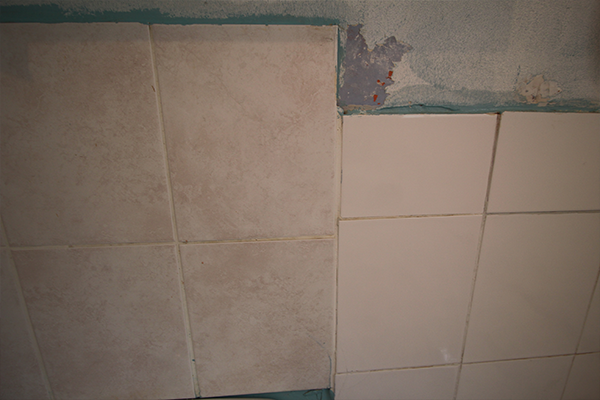
I decided to paint rather than replace the tiles on the bathroom walls for a couple of reasons. The main reason is that the bathroom is downstairs and I may want to move it upstairs in the future. If I were to go to the time and expense of retiling the bathroom, I would probably never end up moving it upstairs and it may affect the resale value of the house. The walls had two different types of tiles in different colours, which stood out like a sore thumb, so I decided to paint them all white so they’d blend in more. Far cheaper and quicker than retiling the whole bathroom!
To paint the tiles, I bought Ronseal tile paint from B&Q for £21.
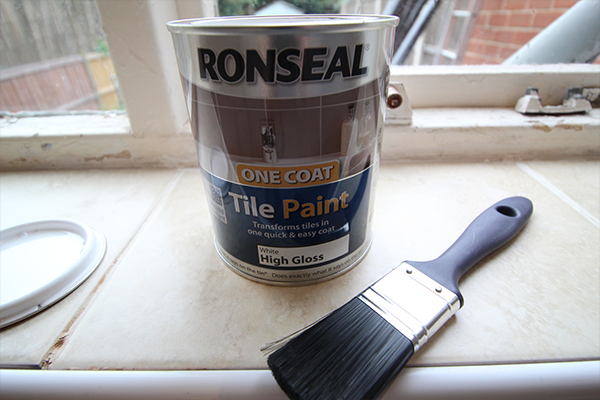
Before you get started, you need to make sure your tiles are clean and dry. Once you’re happy that they are, you can get started. You can use a foam roller or a brush but I used a brush because I had one to hand. The paint is thicker than most paints I’ve used before. It says it’s a one coat paint, but in this instance, Ronseal does not do what it says on the tin. Even painting white on white tiles, I needed more than one coat, so take this into account if you’re planning on buying this paint. It was a little tricky to get a smooth finish because the paint is so thick. If you spread it too much you’ll be in danger of leaving brush strokes, but if you don’t spread it enough it will clump and run – believe me! You’re best off starting in an inconspicuous area until you find a technique that works for you. Be extra careful at the grout lines. I found that although I thought I’d spread the paint evenly, when I checked back over it a few minutes later, some paint had spread downwards from the grout lines and needed to be re-spread. I wouldn’t use this tile paint unless you’re going to be hanging around for half an hour or so after finishing, to keep an eye out for drips.
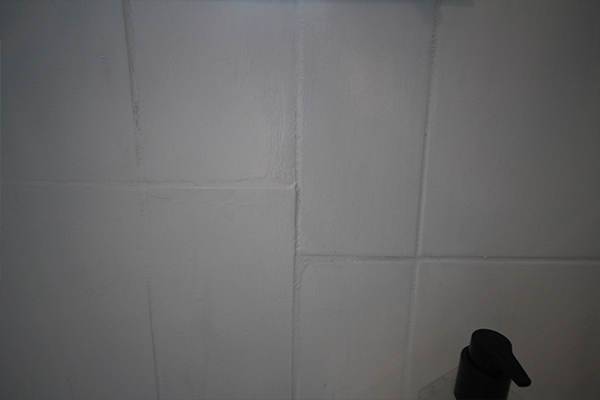
Like I said, you’ll need at least two coats of paint – probably more if you’re painting coloured tiles. A foam roller may get a better finish. The paint is really sticky and it’s a pain if your brush loses a bristle, so that’s worth bearing in mind. Overall the finish I got was okay. At £21 it was a far cheaper option than retiling so I’m happy enough. About a month in it doesn’t seem that durable though – a slight knock of the paintwork and it chips off. I’d say it’s suitable for a short term fix but you’ll be disappointed if you’re hoping for a long-term makeover or hard-wearing result.
How to fit a bath
When I removed my bath from the bathroom, I found that the feet were uneven and broken. Rather than trying to fix them, I thought it was a better option to remove them and start again with new, sturdier bath legs.
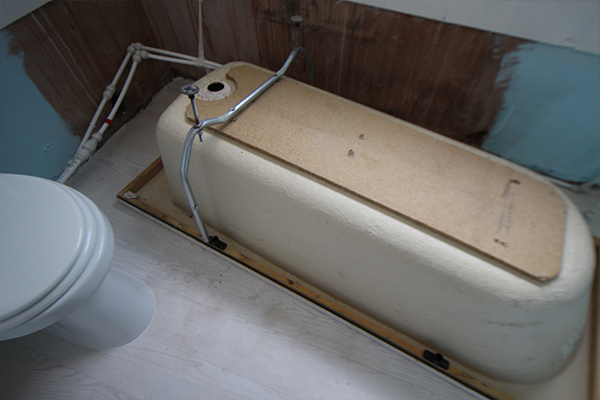
I bought my new bath legs from an online plumbing site called Priority Plumbing. They were the cheapest option that I found and I was so impressed with their service. My order arrived the morning after the evening that I placed it! I bought Kaldewei Eurowa legs, which cost £17.65 including delivery.
Installing the bath feet
To install the feet, I turned the bath over so it was upside down and spaced the feet apart on the wooden panel on the bottom of the bath.
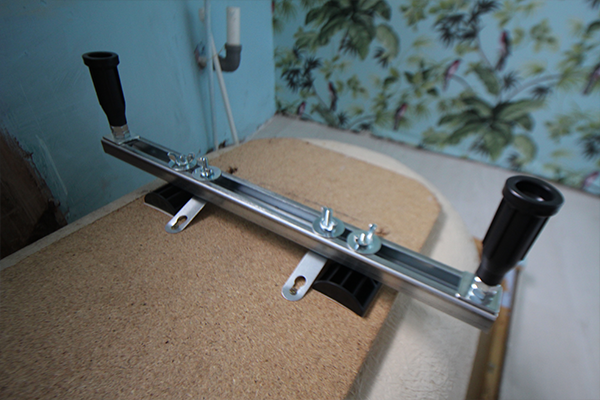
I measured the width of the wood to make sure that the screws I was using were slightly shorter than this measurement. Any longer and they would have pierced the bottom of the bath! Once I was happy with where the screws needed to go to attach the feet, I drilled a pilot hole in each space with a small drill bit – smaller than the width of the screw. Drilling a pilot hole helps to guide the screw into the part of the wood you want it in and stops the wood from splitting. It also only takes a couple of seconds to do and makes the job infinitely easier. One thing to be careful of is that you don’t drill in to the wood too far – remember that if you do, you’ll have a leaking bath!!
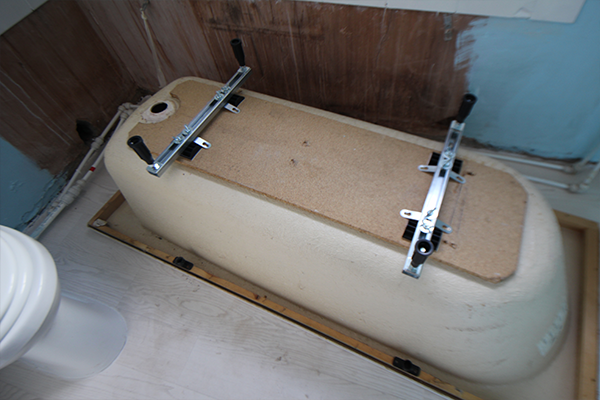
Once you’ve drilled your pilot holes it’s a piece of cake to screw the feet in, securing them to the base of the bath. Then you can flip the bath over the right way around and set about adjusting the height of the feet.
Adjusting the bath feet
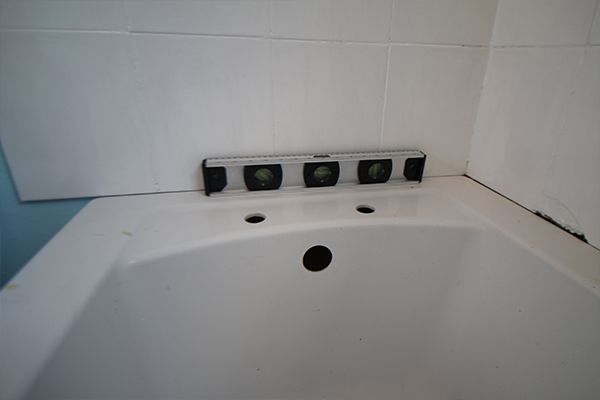
Once you’ve turned the bath the right way around, you’ll need to adjust the feet so that the bath is both level and at the right height. Put the bath where you want it to stand and pop a spirit level along the side of it.
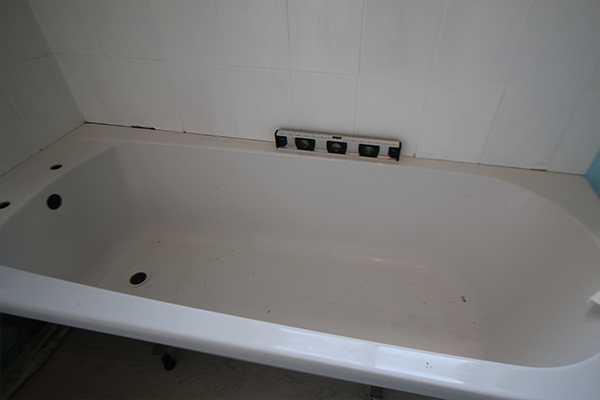
Then you just need to twist the nut at the base of the feet to adjust their height until the bath is level. Do this with the spirit level and the long side and the short side of the bath. Once you’ve done both, go back and check the first one again in case adjusting the second put the first one out.
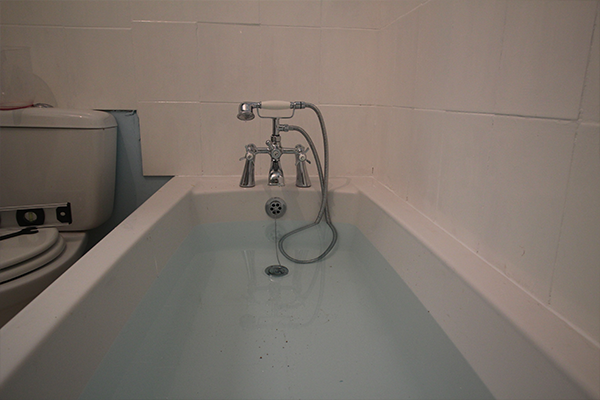
Plumbing in the bath
It may be easier than you think to plumb in a bath. I had no experience of basic plumbing before buying this house earlier in the year and I managed it with relative ease, so I’m sure you can too! I replaced the taps on my existing bath to give it a new lease of life. The taps I bought were from Screwfix and cost £58.99. Once you’ve turned off the water supply (see above), you’re free to remove your old taps, if necessary. To do this, you just need to unscrew the pipe that’s attached to the underside of the tap. Then unscrew the nut under the bath that holds them in place.
Once you’ve removed your taps, you can pop your new ones into the holes and go about attaching them. The first thing to do is screw the nut that comes with them onto the underside of the bath to hold them in place.

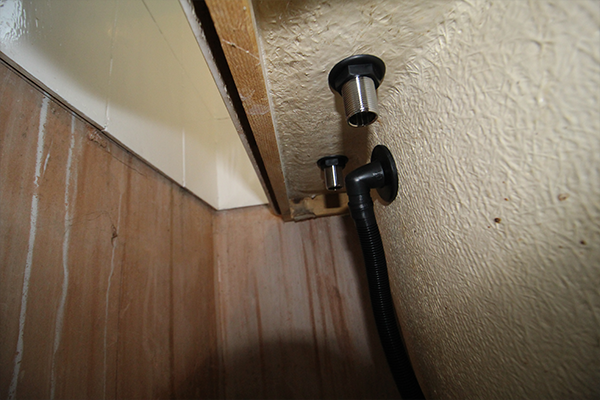
Next, you’ll need to see what size tap connectors you’ll need. They should be either 15mm or 22mm. My bath taps were 22mm. However, one of the pipes they needed to be connected to was a 15mm pipe and the other was a 22mm pipe. For attaching a 22mm tap to a 22mm pipe, I needed a 22mm x 3/4″ flexible tap connector. I bought this one from Screwfix for £2.79. I attached the 15mm pipe to the 22mm tap using this 15mm x 3/4″ tap connector which cost £2.19.
You can use your existing tap connectors if they’re the correct size, but mine were rusted and leaking so I opted to replace them entirely.
How to use flexible tap connectors
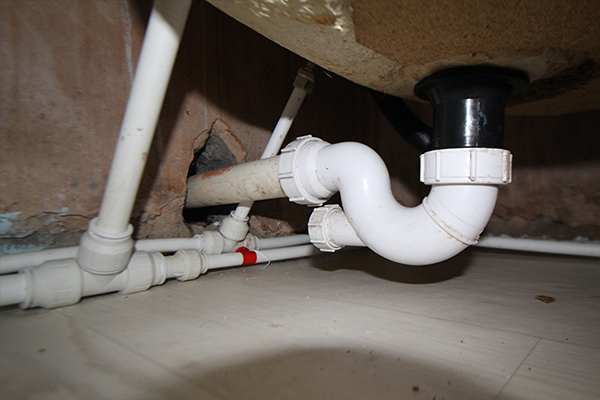
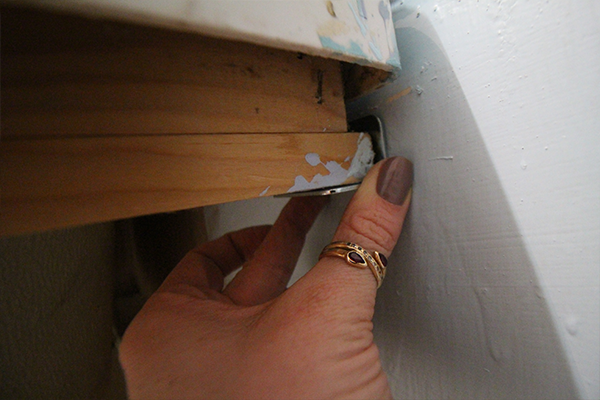
When you’re fitting flexible tap connectors, you want to make sure they’re not too bent. Yes, they’re flexible, but their effectiveness will be limited if they’re not as straight as possible. One thing to remember with plumbing is that if you’re using plastic pipes, you will need to use pipe inserts to make sure you don’t get any leaks. These are just little plugs that you put in the pipe before you attach anything. To connect your tap connector to the pipe, pop an insert in the pipe, open the screw at the end of the connector, place the part you’ve unscrewed, followed by the olive*, over the pipe and then screw it back onto the connector. It sounds a lot more complicated than it is, so I’ve annotated the following picture to make it more clear.
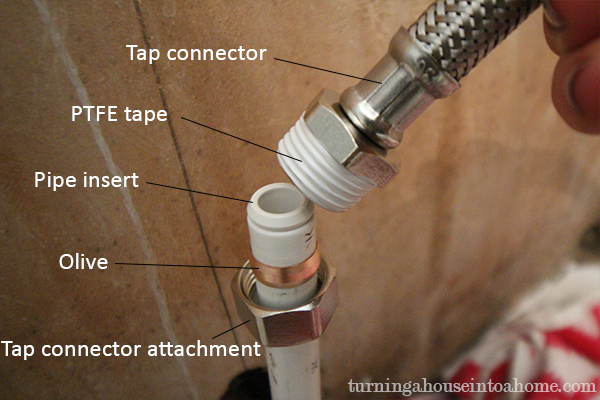
*”What’s an olive?” I hear you ask… it’s basically a little piece of metal that looks like a ring that you put around a piece of pipe before you screw on an attachment. It tightens onto the pipe as you screw on any attachment to form a nice tight waterproof bond. You can also use PTFE tape to keep the connection watertight. This is a roll of thin rubbery tape that you wrap around any threads you’ll be screwing attachments onto to give a nice snug fit.
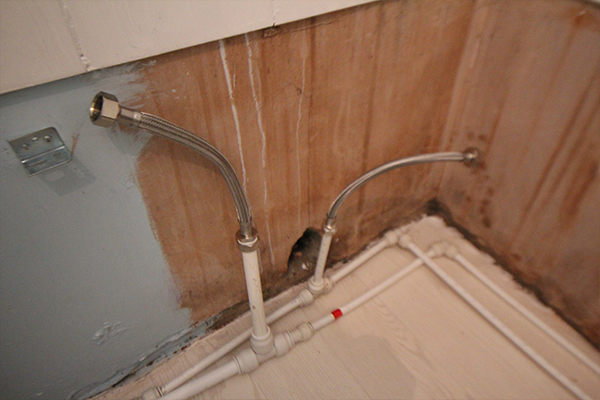
When you’ve attached your flexible tap connectors to your water pipes, next you need to attach the other end to the taps. Make sure you connect the hot pipe to the hot tap and the cold to the cold one! Attaching them is really easy: all you need to do is screw the other end of the connector to the underside of your taps, underneath your bath. Make sure you tighten it really well. I used two of these spanners, one on each part of the connection to get it as tight as possible.
Turning the water back on
Once you’re happy that you’ve connected everything together, you should be finished plumbing your taps in! It’s a good idea to check that they’re plumbed in okay before you anchor the bath, if that’s something you need to do. Make sure your taps are in the “on” position so you don’t damage them when you turn the water back on. Put a basin under the taps if your plug hole isn’t plumbed in. Now you just need to twist your stop cock tap again to allow water to flow through to your taps again. You should now have water coming out of your newly fitted taps. Check that they turn on and off okay and that there’s no water leaking from the connectors under the bath. If there is water leaking from anywhere, turn your water supply off again and refit the connector at that point to ensure a tight fit.
Attaching a new bath overflow
I replaced my bath’s overflow because when I moved my bath I realised that the old overflow was leaking due to an old rubber seal. Replacing your overflow is really easy. I bought a new one from Screwfix for £7.39. Fitting it takes 5 minutes. It’s easiest to do before you anchor in the bath so that you can get at it easily but it’s not impossible if your bath is anchored in – just a little more fiddly.
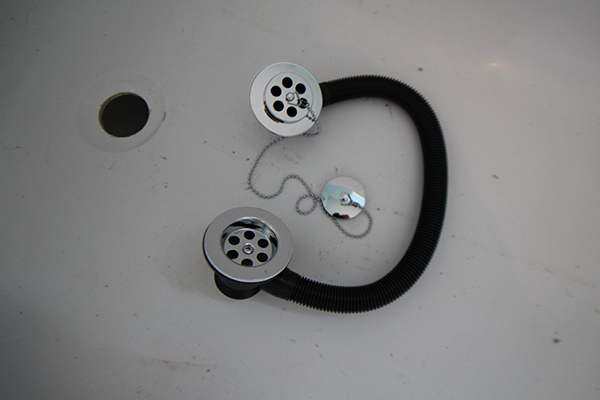
To attach the overflow, you just place the overflow part into the hole near the top of your bath, making sure the rubber washer is in place to ensure a watertight fit.
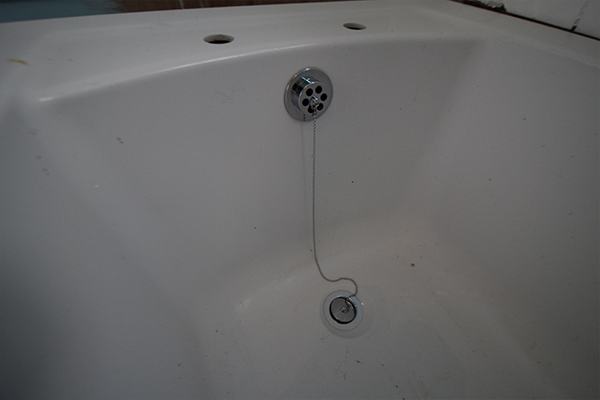
Then screw the attachment onto the other side on the underside of the bath tightly by hand. Then do the same with the plughole part: put it in place inside the bath, then screw to attach it on the outside. Then that’s it – you’ve fitted it!
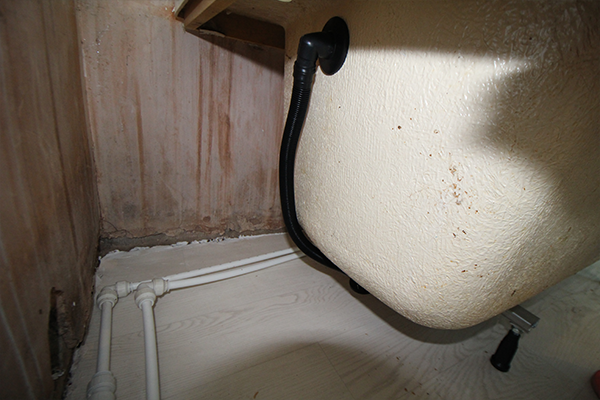
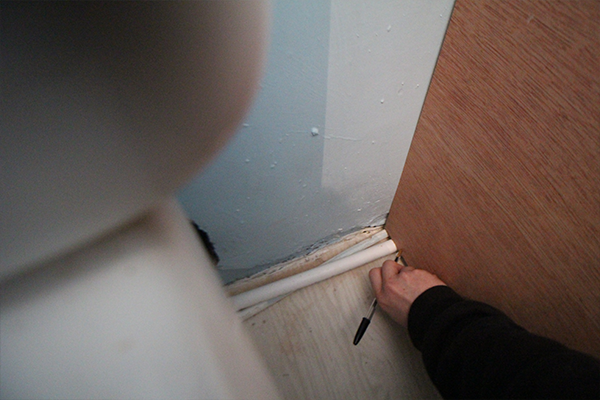
The last thing you’ll need to do it attach your waste pipe so the water can drain away. I used my old one for this so I’m afraid I can’t advise on what these are called or if there’s any difference from one to the next.
I just screwed in onto the underside of the plug hole, again tightly by hand, and fed the pipe outside through the hole in the wall.
I then went outside where I reattached the pipe to an outside pipe which fed into the drain. All of these pipes fixed together easily by hand and were straightforward to attach. Once you’ve done all of this, run your tap and allow the water to run down the plug hole. Check that the water is running into the drain outside and that there are no leaks under the bath.
Anchoring the bath
I anchored the bath last, so it was easier to attach the taps and the overflow. To anchor it, I put it in place and checked that it was level by laying a spirit level along the long and then the short sides, as above. Adjust the feet slightly if you’re not happy with the position of yours. When I was happy that it was level and in the right position, I set about anchoring it to the wall. This simply entailed attaching 2 steel L shaped brackets to the wall and then to the bath. I bought the brackets from the Range for a couple of pounds.
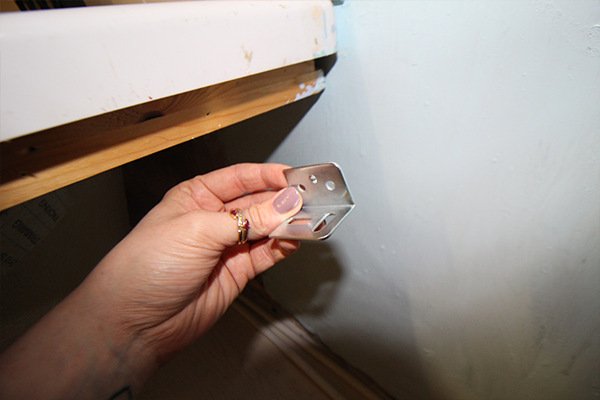
Once the bath was in position, I held one of the brackets where I wanted it to be, then moved the bath slightly so I could mark the wall. Then you just need to drill into the wall and attach the bracket. You can then put the bath back in position and screw the bath’s wooden underside into the other side of the bracket. As always, the easiest way of screwing into wood is to drill a small pilot hole first, then screw into this.
Sealing the bathtub
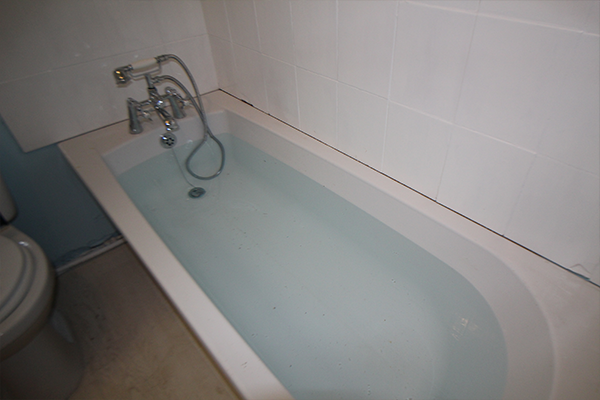
To seal the bath, you need to put the plug in and fill the tub with water to weigh it down. Once it’s been filled, you can seal the edges.
Make sure the edge of your bath and the surface it’s against are clean and dry. I found that the easiest way by far of using sealant is to use masking tape to mask just above and below where you want to put the sealant.
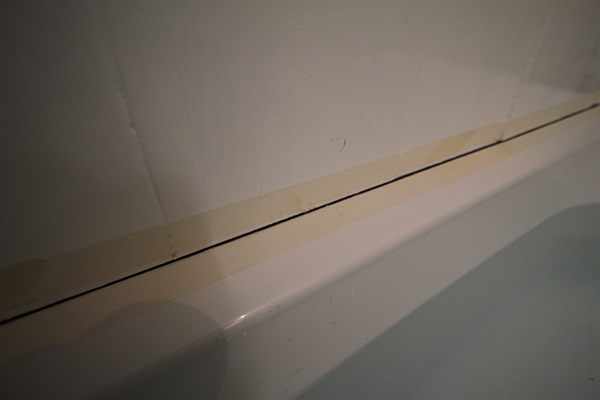
Then use your sealant and gun to draw a line of sealant in the gap between the masking tape. I used No Nonsense Sanitary Silicone in white.
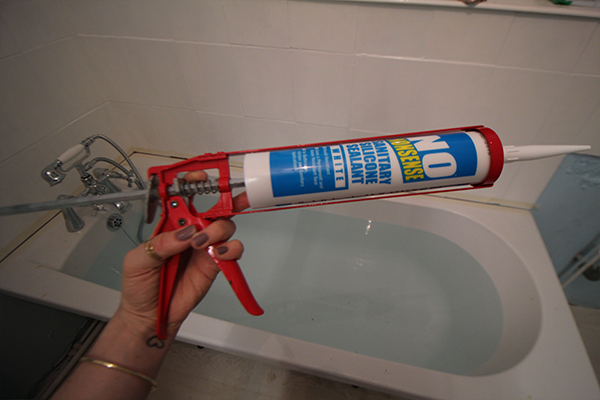
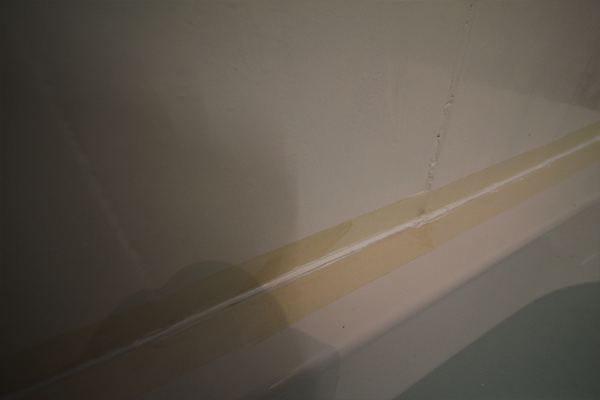
Sealant can be messy so it’s easiest to wear disposable gloves when using it. Once you’ve created your line of sealant, run a wet finger all along the sealant and then remove your masking tape and you’re done! Leave the bath filled for 24 to 36 hours after sealing it to allow the sealant to fully set.
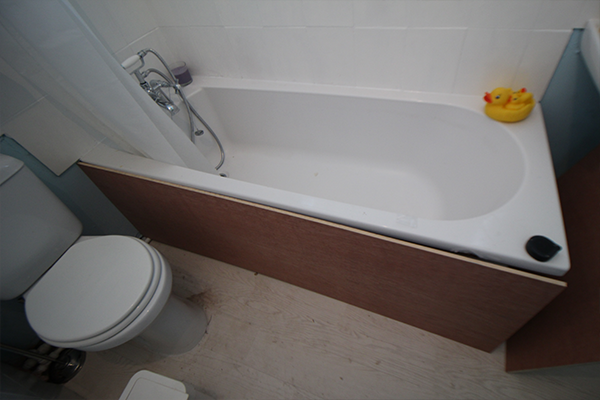
Making a bath panel
I had originally planned to paint my existing bath panel, but when I saw how my bathroom was coming together, I decided to just replace it. It looked awful, with big holes in it. I had a look at bath panels online and couldn’t believe how much they cost, so I decided to make my own. I bought a sheet of plywood from B&Q for £28. You can buy other sheet materials such as MDF from there for cheaper, but don’t! MDF is great for some things, but you don’t want to make a bath panel out of it because as soon as it gets wet it will rot. the sheet that I bought was big enough for both panels of my bath and then some, but too big to fit in my car. Luckily, B&Q offer a free in-store wood cutting service, so I got them to cut the sheet roughly down to size so I could get it home.
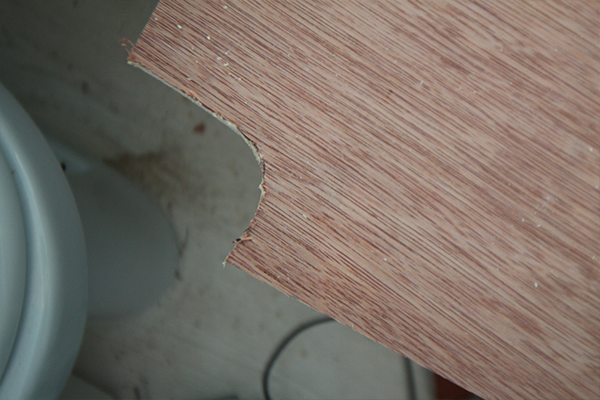
Once I got it home, I used my jigsaw to cut it to the right size. There were pipes coming out of two sides of the bath and that would need to go through the panel. To cut holes for these, I put the panel up against them to mark how high and how wide I’d need to cut.
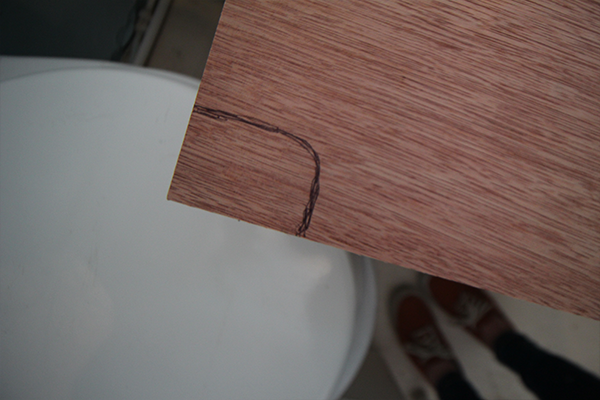
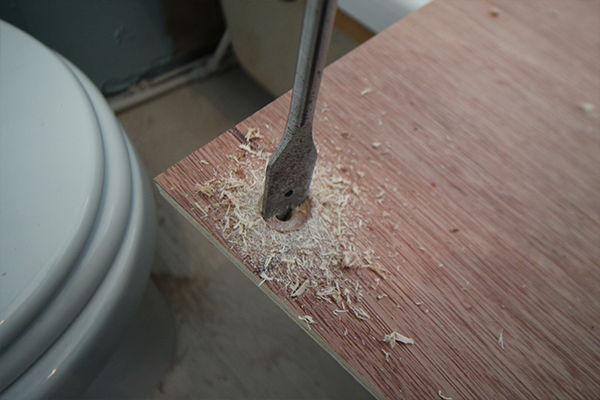
I then used a round wood drill bit to cut the corner where these two points met.
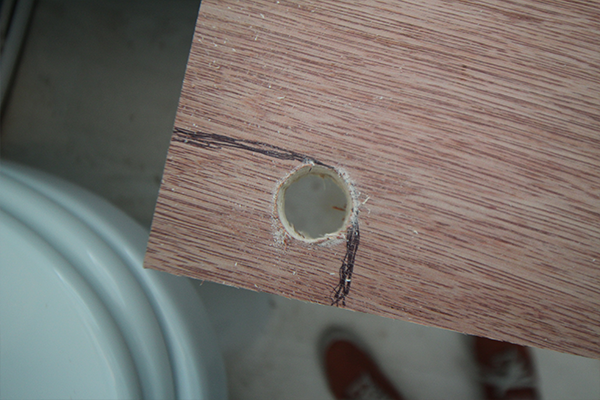
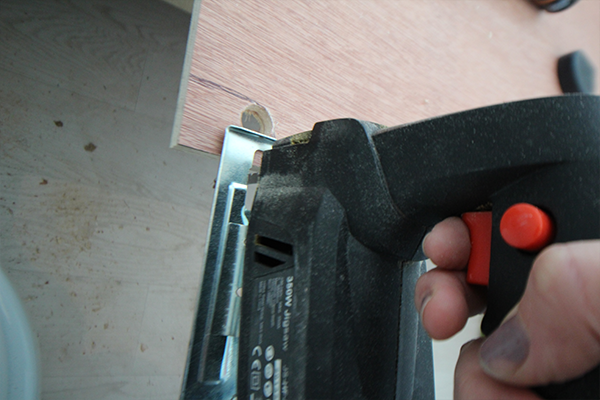
Then I used my jigsaw to cut up to and across to the top of this circle. This resulted in a snug gap for the pipes to fit into, with a nice rounded corner.
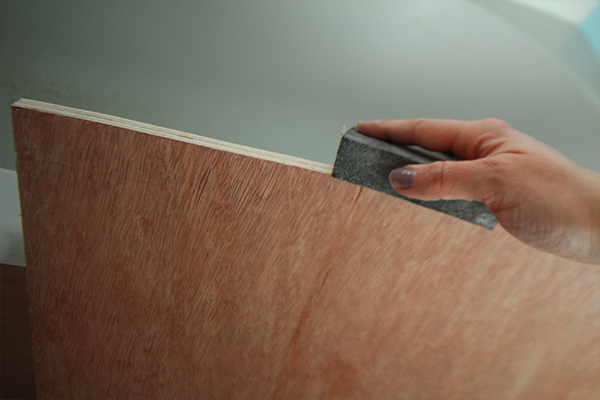
I did this for both panels and then fitted them to see if they were the right size. They were slightly too wide, so I used my jigsaw to cut them down to size. If you’re cutting any away, do this at the top (the part that fits under the lip of the bath or the parts that meet the wall. This will ensure a nice clean line where the panels meet and along the floor. The bath panels fitted perfectly without having to screw them in. I just angled them to position them under the bath lip and then pushed them from the bottom to straighten them up. I removed them once I was happy with their fit so I could paint them. You can paint them once they’re in position if you like, but I didn’t want to risk getting paint on my newly fitted flooring. Before painting, I gave the edges that had been cut a quick sand to smoothen them.
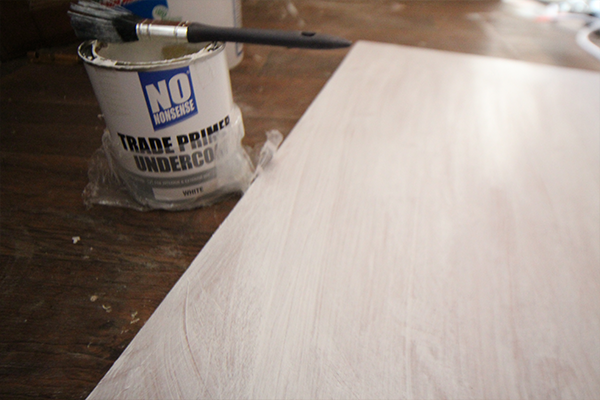
To paint the bath panel, I did a coat of primer, followed by two coats of the same white gloss paint that I’ve been using to paint the doors and skirting boards of the house.
Once the paint was dry, I popped the panels back into place and my bath was done!
Fitting the hand basin
I’m not going to go too in-depth with how I fitted the hand basin because:
- it’s pretty much the same process as fitting the bath taps
- honestly, this post is dragging a bit and I’m bored of writing it
I bought new taps for the hand basin to match the bath taps: these Edwardian basin taps from Screwfix for £23.99. See above for how to fit new hand basin taps and follow the bath tap instructions. The main difference for me was that the sink taps needed a 15mm connector rather than 22mm. So I bought two of these from Screwfix to attach the taps.
As always, make sure you connect the hot tap to the hot pipe and the cold tap to the cold tap. My old taps and pipes were actually mixed up since I first moved into the house so I was so happy to finally have this sorted out!
To fix the hand basin to the wall, I used this fixing kit. I held the basin in the position I wanted and made a mark on the wall underneath it so I knew where to drill. Then it was just a case of drilling into the wall, fitting the rawlplugs and screwing in the fittings to attach the basin to the wall.
Once you’ve fitted it to the wall, use the same process as with the bath to seal the top where it meets the wall.
Finishing touches
So, at this point, I had:
- painted the walls
- painted the tiles
- fitted the vinyl flooring
- created a feature wall
- painted the door
- fitted a bath and new taps
- fitted a sink and new taps
and finally the only things left to do were finishing touches!
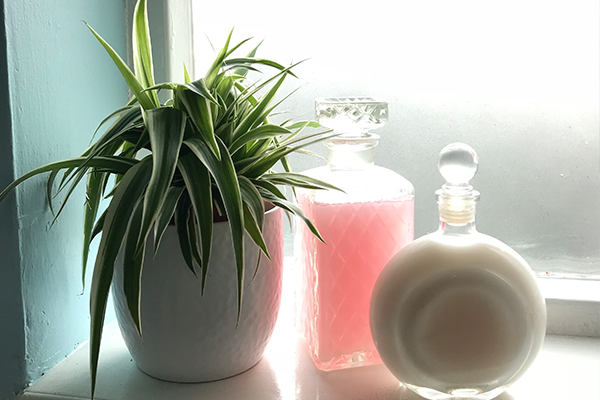
Bathroom plants
I wanted to add some plants to the bathroom but was wary that I’d need to be selective in choosing my plants because of the humidity and lack of direct sunlight in the room. I did a bit of research into what plants would do best in that environment and came up with:
- fern
- spider plant
- ivy
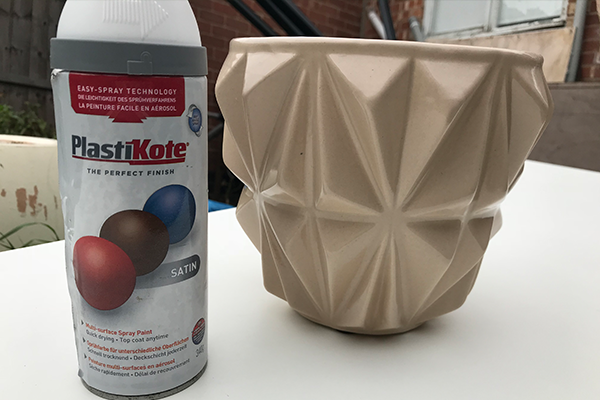
I bought all three. I planted the ivy in a vintage teacup. I bought a plant pot in TK Maxx’s clearance section for £2. The pot was lovely but the colour was all wrong so I spray painted it white to match the room.
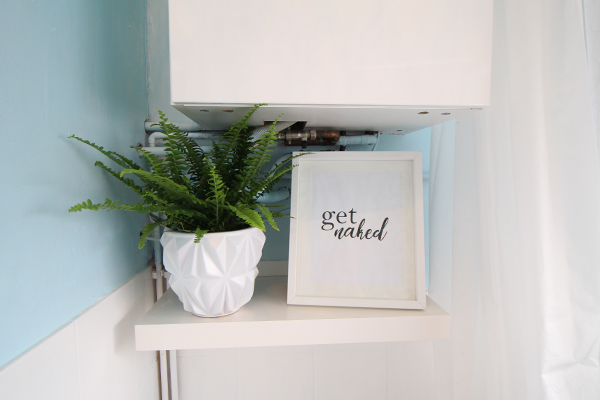
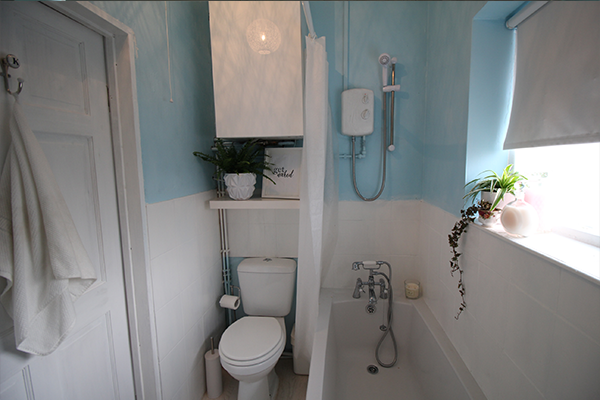
Bathroom shelf
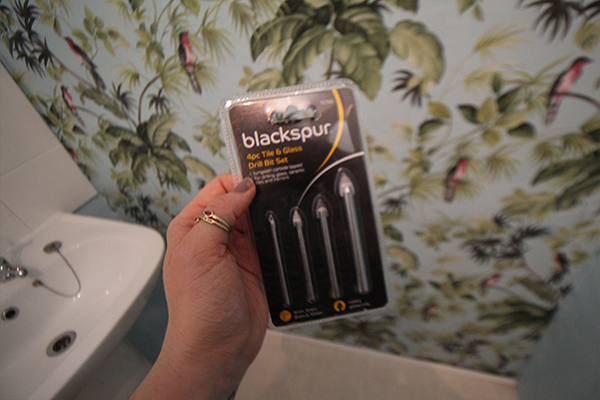
A few month ago I had my boiler moved into my bathroom. It’s housed in a cabinet, but it has lots of ugly looking pipes sticking out the bottom of it. Underneath the pipes is also where the two different types of tiles in the bathroom meet. I put up a shelf beneath the cabinet and put a frame and a plant on the shelf to disguise the pipes and the join in the tiles. I used a Persby shelf from Ikea, which cost £8. As the shelf was being fitted on tiles, I needed to make sure I used a tile drill bit so the tiles wouldn’t crack. I created some simple bathroom art and popped in a white frame, which I got for £2 in Asda.
Bath bubbles
I found a crystal decanter in a charity shop for £2 and bought it to fill with bath bubbles. So much nicer than having ugly plastic bottles on display! I filled a big jar I had with bath bombs too, to give my new and improved bathroom a nice relaxing pamper room feel.
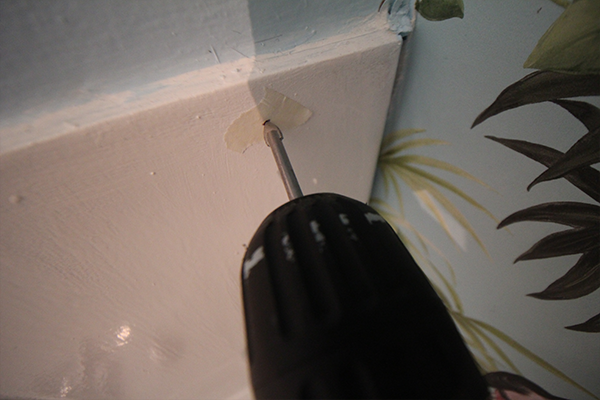
Towel hook
I fitted a little towel hook next to the sink. Like the shelf, the most important thing to remember is that if you’re drilling into tile, you need to use a tile drill bit. Because tiles can be slippy, I also put a little bit of masking tape over the part I wanted to drill so the drill wouldn’t slip.
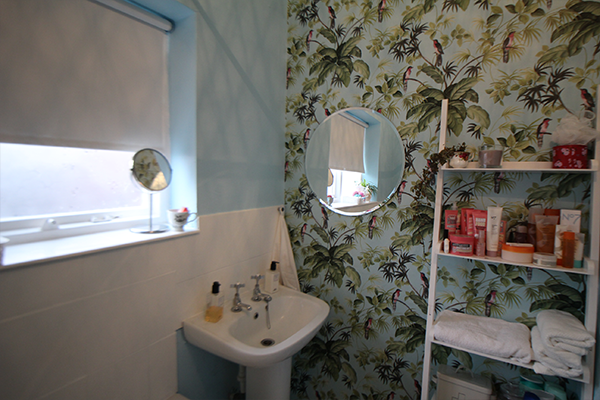
Bathroom mirror
My bathroom mirror was the perfect finishing touch to finish off my feature wall! It’s an Ikea mirror, but I bought it on eBay for £5. I’d really recommend checking out eBay before making a big purchase. I’ve had so many bargains from it and you never know – someone could be getting rid of the very thing you want!

Overall, my “new” bathroom cost just under £250. This includes new floor, paint, new taps, wallpaper and all the little bits in between. It took two weekends of my time but I loved it. It was challenging at times but I learned so much and am so happy with the results!

Time taken: 2 weekends
Difficulty: 7/10
Cost: £250
What I’d do differently: make sure I knew exactly what I needed from the start so I didn’t have to do so many trips to Screwfix!
Hi
I saw you tweet about blog and I thought I’d checkout your website. Looks like Turning has come a long way. Keep up the good work.
I am sure you will like my blog http://www.twosomelife.com too.
That’s a brilliant diy guide- have pinned it for when I get to my bathroom!
Thank you very much! 🙂