Please note: This post is about how to use paste-the-wall wallpaper. For instructions on how to use paste-the-paper wallpaper, see this post.
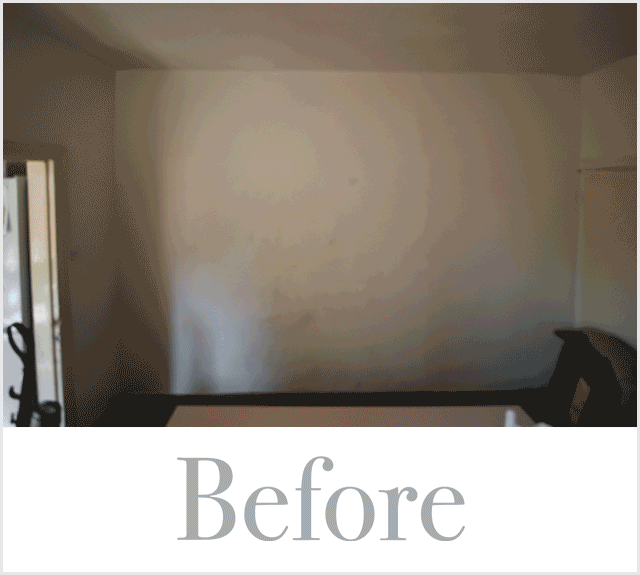
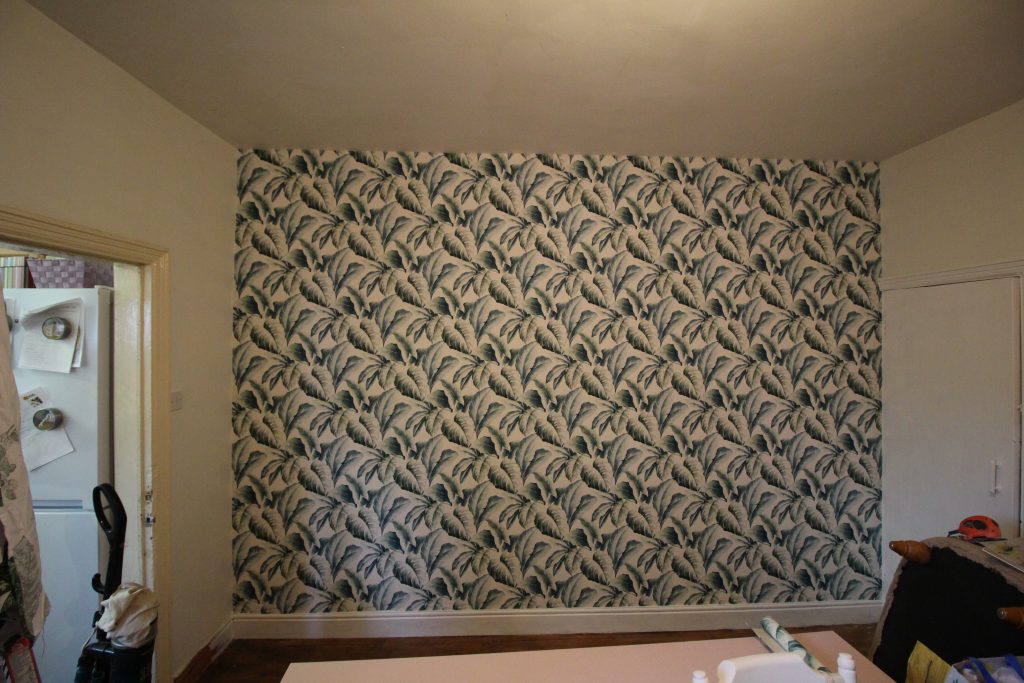
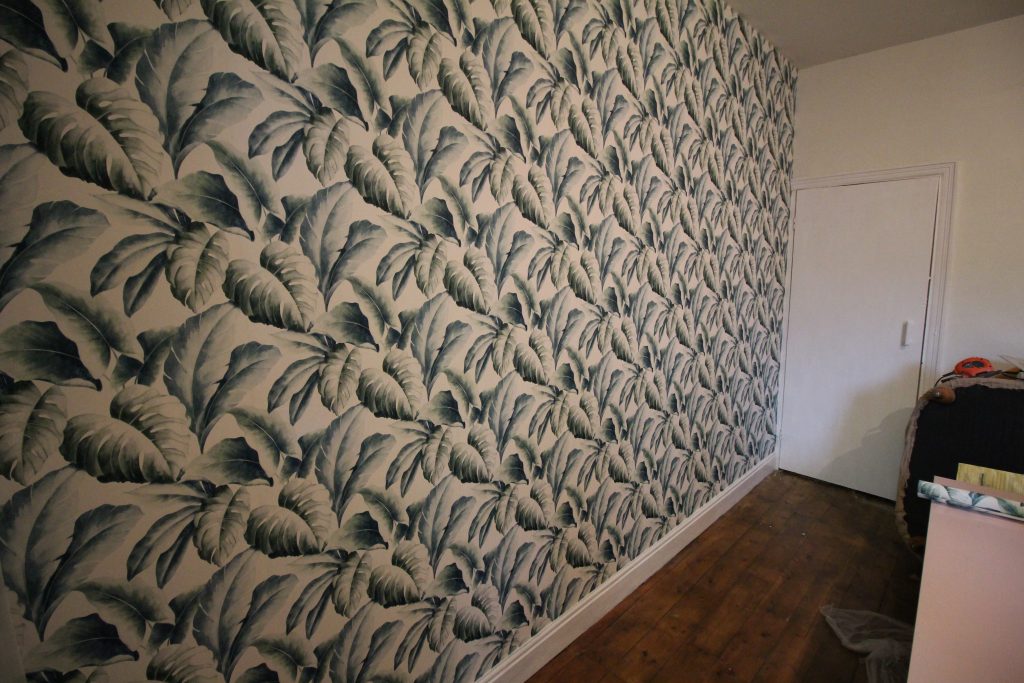
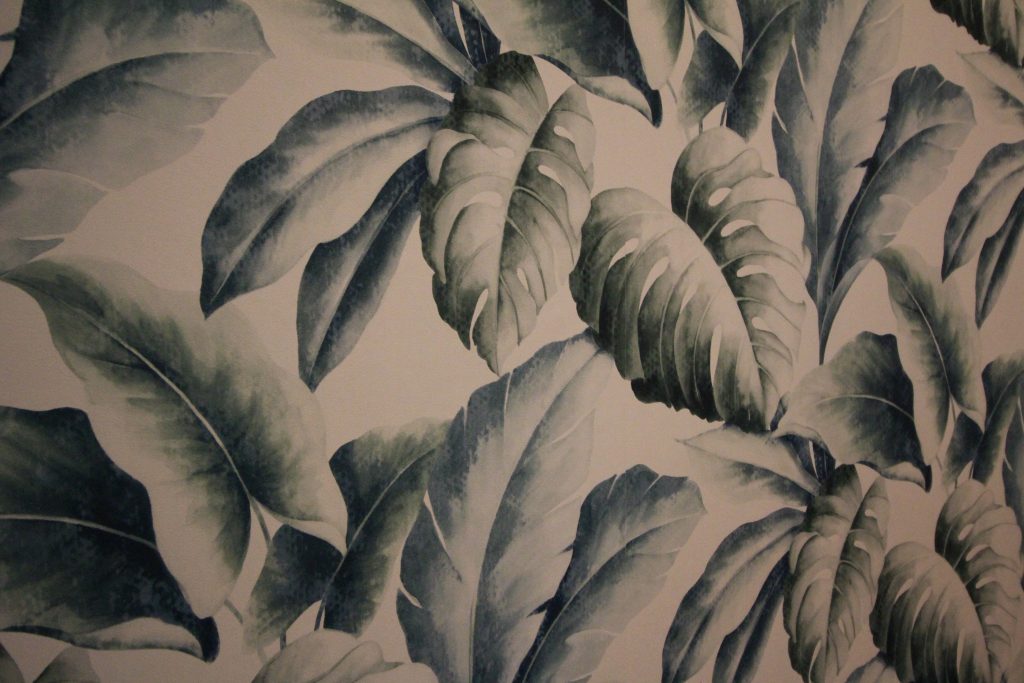
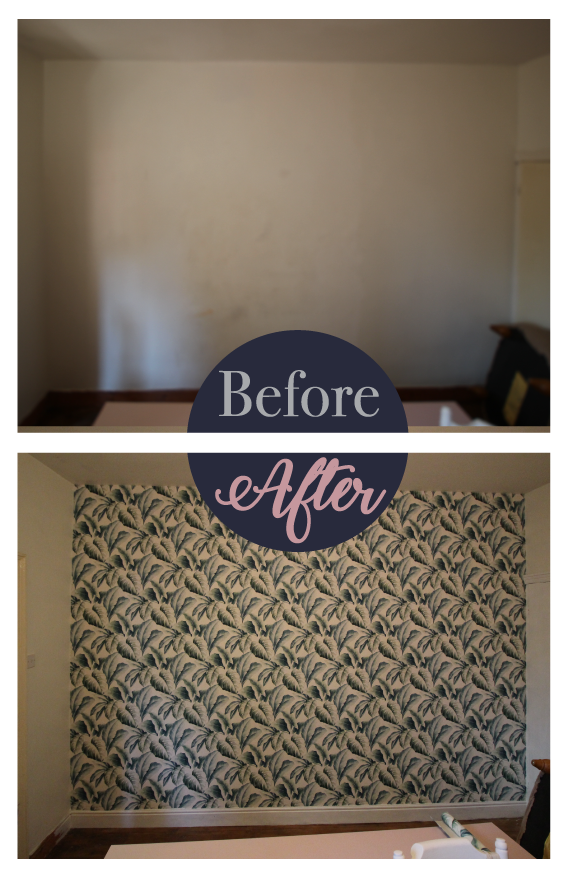
Last weekend I created a feature wall in my dining room. I went for a large leafy print for contrast behind the big pink cabinet I knew I was going to put against that wall. A feature wallpapered wall can really turn a room around.
There are two types of wallpaper: one is the traditional paste-the-paper type, where you set up a pasting table. The other, and the one I’m going to show you how to do, is the paste-the-wall type.
When you buy wallpaper, it will say on the roll whether it’s paste-the-wall or paste-the-paper. Paste the wall is generally considered the easier of the who and is becoming the more popular option nowadays.
Read on for my tips when using this type of wallpaper. It may be easier to do than you think!
How many rolls of wallpaper do I need?
One way to figure out how many rolls of wallpaper you need is to measure the wall you’ll be covering. Multiply its height by its width to get the wall measurement in square metres. Add 5% on to this for wastage. The wallpaper you’re using will tell you how many square metres it will cover. Divide your wall’s measurement by the number of square metres the wallpaper will cover. Round your answer up to the nearest whole number and that’s how many rolls you’ll need.
The second, lazier easier way, is to use an online calculator such as this one from B&Q. Simply insert your measurements and it’ll figure it all out for you.
However many rolls you need, make sure they all have the same batch number. This will be a number printed on the label which correlates to when each roll was printed. If all the batch numbers are the same, this means all of those rolls were printed at the same time. If you don’t use the same batch numbers, you run the risk of the colours of your rolls not entirely matching.
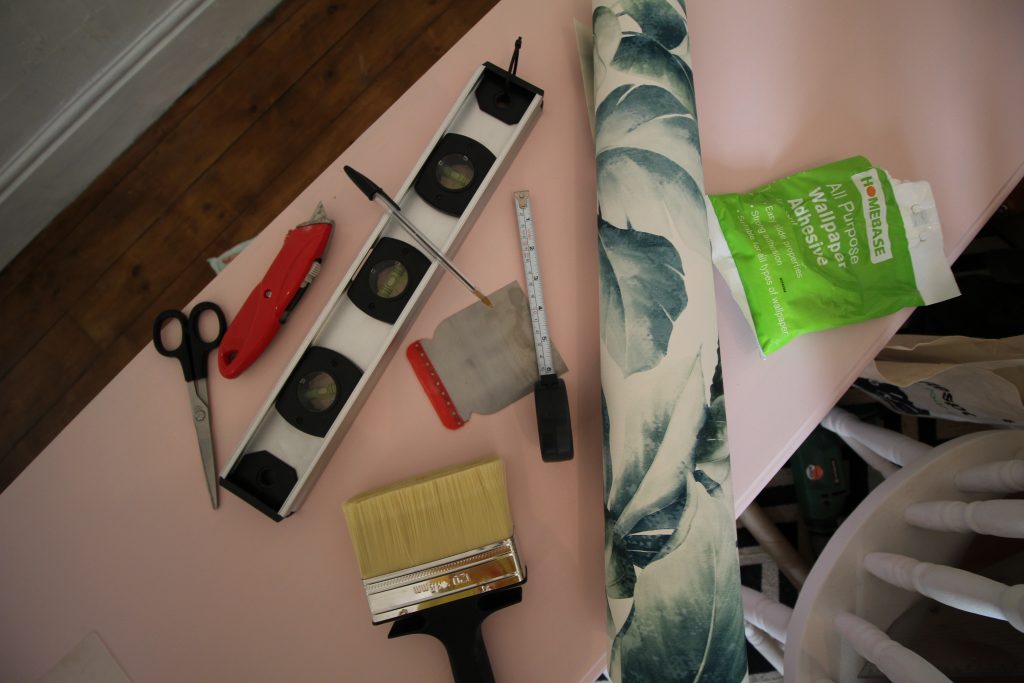
What do I need?
Because you’re using paste the wall wallpaper, you don’t need to use a pasting table (but you can if you want to or you have one). You’ll need:
- your wallpaper (duh!)
- a step ladder
- scissors
- wallpaper paste
- a brush
- a stanley knife
- something to smoothen the paper
- a spirit level
- a pen
What do I do first?
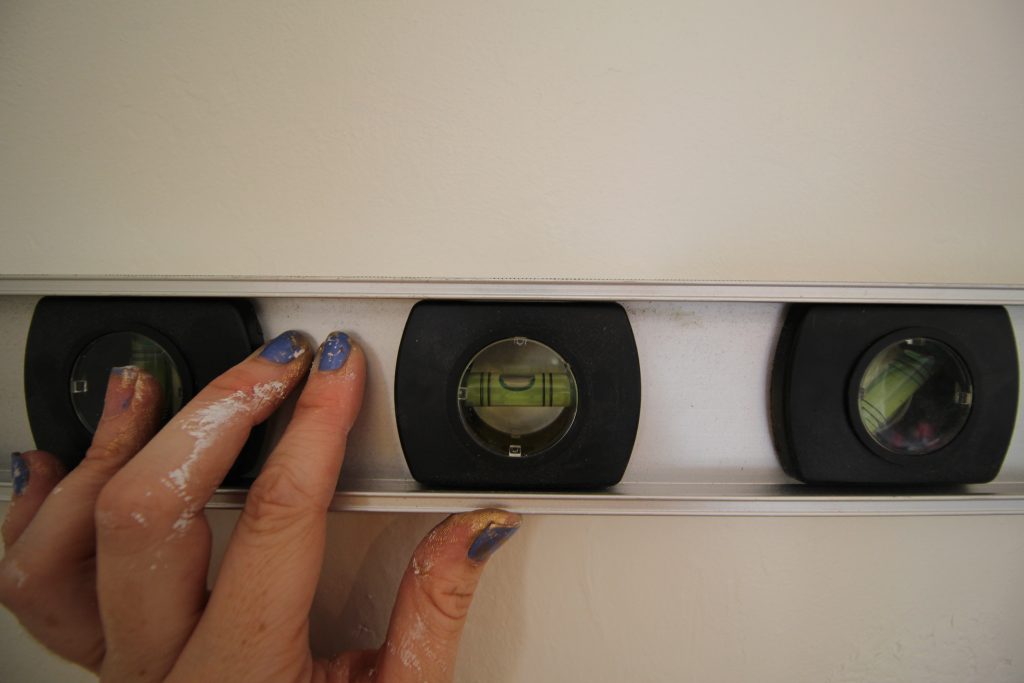
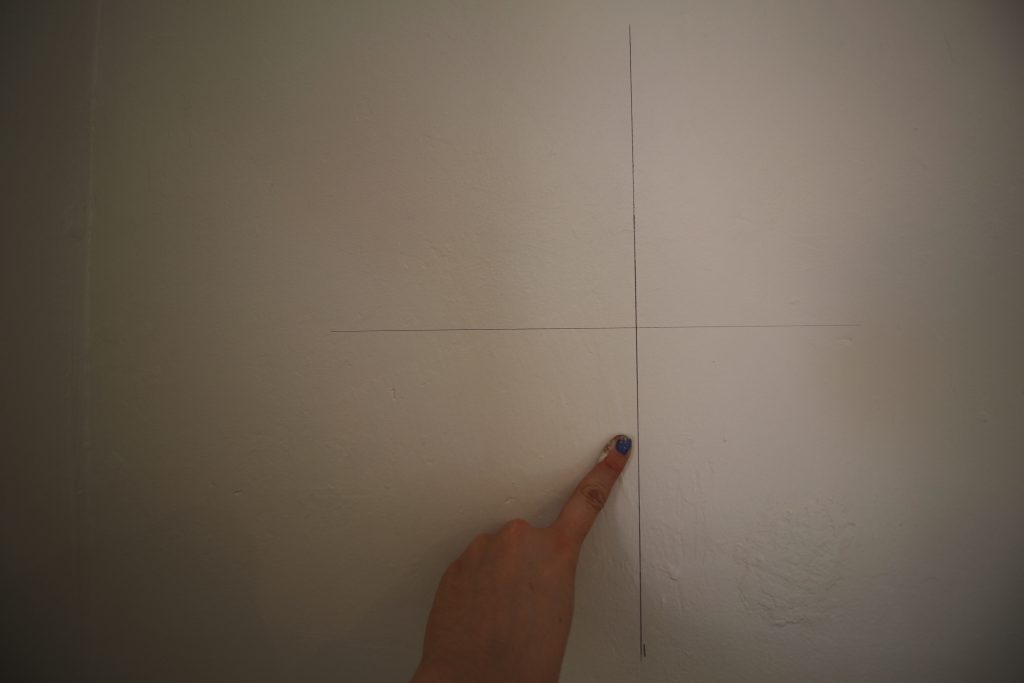
Don’t take it for granted that your walls are straight – you may be surprised to find that they’re not! To ensure that your wallpaper is hung straight, you’ll need to draw a line to follow rather than lining it up with the wall. There are a few different methods you can use for this. I used a spirit level as I had one to hand.
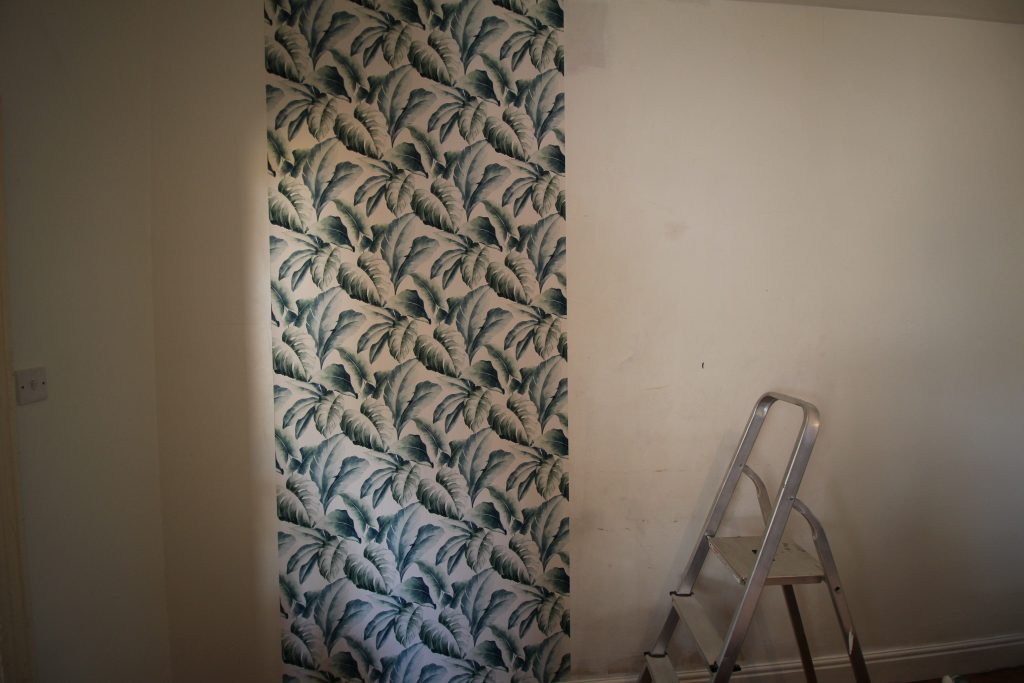
You need to decide where you’re going to place your first strip of wallpaper. I worked from left to right and put my first strip a short distance from the very far left of the wall. This means you’ll be working from left to right and then back to the very left again for the last strip. My wallpaper was 53cm wide, so I started about 40cm in from the very left edge. The reason you do it this way is so that you can fit the paper perfectly, even if your walls aren’t perfectly straight. Pick a measurement just a bit narrower than your roll of paper and start that amount away from the far left.
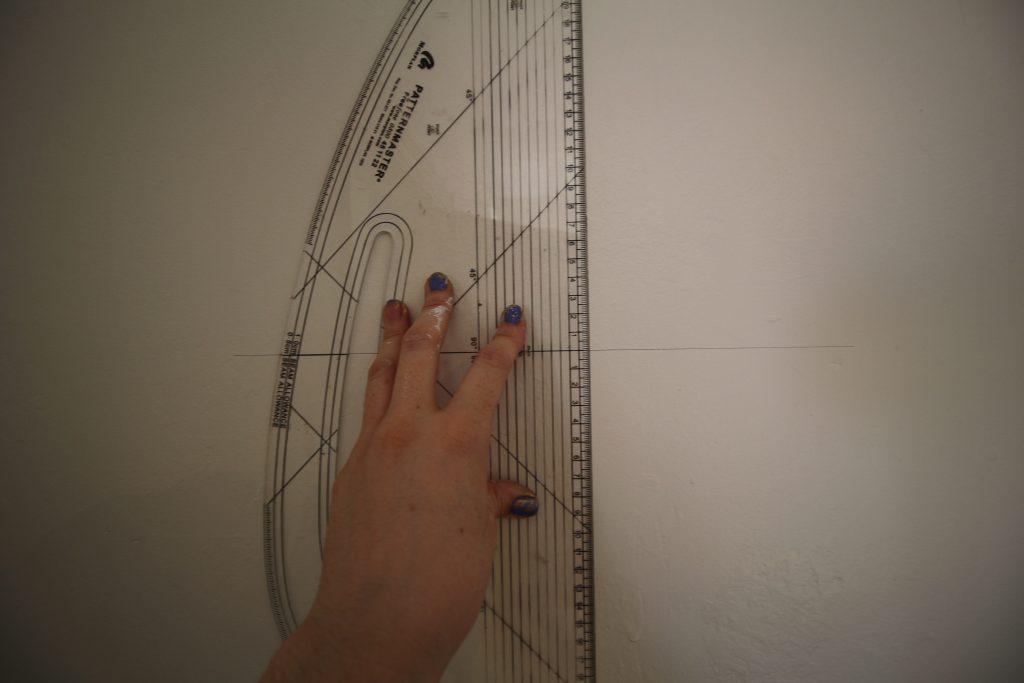
As I said, I started 40cm in from the left edge, so this is where I drew my line. I used my spirit level to draw a horizontal line and then used a set square to draw a vertical line perpendicular to this. You don’t need to do it this way – you can just use a spirit level to draw your vertical line. I just wanted to be extra sure that it was right because my walls are so wonky!
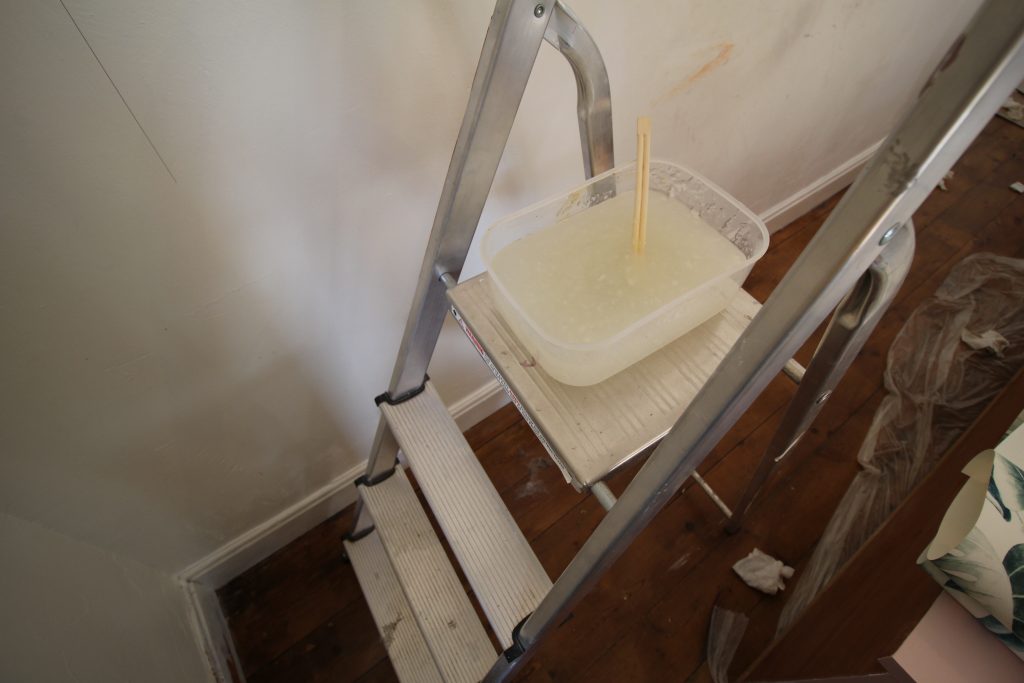
Mixing the paste
You can buy paste ready-mixed or mix your own. I mixed my own and it’s as easy as adding it to water and giving it a mix. I used a Homebase own brand paste that cost less than £2, which I had left over from wallpapering the back of the cabinet I upcycled recently.
I filled a tub with water and sprinkled the wallpaper paste flakes on top. After a quick stir and leaving it for a few minutes you’re ready to get on with your wallpapering!
Hanging the first strip
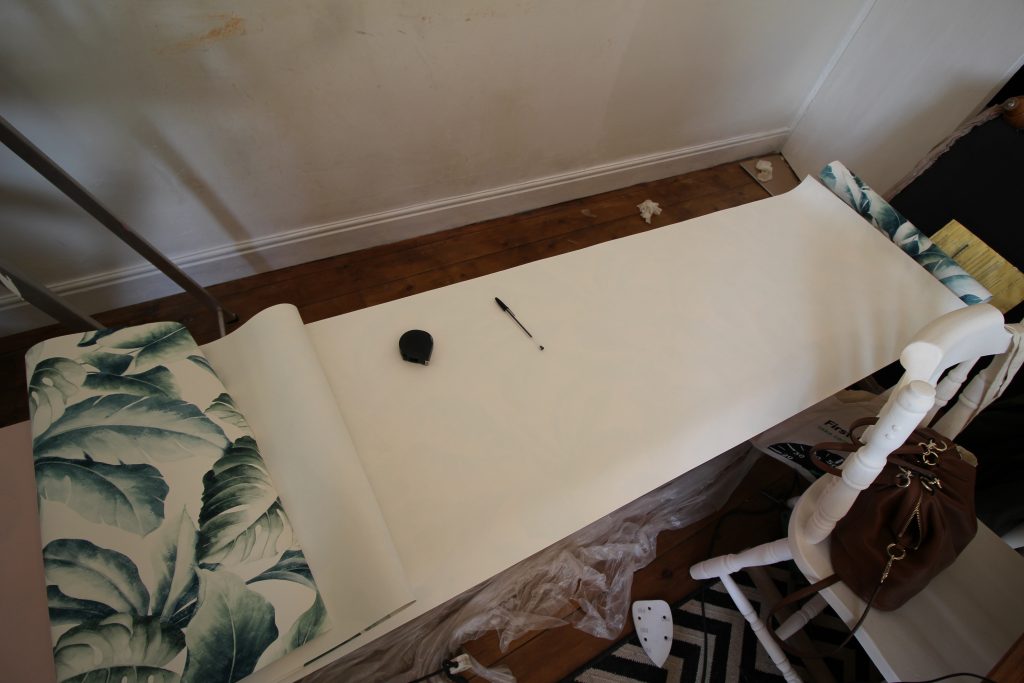
You need to measure your wall and then cut your first strip of wallpaper slightly longer than the wall is. My entire wall including skirting board was 107 inches, so that’s how long I cut each strip.
Leave the wallpaper strip aside whilst you prepare the wall.
I made a mark 53cm (the width of my wallpaper) to the right of the vertical line I’d drawn so I knew how far I needed to paste.
Use a brush to put an even layer of wallpaper paste on the first section of wall. I bought my brush from the pound shop and it was perfect.
Get the wallpaper strip you’ve already but and line the left side of it up with the vertical line you’ve drawn on the wall. Leave the paper a little too long on the top and the bottom. You’re using paste, not glue, so don’t worry too much, it’s easy to reposition the paper if you need to.
If you leave too much excess paper at the top, it will start to roll back down the wall. So although you want the paper to be slightly longer than the wall, try not to go overboard.
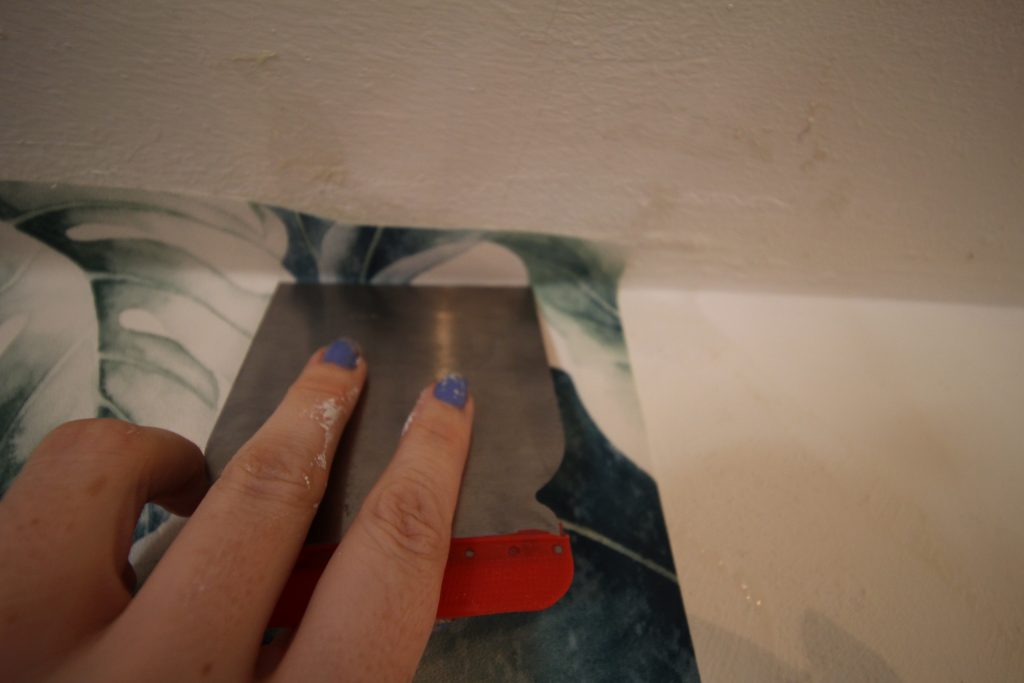
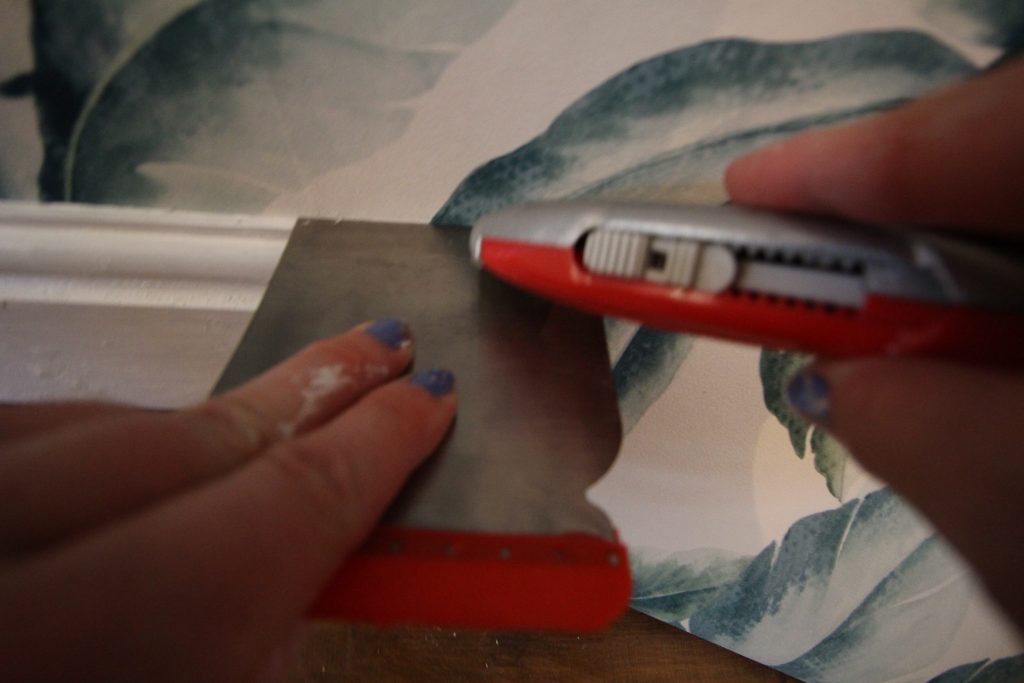
Use something smooth and flat to smoothen out the paper. I used a little metal tool that may or may not have been made for that purpose, but it did the trick. You want to smoothen out the paper towards the edges. When you’re happy that the paper is correctly in place, use the tool to push it into the edges where the wall meets the ceiling and the skirting board and use your knife to trim the paper to size.
Hanging the next stripTake note of what part of the pattern is at the top right of the wallpaper you’ve just hung. You want to find the part that joins it on the next part of your roll. Find the correct part and cut your paper just above it. Anything you’ve just cut off is wastage. Again, measure your paper just longer than the height of your wall. Then you just need to repeat the process, but this time instead of lining your paper up with a line you’ve drawn, you’re lining it up with the right hand side of the last sheet you hung.
Again, once you’ve cut your paper to size, you need to brush wallpaper paste all over the next section of wall you’re going to be covering. Climb your step ladder and hang the next sheet from the top, matching it to the pattern on the last sheet and smoothening it as you go. Again, don’t worry – at this stage the wallpaper is easily repositionable so don’t panic if the pattern doesn’t quite match straight away.
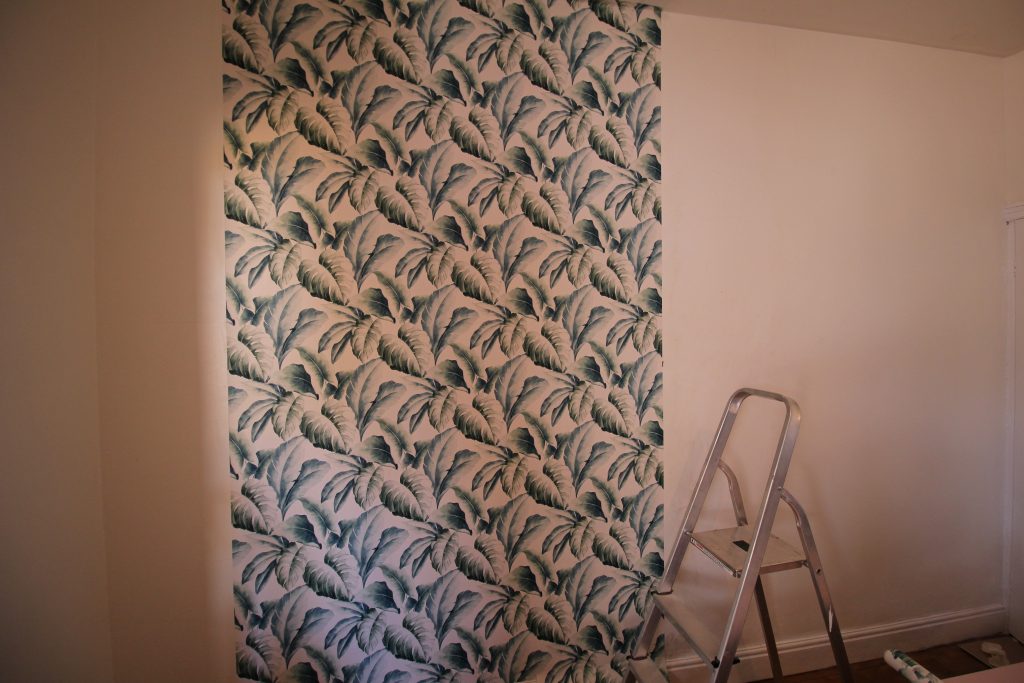
Now you just need to repeat the process to hang your third strip, remembering again to make sure that the pattern lines up before you cut the paper.
You’ll soon find that you’ll get into a pattern of:
- cutting your paper
- pasting the wall
- hanging the paper and matching the pattern
- smoothening it out on the wall
- trimming it at the top and bottom
And soon all you’ll be left with are the last two strips to hang: one on the very right of the wall and one on the very left. By this stage you’ll be quietly confident in your abilities and will have realised that wallpapering is easier than it looks. You’ll be used to trimming the tops and the bottoms of each strip of wallpaper that you hang.
Finishing up
The last strips are pretty much the same as all the other ones you’ve already hung. The only difference is that instead of trimming them at the top and bottom, you’ll also have to trim these two on one side. For my last strip on the very right of the wall, the space was quite thin, so after I cut my sheet of wallpaper, I then cut it up the middle to narrow it. You don’t need to do this, but I found that it was easier for me to work with it.
Hang the strip of wallpaper as normal, match the pattern and smoothen it out. Then take your smoothening tool and knife and trim the paper where the wall meets the ceiling, where it meets the next wall over and where it meets the skirting board.
Before you know it, you’ll have wallpapered the entire wall. I had never wallpapered before this and I completed the whole wall in under two hours.
The last thing you need to do is clean up. Simply dampen a clean cloth and run it over the wall to wipe up any stray wallpaper paste that may be on the paper. Don’t forget to do the same for the ceiling and the skirting boards!
Difficulty: 2/10
Time taken: 2 hours
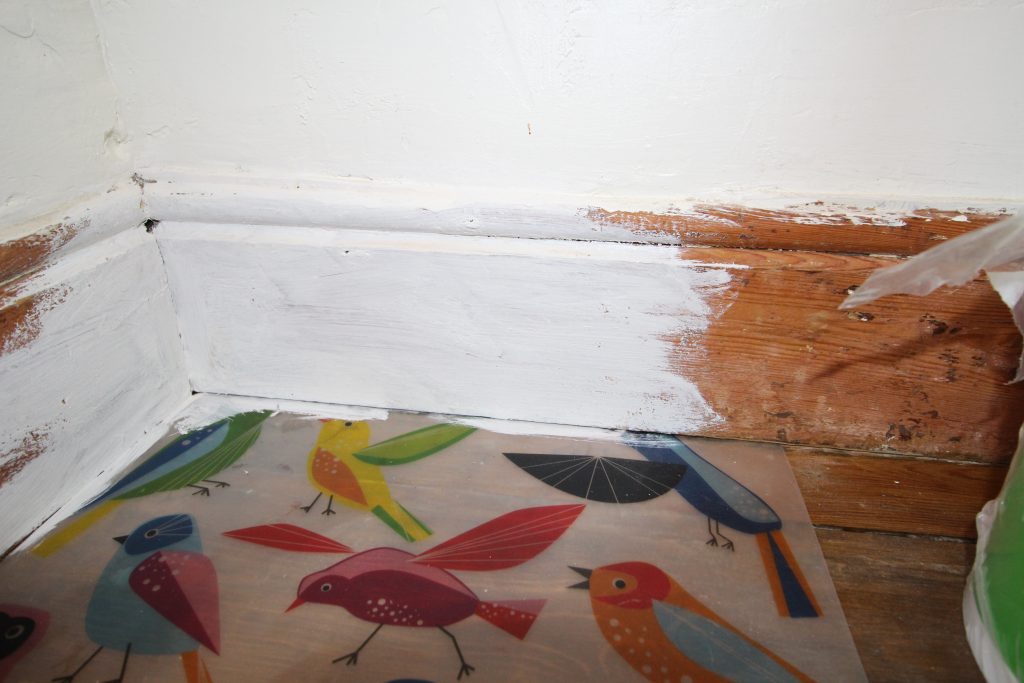
Top tips: Make sure you’ve painted any woodwork (skirting boards, etc) before you start wallpapering. You can afford to be a little messier than usual when you paint skirting boards before wallpapering because the wallpaper will cover the wall so it doesn’t matter if you go up the wall a little with the paint. If you paint skirting boards after wallpapering, you need to be a lot more careful because you don’t want to get paint on your wallpaper.
I painted my skirting boards in no time before wallpapering because I didn’t need to use masking tape on the wall and I used an old thin plastic placemat to protect the floor where it met the skirting board. I simply put the mat down, painted that section of skirting board, moved it along and painted that section, and so on.
For anybody who’s interested, my wallpaper was from B&Q‘s new range and is £16 a roll.
Remember: To match your batch numbers!
[…] it all one colour and to wallpaper the wall behind it to make a feature of the room. See my post here on how I wallpapered the wall. It only took 2 hours and it looks amazing, if I do say so […]
[…] may have seen that I recently did a post on creating a feature wall with paste-the-wall wallpaper. Well this time I’m going to show you how you can do the same but with the other type of […]