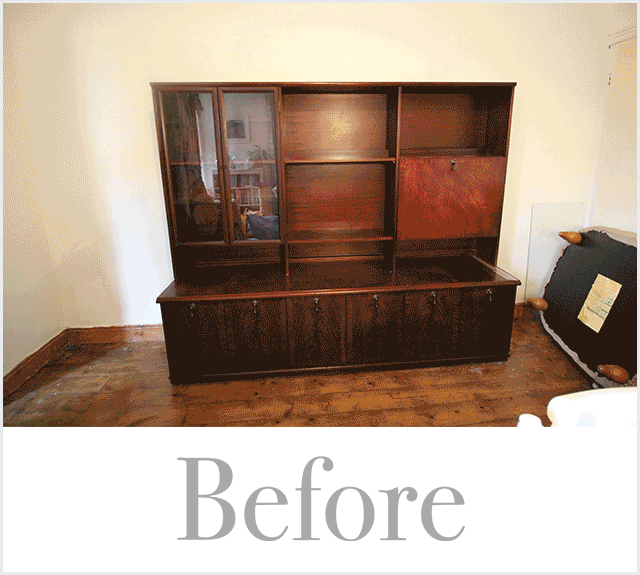
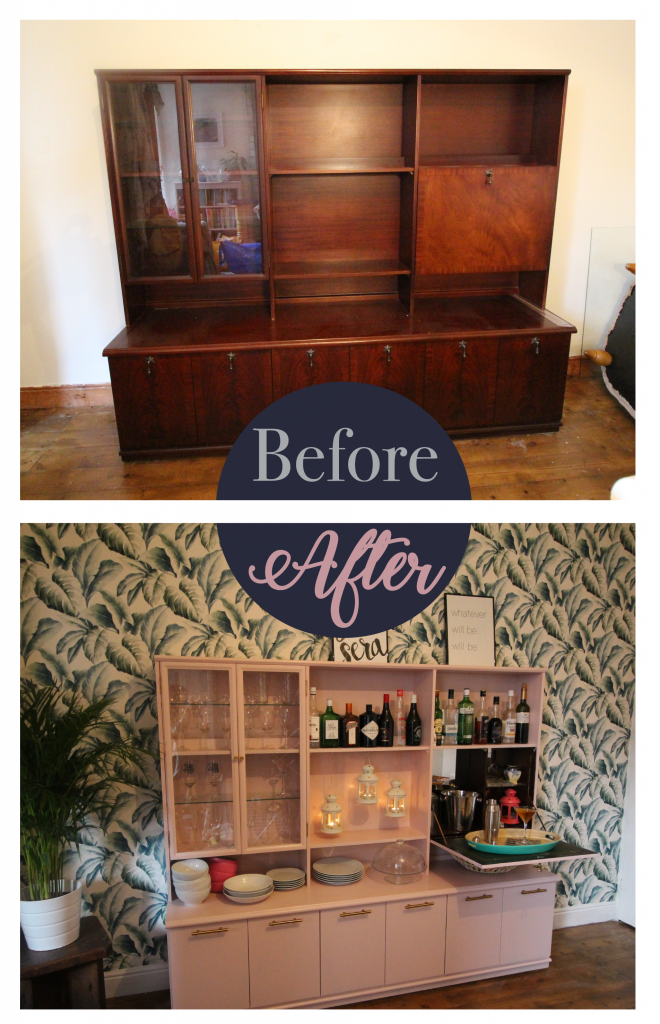
If you’ve read my blog before, you may recall the dresser that I upcycled for my dining room. Although I liked it, it didn’t seem quite right for my dining room for a number of reasons. Firstly, it looked quite small against such a big wall. Secondly, it was painted quite a bright colour, which meant I couldn’t really paint the wall behind it. It also had wallpaper pasted in the back of it, which meant I couldn’t wallpaper the wall behind it. Thirdly, it was quite detailed and I decided I’d prefer something with cleaner lines.
I decided to take the plunge and sell it on eBay and buy a replacement. I did think I must be mad – I have so much to do in the house and I spent a weekend upcycling that cabinet, just to sell it and start again. But I’m so glad I did!
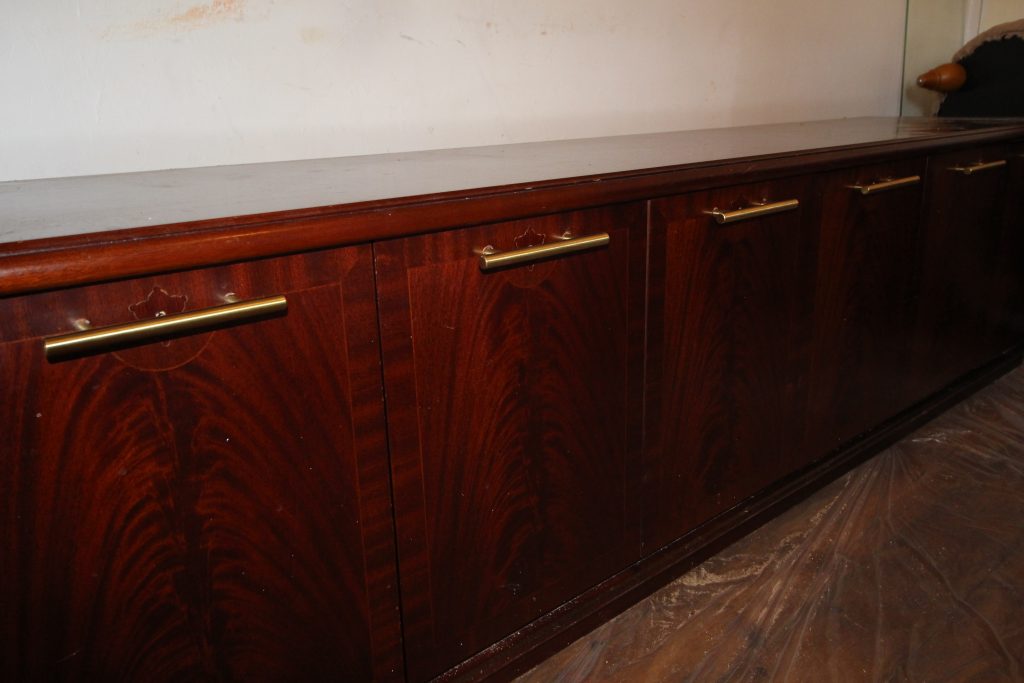
The replacement cabinet that I bought ticked all the boxes: it was much larger than the old one and had much cleaner, straight lines. Even better, it only cost £10! Winner.

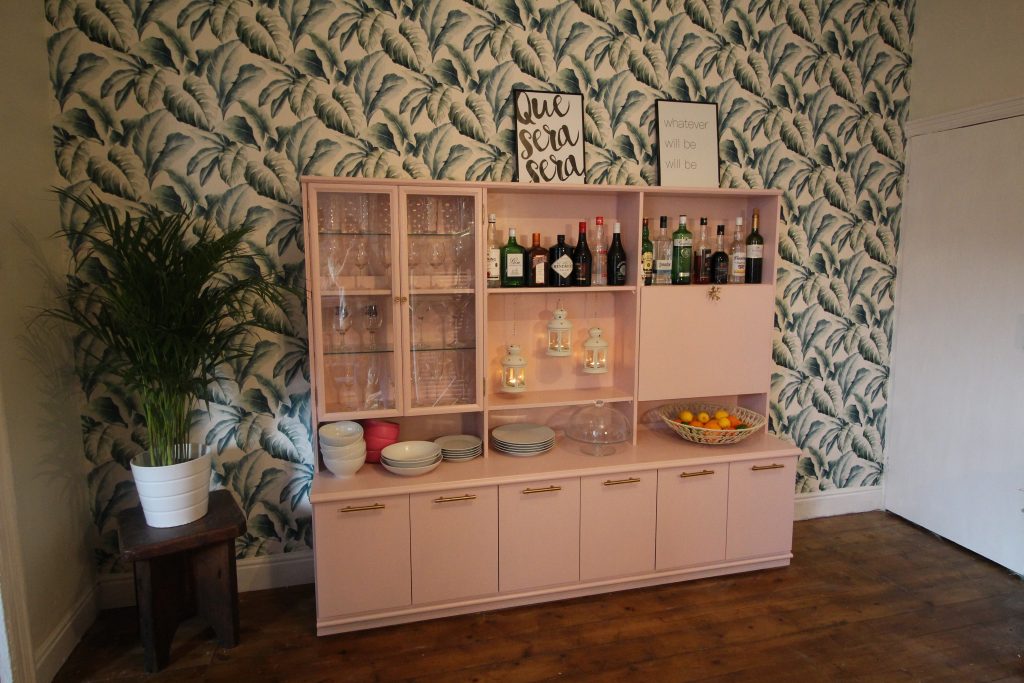
I was careful not to fall into the same trap I did with the last cabinet and decided to keep it all one colour and to wallpaper the wall behind it to make a feature of the room. See my post here on how I wallpapered the wall. It only took 2 hours and it looks amazing, if I do say so myself!
I had already painted my dining room bookshelf pink and decided to paint the cabinet the same colour. For contrast, I wallpapered the wall behind it with a large green leafy print.
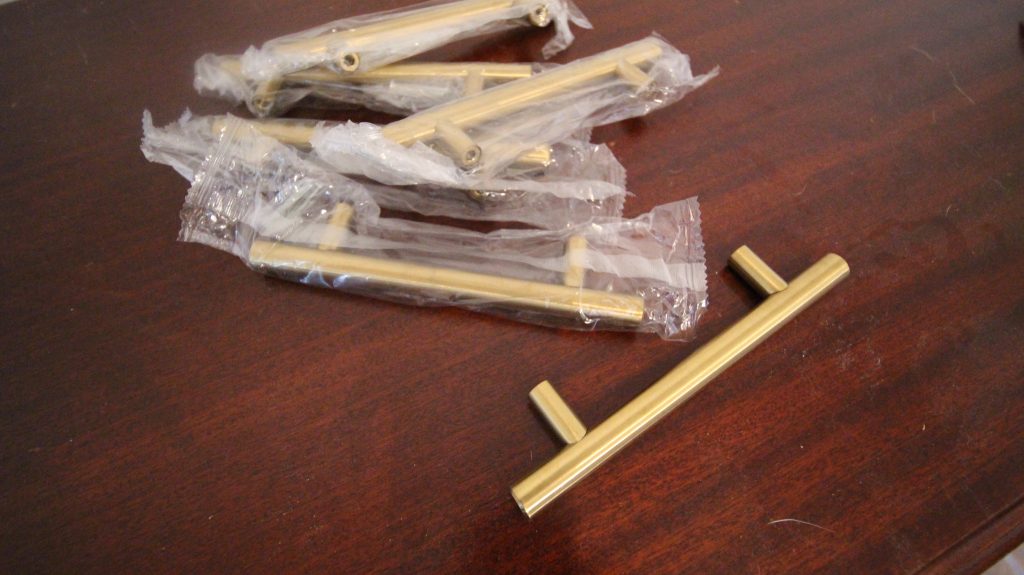
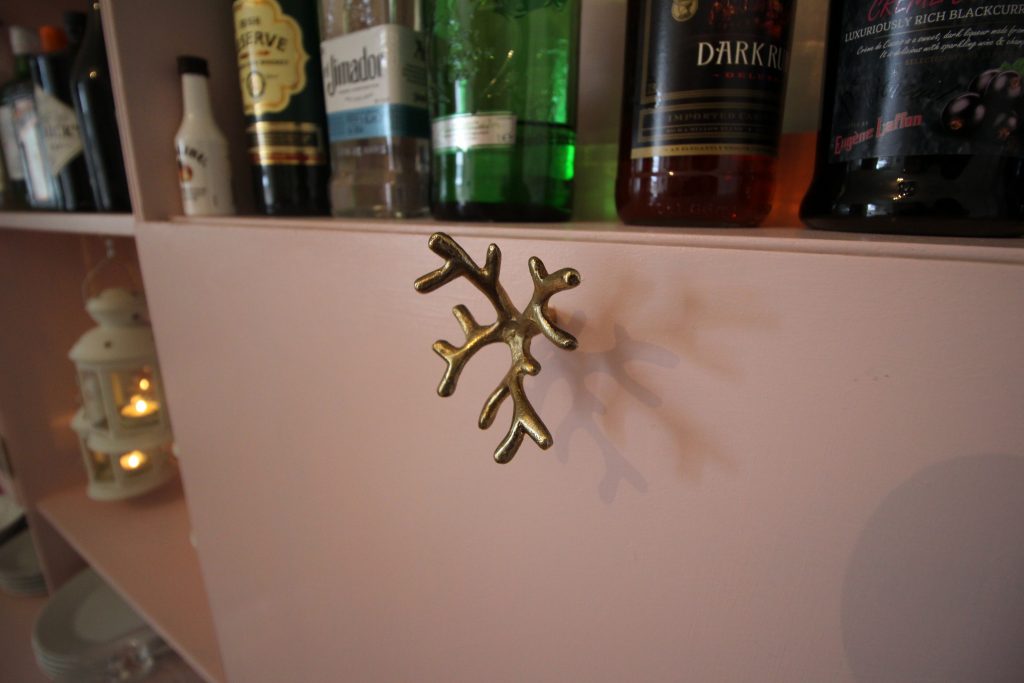
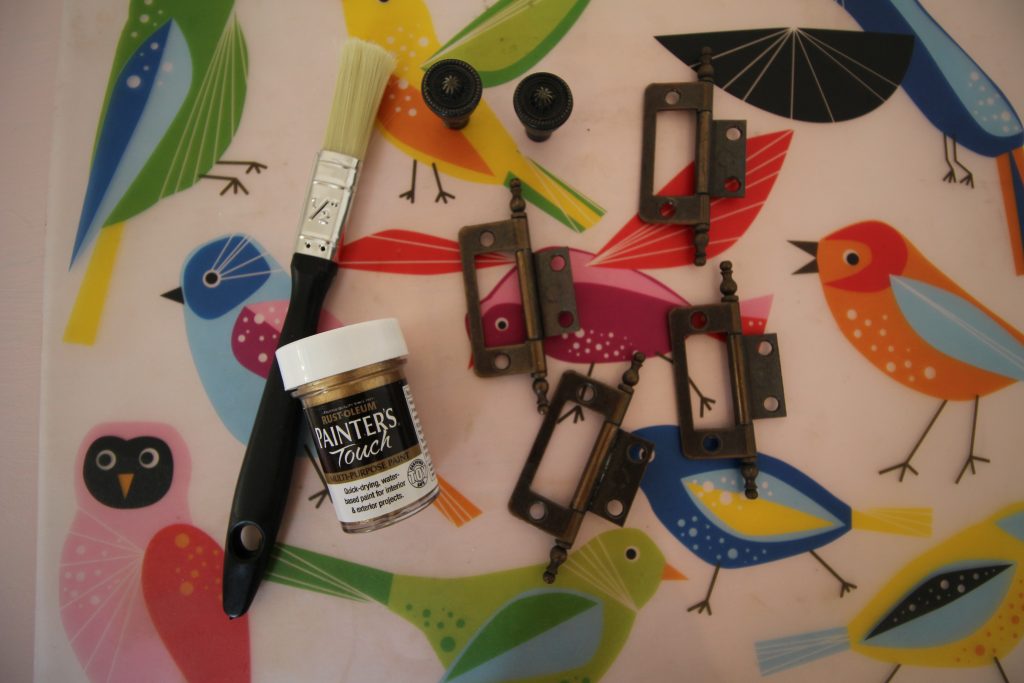
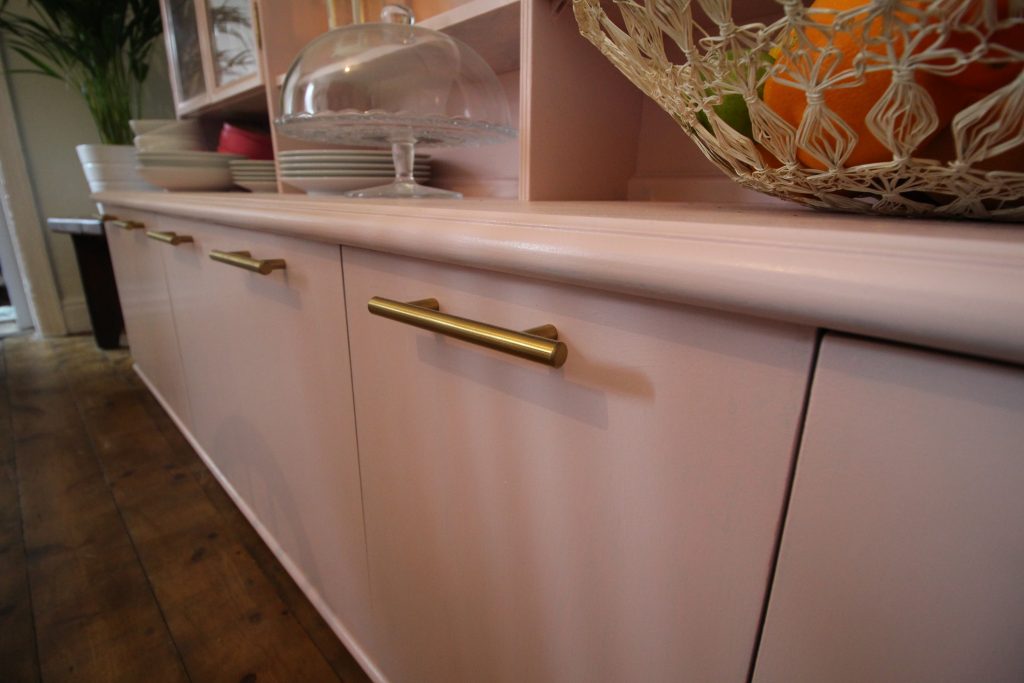
The handles on the cabinet were a bit naff and not quite the look I was going for so I switched them up. I bought 6 gold bar handles for the bottom doors and a gold coral knob for the pull down door. I could have spent a lot more on all the knobs and handles but I bought them from an eBay shop.
If you’re not familiar with eBay, it’s not all about bidding – lots of people have eBay shops that you can buy from for a set price right away. I bought my long gold handles from China, paying £10 for 6. The coral was slightly more expensive at £5 for one, but I wanted a statement handle for the drop down door and it was still cheaper than you’d pay elsewhere.
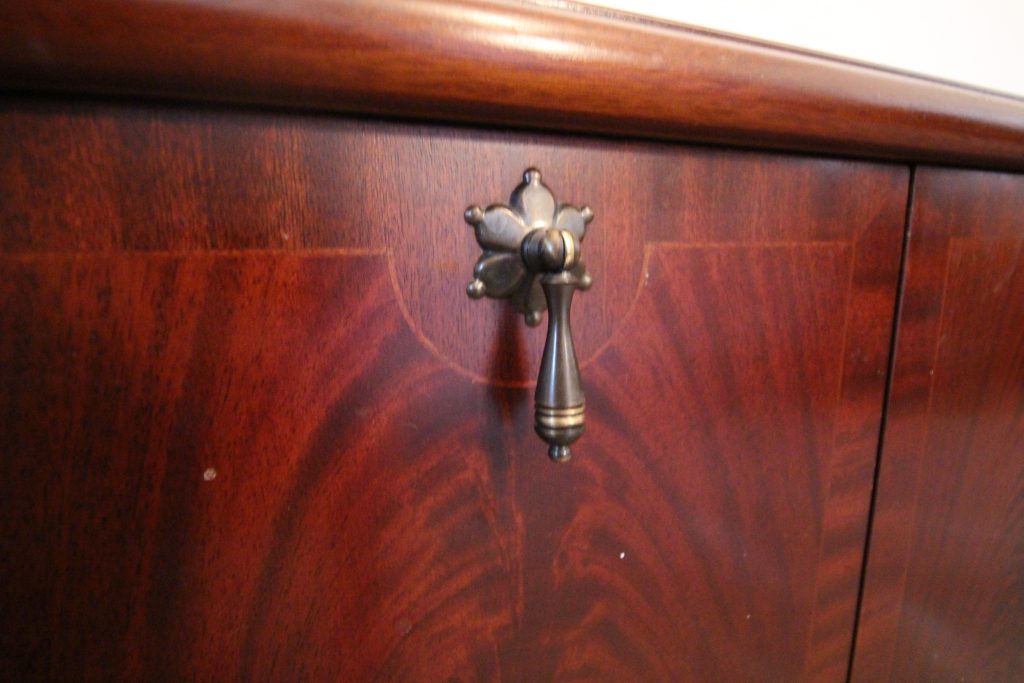
I wanted to keep the other knobs and the hinges on the glass doors but paint them gold to match the rest of the handles I’d bought.
Fit the handles
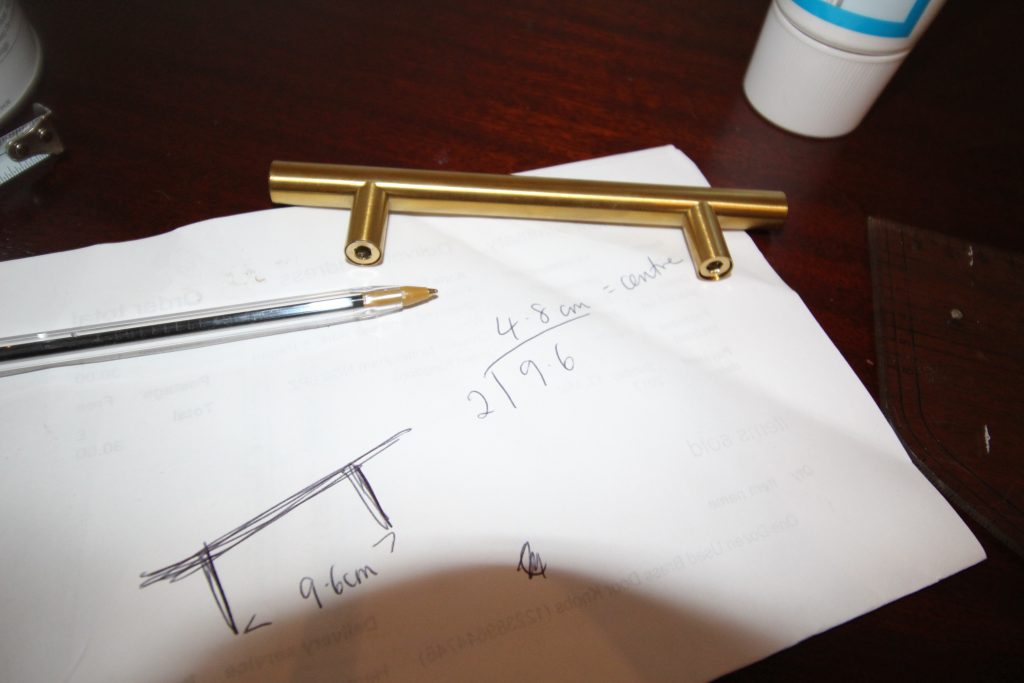
To start, I took all the existing handles off the cabinet. I then needed to drill the holes for my new bar handles. The distance between both holes of the new handles was 96mm and the original handles were right in the middle of the doors so I measured and marked 48mm to the left and 48mm to the right of the hole for the original handles.
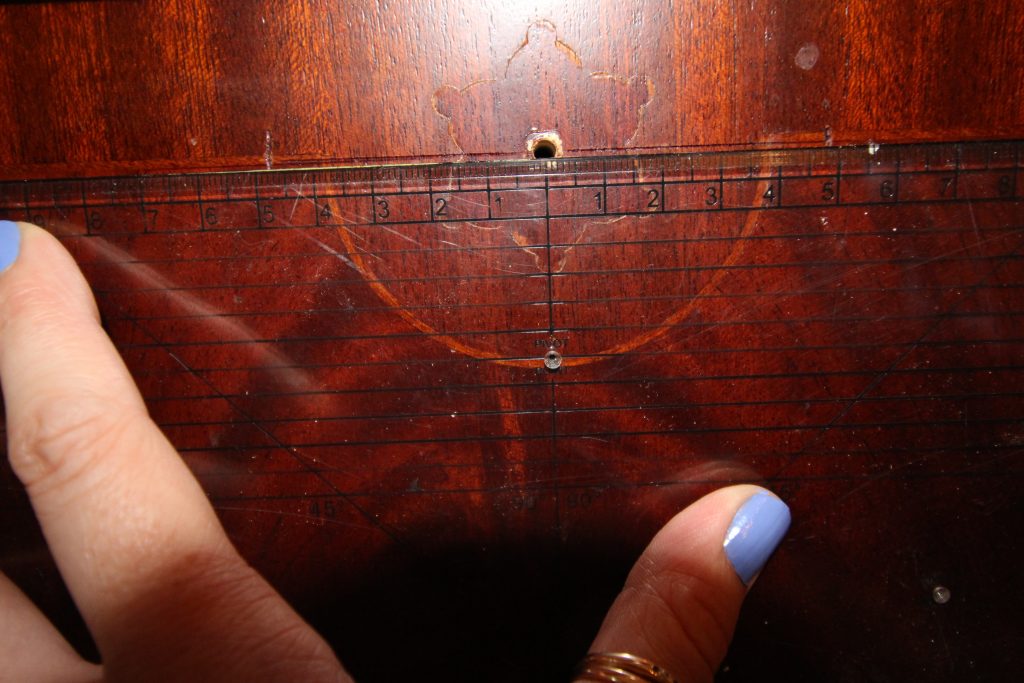
I checked that the marks were in the right place and then drilled the holes for the new handles. Top tip here is to mark the place you want to drill with an X. This holds the drill in place and makes it less likely that it will slip.
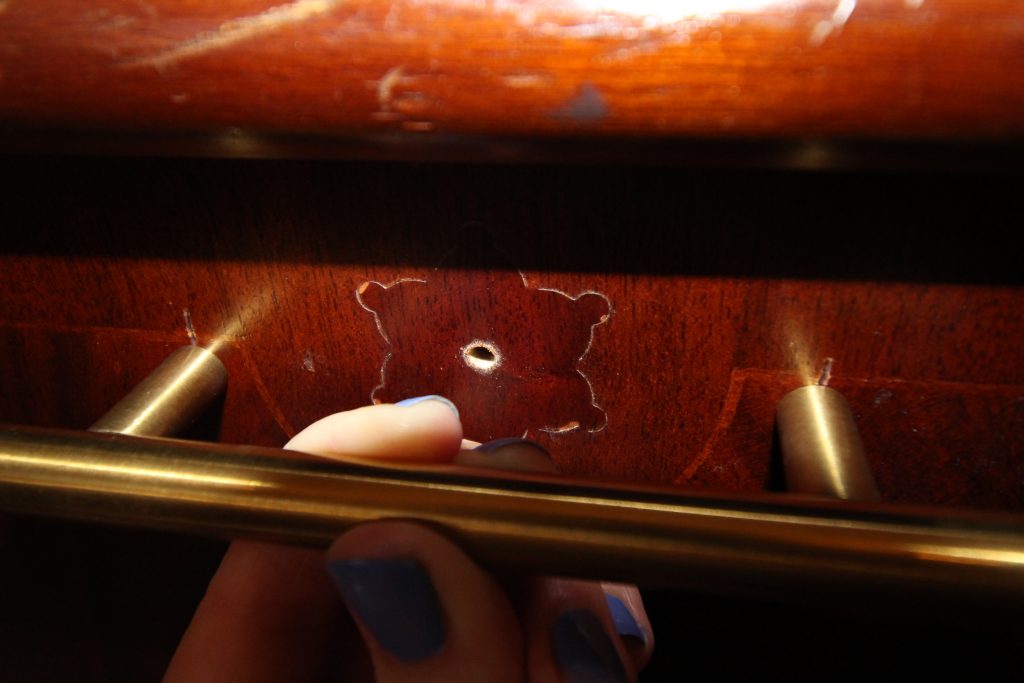
Once I’d drilled the holes, I fitted all the handles to make sure they fit. You don’t want to do this for the first time after finishing the entire cabinet only to find that you should have drilled a couple of millimetres more to the left! Remove the handles again once you’re happy that they fit.
Fill in any holes
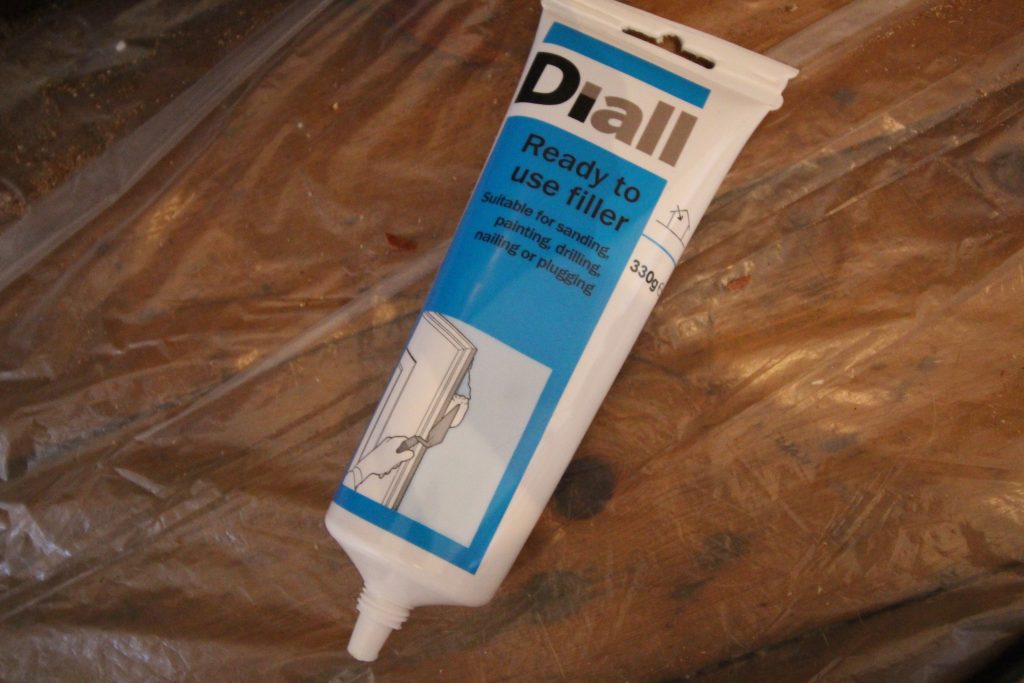
As I’d drilled holes to fit my new handles, I needed to fill in the holes from where the original handles were attached. I used a pretty basic filler for this: Diall Ready to Use Filler, which cost £2 from B&Q.
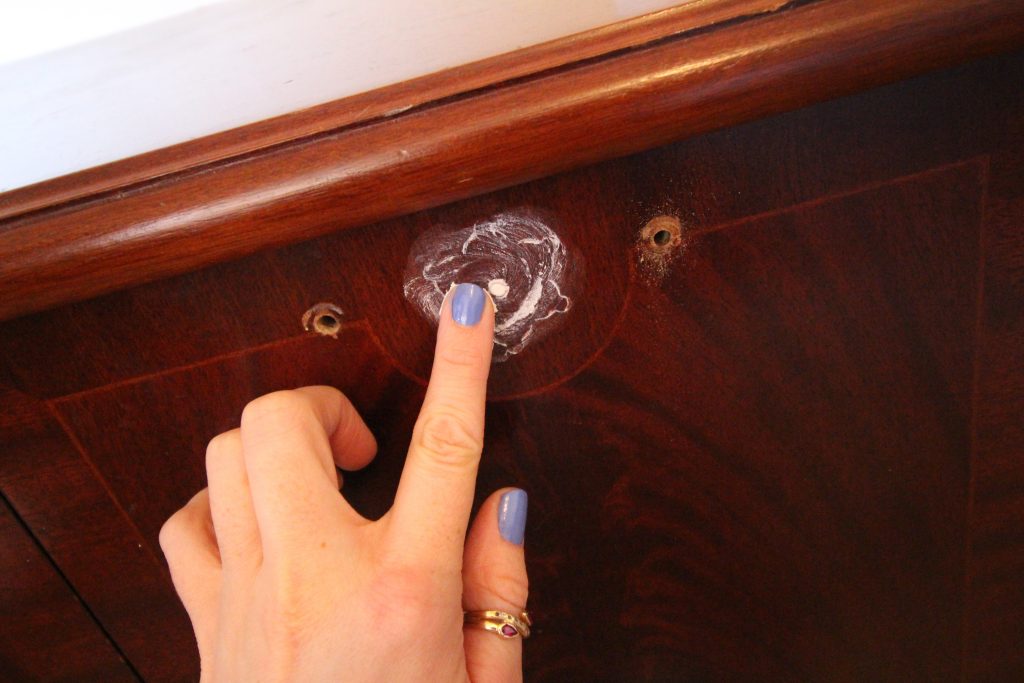
You want to make sure that you’re filling in anywhere that there’s damage to the wood. The original handles from my cabinet had left a slight indent in the wood so I used my finger to rub some filler into all of these parts.
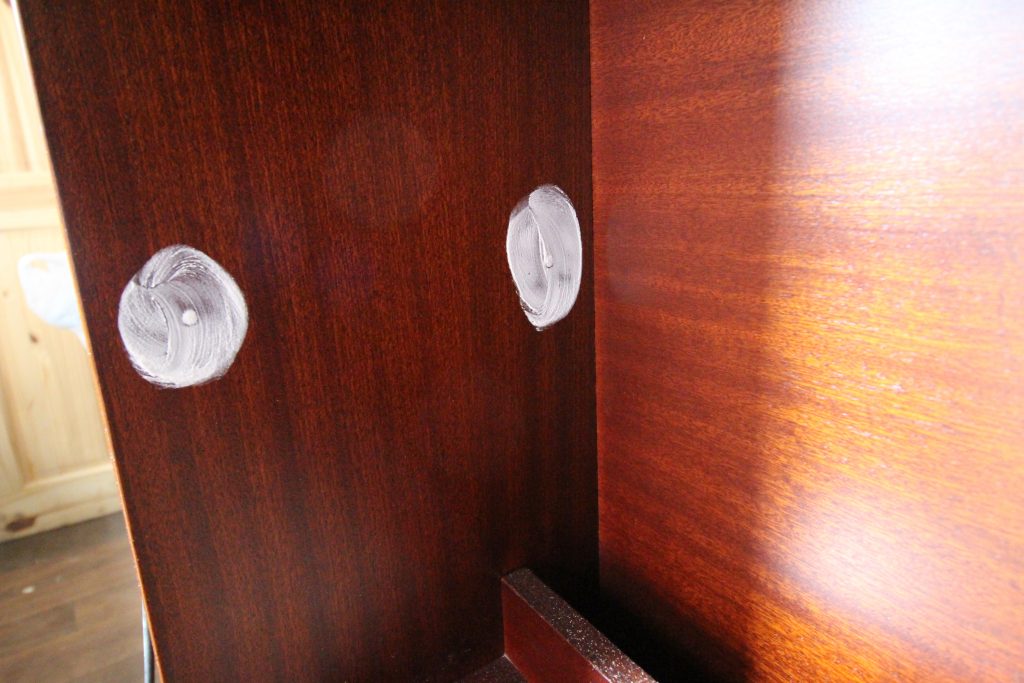
Have a look and see if there are any other parts you need to fill. In the top part of the cabinet I found some holes from where there must have been extra shelves at one point, so I filled those in too.
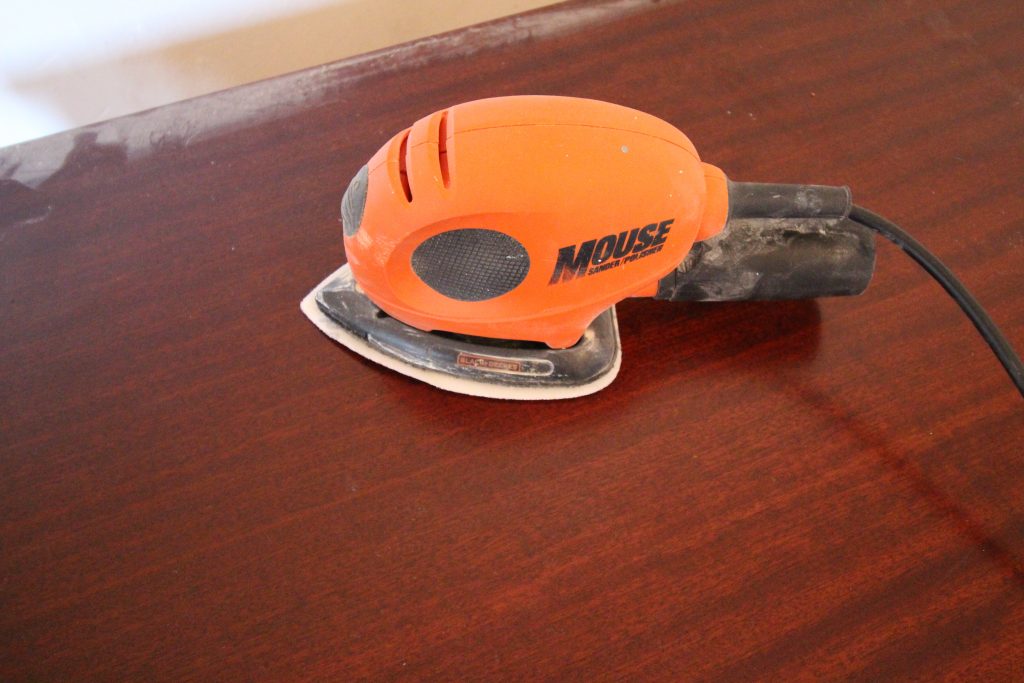
Sanding
Once your filler has dried, it’s time to sand the whole cabinet. Yes it’s boring, but yes it’s necessary. Without sanding, the slightest knock will make your lovely paint job chip away.
As always, I used my Black & Decker mouse, which makes easy work of sanding so you can get on with more fun parts sooner.
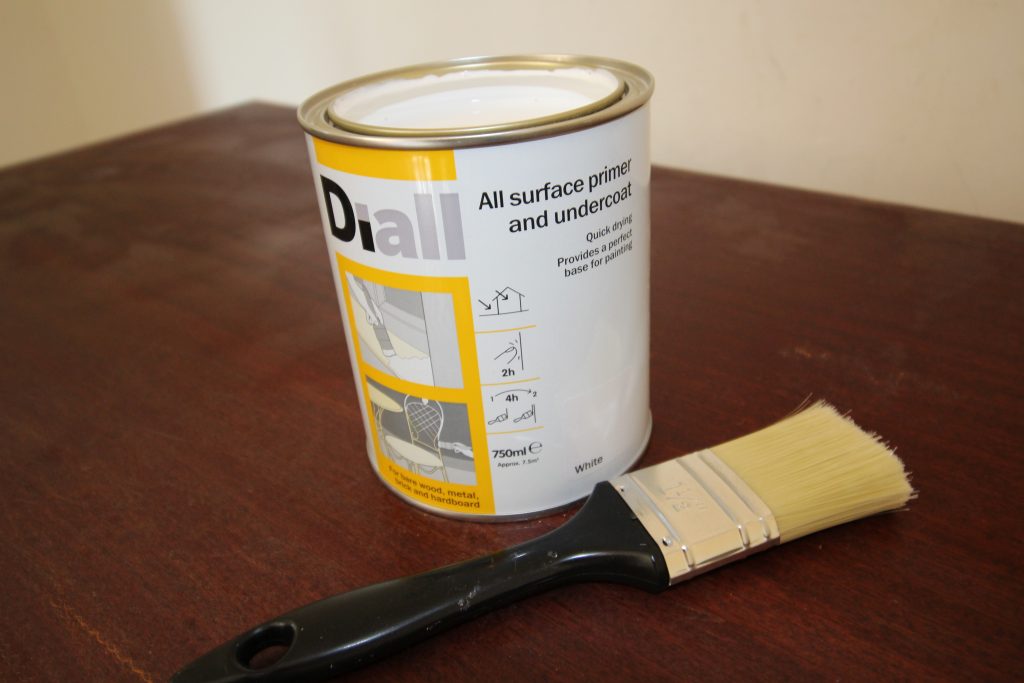
Primer
As I already had the paint I was going to use and I didn’t want to buy any more, I decided to use primer for the first two coats. Otherwise I would have had to buy another tin of paint for £20 and a £12 tin of primer was much cheaper. I bought Diall All Surface Primer and Undercoat and two full coats on the cabinet used half a tin.
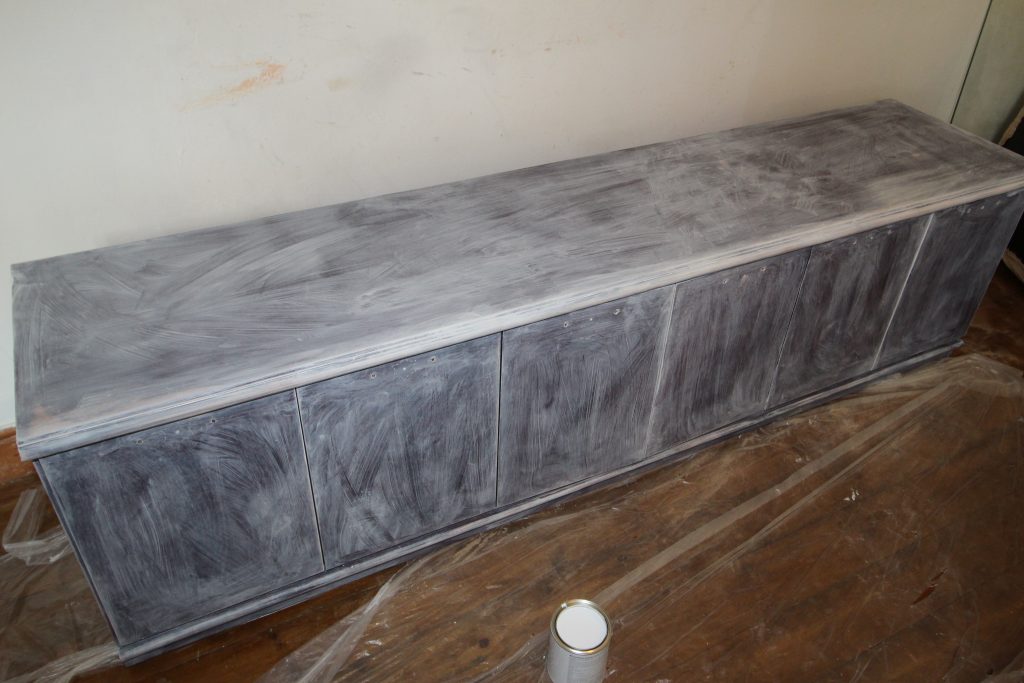
Painting
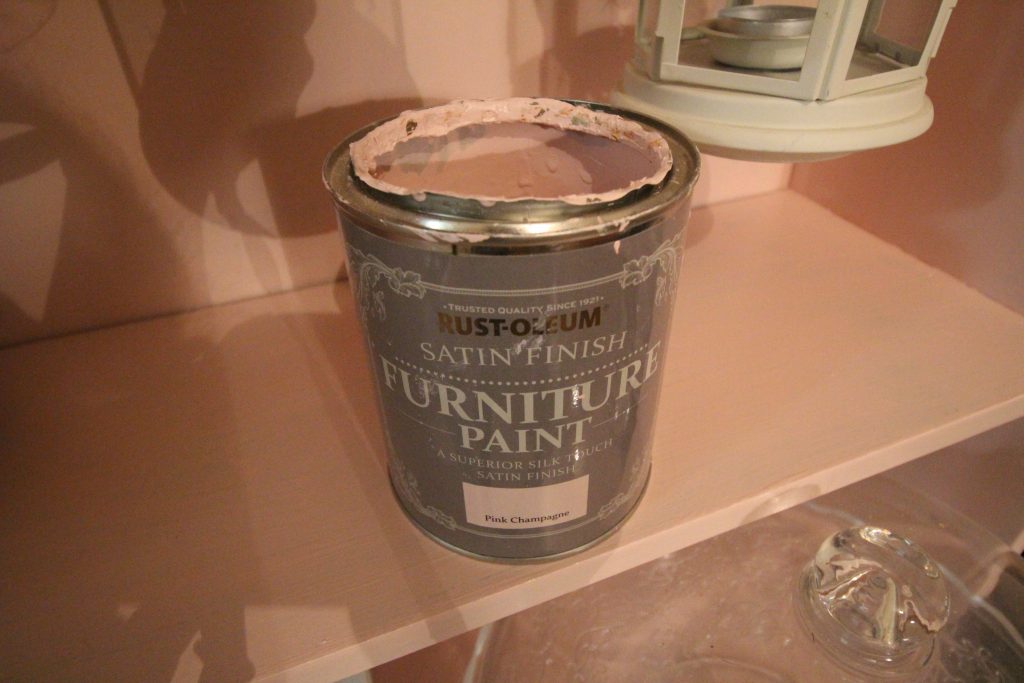
After doing two coats of primer, it was time to start painting finally. I used Rustoleum Satin Finish furniture paint in Pink Champagne. You’ll have seen that I’ve used this paint quite a few times in different colours: in white for my dressing table, in shortbread for Ted’s fireplace dog bed and in teal for the cabinet that this pink one is replacing. It’s really lovely paint that gives a great finish without the need for buying separate waxes or varnishes for the top. It’s normally £20 for a tin but I bought all of mine when B&Q had an offer on with two for £24, so it’s worth keeping an eye out.
I used a synthetic brush to paint the cabinet. Some people prefer to use a foam roller so you don’t get any lines, but I like to use a brush to paint in the direction of the wood grain to give a little more character. It’s all down to personal choice.
I did two coats of the pink paint and coupled with the earlier two coats of primer it gave a really nice finish. In the past I’ve just done four coats of Rustoleum Furniture Paint, with no primer, but I’d definitely use primer in the future as it works out cheaper overall and leaves you with more paint to use. Plus the finish looks the exact same either way.
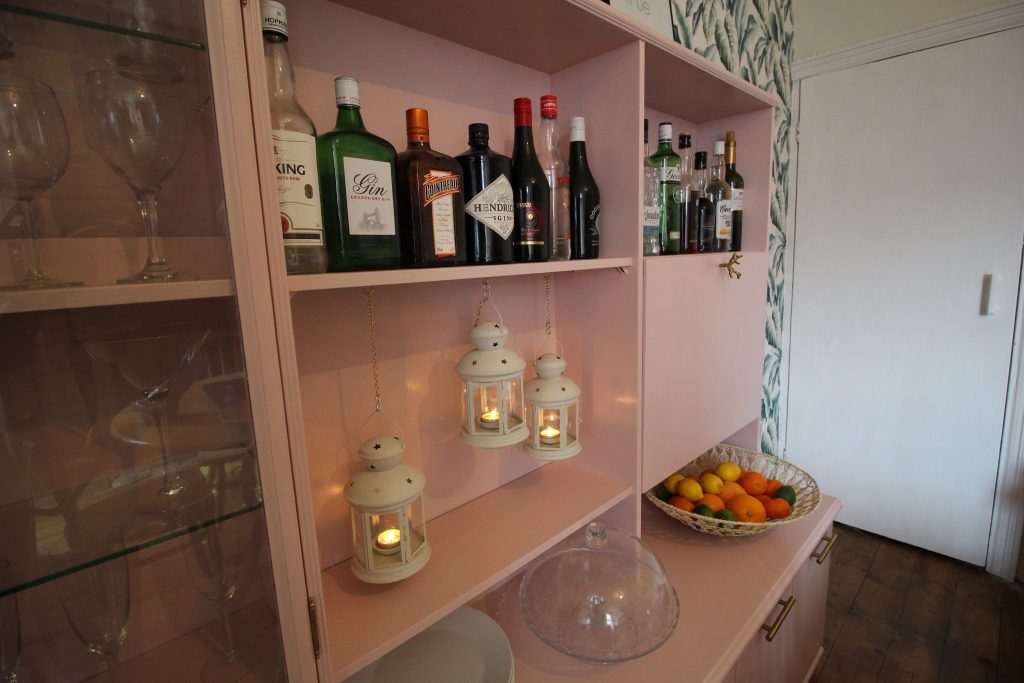
I’ve already showed you the new handles that I bought for the cabinet, but on the glass doored part of the cabinet, there were 4 brassy looking exposed hinges and two small brassy knobs. I decided to keep these but paint them gold to match the other new handles that I’d bought. I used another Rustoleum product: Painters Touch. I bought a tiny little pot of gold paint for £2 from B&Q and it only took the tiniest amount to paint the hinges and knobs gold.
Finishing touches to the bar
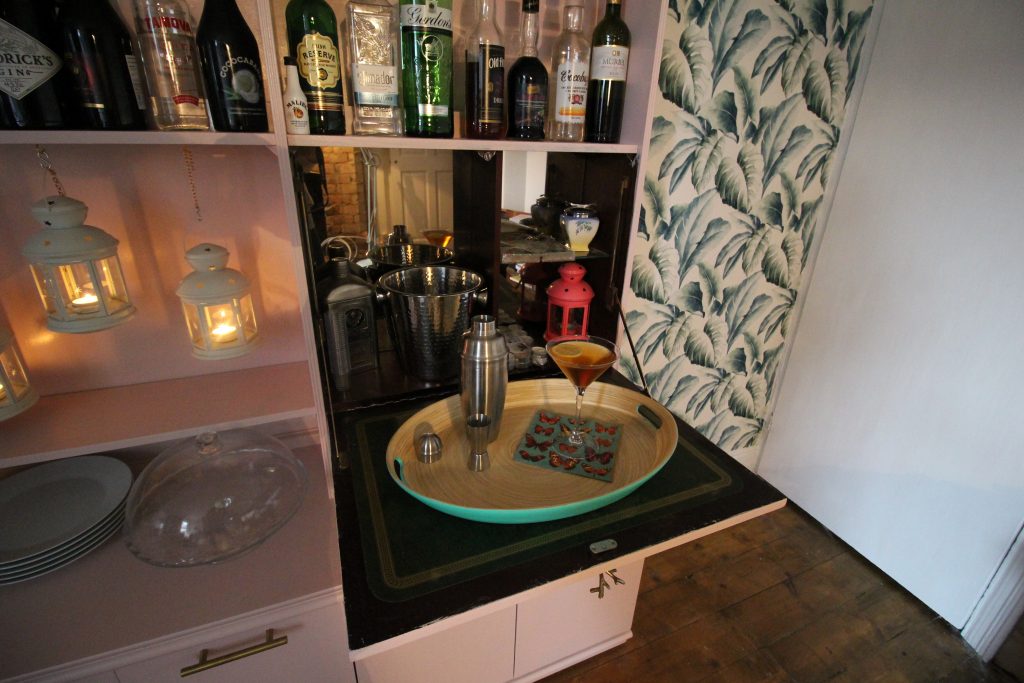
Once all the paint had dried, it was time to put the cabinet back together! I lifted the top back onto the base (with a little help from my lovely boyfriend) and set about reattaching the glass doors with their (like) new gold hinges and attached all the new knobs and handles to the doors.
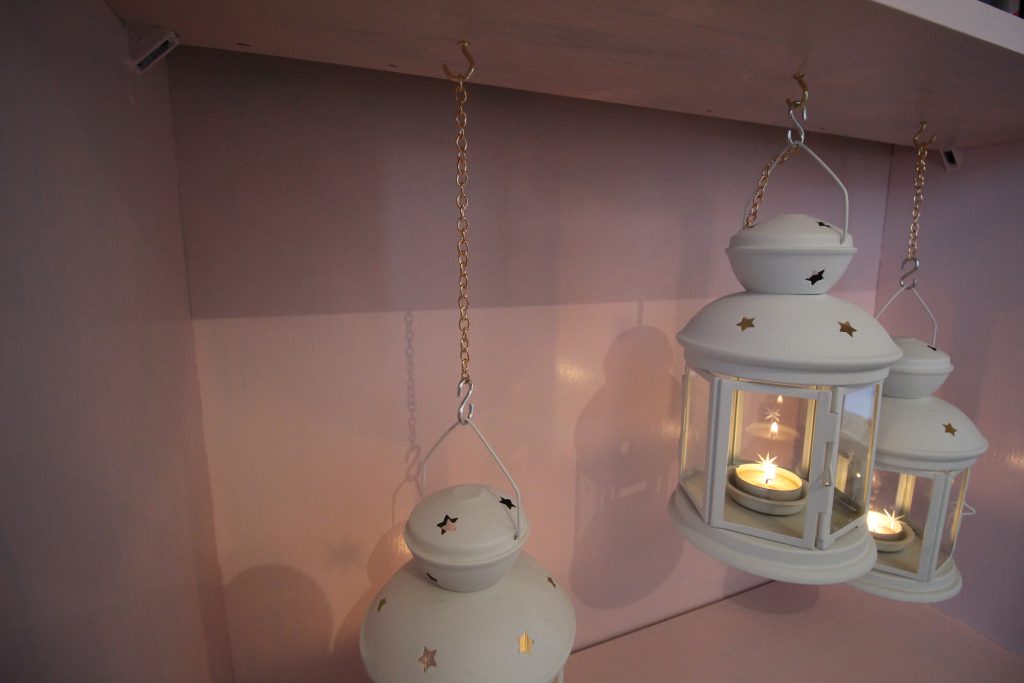
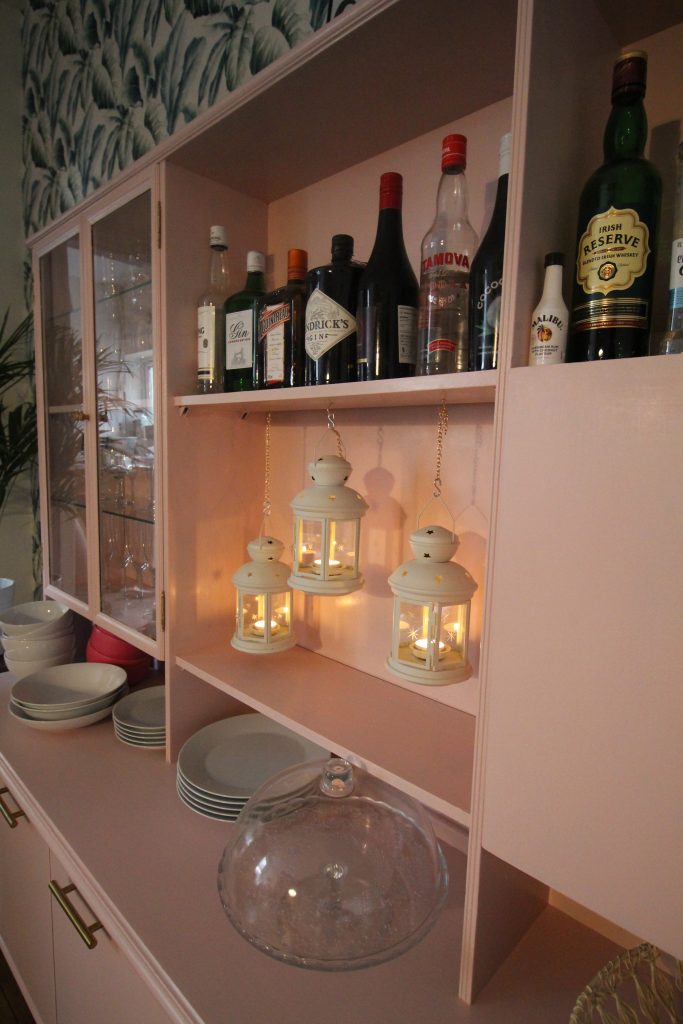
To add a bit of character to the bar, I suspended three lanterns at various heights in one of the sections. I screwed three little hooks into the underside of one of the shelves and used S hooks and chains to suspend the lanterns. I got the lanterns from Ikea. They’re normally £2 each but I got them on offer when you could get them for £1 each if you had an Ikea Family card.
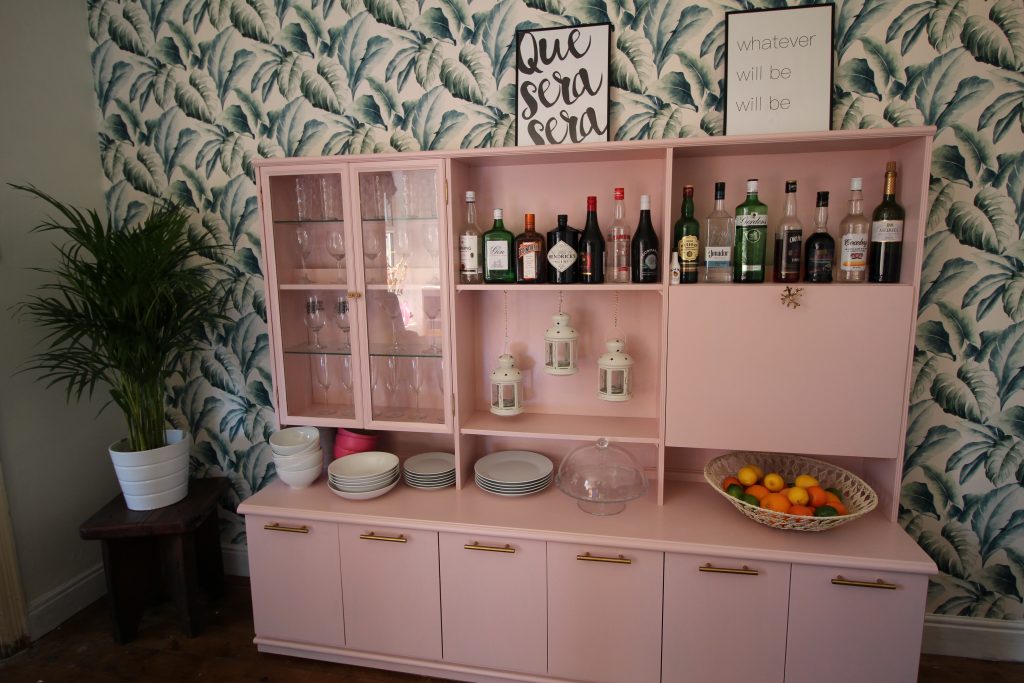
I’m absolutely in love with Doris Day (she’s pretty much the best person ever) so I created some “Que sera sera” “whatever will be will be” artwork and put them in frames a few months ago but wasn’t quite sure where they should go. Once the home bar was finished, I decided that they’d look perfect perched on top as a finishing touch.
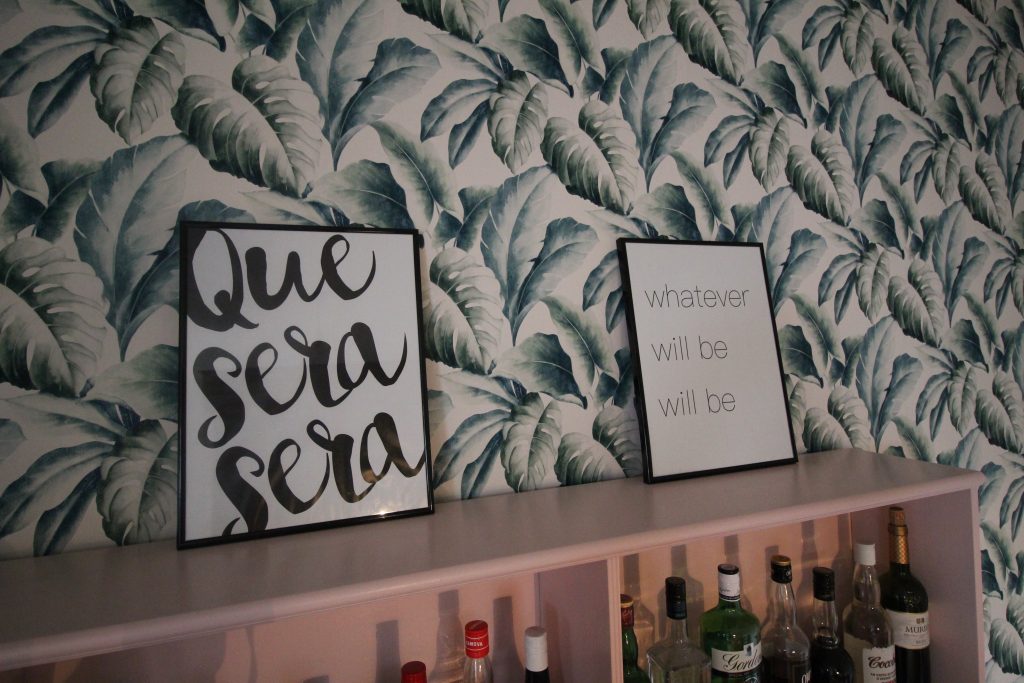
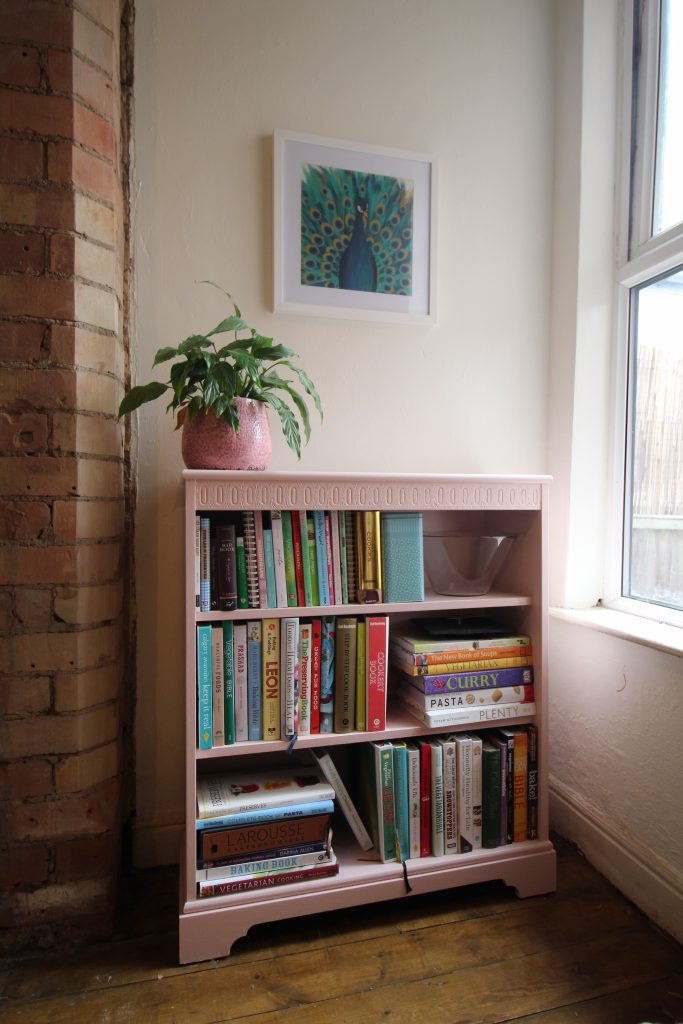
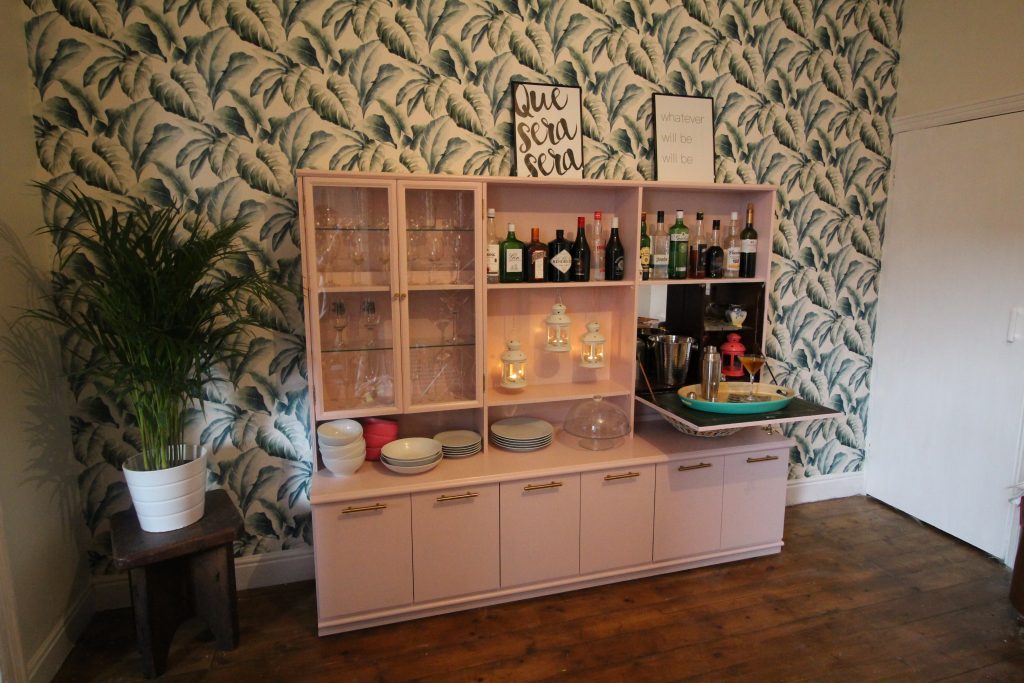
Now that the bar is stocked, I absolutely love it! It’s hard to believe it’s the same cabinet that I bought on eBay for a tenner. I will definitely be keeping hold of this one. I love the contrast of the pink bar against the bold leafy print wallpaper.
Time taken: 1 day
Cost: >£30
Difficulty rating: 2/10
This is absolutely FANTASTIC!!! This shows that anything can be done and in a short space of time, I’ll certainly consider checking ebay before taking a trip to Ikea that’s for sure.
Great Job!!!!
Thanks! 🙂
[…] 2 of my house this month is colour crush so I thought I’d share my pink bar in the dining […]