You may have seen that I recently did a post on creating a feature wall with paste-the-wall wallpaper. Well this time I’m going to show you how you can do the same but with the other type of wallpaper: paste-the-paper wallpaper (what a mouthful!)
The difference between paste-the-wall and paste-the-paper
It’s pretty obvious from the names what to do with each type of paper, but there are also a couple of subtle differences. For one thing, with paste-the-wall wallpaper, you can just put the dry paper straight on the wall once you’ve pasted the wall. In comparison, with the paste-the-paper kind, you don’t need to paste the wall but will need to cover the paper in wallpaper paste and then leave it to soak in for however long the instructions on the paper you’re using specify (the time can vary). Whichever method you favour is down to personal preference and neither one is particularly more difficult than the other. Another thing to note is that you will need a pasting table or similar if using paste-the-paper wallpaper. This isn’t necessary, but you may find it useful to, with paste-the-wall paper.
What you need
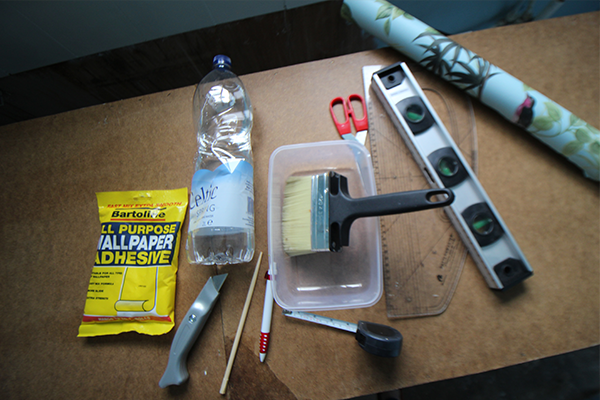
You’ll need all the same things that you need for the paste-the-wall kind, plus a pasting table. Here’s your list:
- wallpaper
- spirit level
- measuring tape
- pen/pencil
- ladder
- wallpaper paste
- wallpapering brush
- scissors
- Stanley knife
- flat smoothening device (I improvised with what I believe to be a paint scraper)
- wallpaper pasting table
TOP TIP: there’s no real need to spend a lot of money on a brush. You’re pasting the back of the paper so you’re never going to see the brush strokes. I got mine from the pound shop and it worked perfectly.
Choosing your wallpaper
The first thing you’ll need to do is make sure you’ve got the right amount of wallpaper for your wall. You can do this by following my instructions here, or make things easier for yourself by using an online tool that will calculate it for you like B&Q’s here. Luckily the feature wall I was creating wasn’t big so I only needed one roll. If you need more than one roll, check that the batch numbers on each roll match each other or you may end up with slightly mismatched colours.
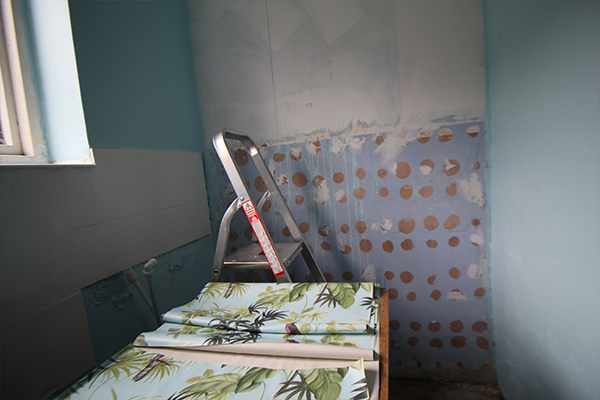
Prep
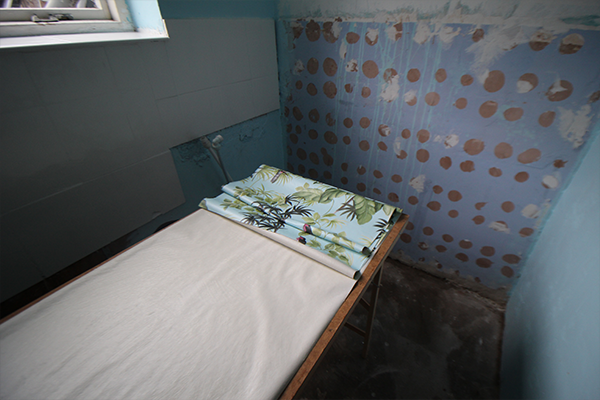
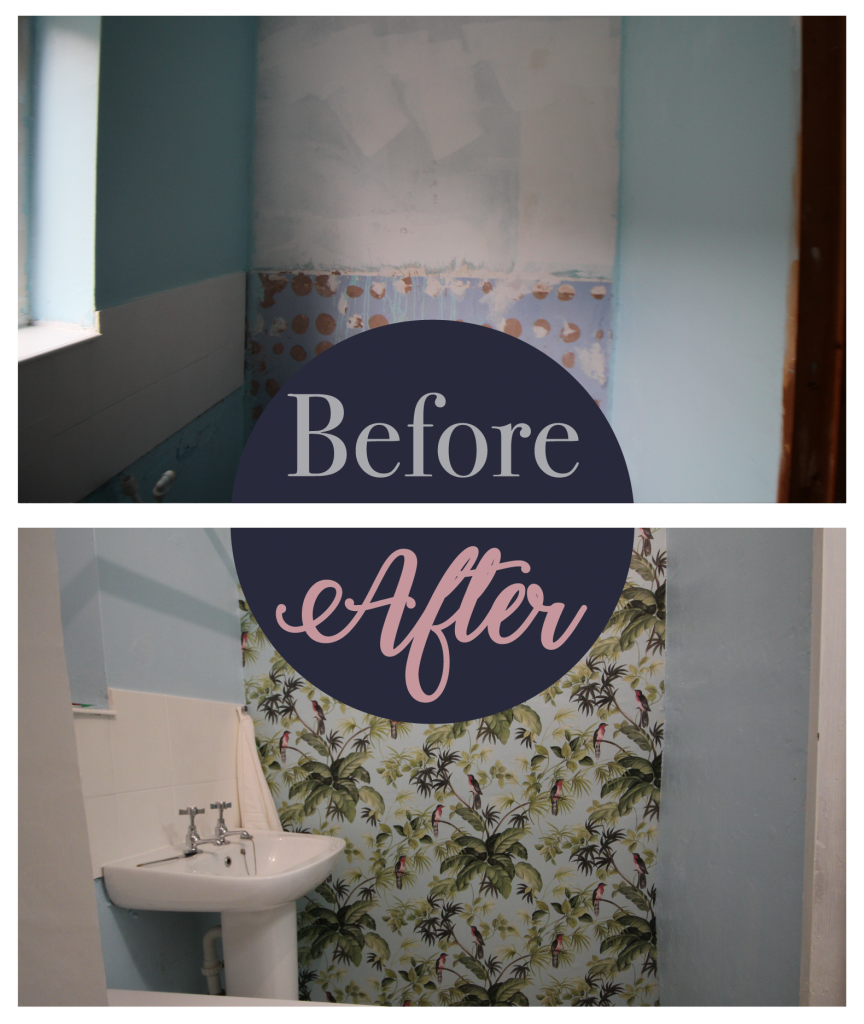
If you’re lucky, you’ll have a lovely clean, undamaged wall to work with. If your house is like mine, you’ll have uneven walls with holes in the plaster made by the tiles that used to be on them. If necessary, you’ll need to fill in any holes before you start wallpapering. I used a bog standard filler for this. The next thing to consider is your surrounding walls, ceiling and skirting boards. If any of these need to be painted, you should do it before you start to wallpaper because it will be much more hassle afterwards.
Measuring your wall
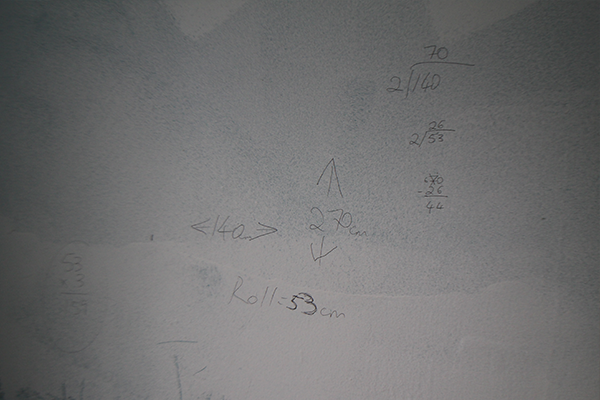
Here’s where you need to do a little bit of maths, but don’t worry, it’s really simple! This is also the best way to calculate where to hang wallpaper on a chimney breast so that your paper is centred.
My roll was 53cm wide and my wall was 140cm wide. This meant I would need to hang three sheets of wallpaper to cover the wall. I wanted the middle sheet to be exactly in the middle of the wall, so I took the width of the wall, divided it by 2 and made a mark here. (Don’t be scared to doodle on the wall, remember it’s going to be covered in paper!) This mark was exactly the centre of the wall and where I wanted the centre of my middle sheet to be. So I next divided 53cm, the width of my sheet, by 2 and marked that distance to the left of the first mark I made. When you line your sheet of wallpaper up with this point, it will ensure that it’s right in the centre of the wall.
The next step is to draw a long vertical line at the point that you’ve just marked. Use your spirit level to do this. When it comes to hanging your wallpaper, you’ll line it up with this line that you’ve drawn. This will ensure that it’s hung straight.
Lastly, measure the height of your wall: right from the ceiling to the floor, or top of the skirting board if you have one. My measurement was 270cm.
Hanging your paper
Some wallpaper pastes come ready-mixed, others are a flaky consistency that you need to mix with water. If yours is the latter, mix it up to a nice thick paste before you start. Mine was the flaky variety from the poundshop. You just need to sprinkle it onto water, give it a mix and it’ll form a paste. Then you’re good to go!
You’ll want to cut each strip of wallpaper about 10cm longer than the length of your wall. Lay the paper pattern-side down on the pasting table and use your brush to paste it all over. Start in the centre and work the brush out towards the edges of the paper. Once you’ve covered the paper in paste, you’ll need to leave it to soak in. The particular paper you’re using will say how long to leave it. Mine said 5 minutes. The reason you need to leave it to soak is that the paste makes the paper expand, so if you were to put it straight onto the wall and then line up the next sheet, expansion would mean that your pattern will no longer line up.
While you’re waiting for the time to pass, you can fold your sheet of wallpaper up to make it easier to handle and apply. the best method for this is to loosely fold it like a concertina, putting pasted sides together and keeping the top of the sheet accessible to make it easier to hang.
Once the correct amount of time has elapsed, you can get on with hanging your first sheet. Climb the ladder with the sheet you’ve prepared and line the left hand side of the sheet up with the line that you’ve drawn on the wall. Don’t worry about not getting it exactly right at first, it won’t dry for some time so you can simply adjust it as you go. Fix it into shape and smoothen it out to ensure there are no air bubbles. I just used a clean, dry paint brush for this.
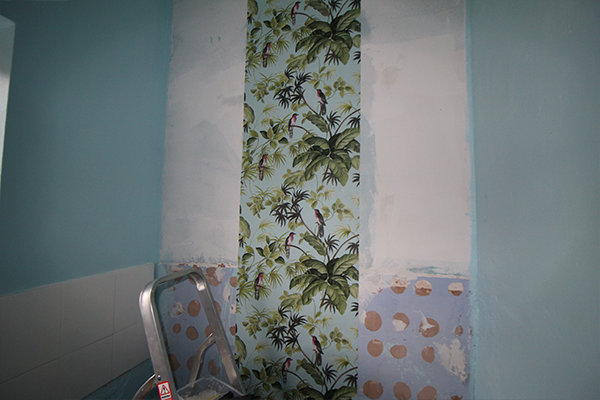
Once you’ve fitted your sheet of wallpaper and are happy with its position, use your flat smoothening device and a knife to cut the excess paper away at the top and the bottom. I used a paint scraper for this. You could use a ruler or something similar. Hold whatever straight flat tool you’re using at the top of the wallpaper, where the wall meets the ceiling. Hold your knife above it and trim away the excess. Repeat this at the bottom of the sheet.
TOP TIP: Make sure you wipe down your pasting table with a damp cloth before unrolling more paper, to avoid getting paste on the front of your paper.
Have a look at the pattern of your wallpaper and how it will match up. I hung the right hand side sheet next, so I checked the top right hand corner of the sheet I’d already hung to see how the pattern would match up. Pinpoint the matching part of the pattern on your roll and start again at this point, measuring the length of your wall plus about 10cm before trimming the paper. Then you need to repeat the pasting process: paste the back of the paper, fold it like a concertina, pasted sides together, and then leave it to soak for the correct time before affixing to the wall. When it’s time to hang this sheet, simply line it up with the one you’ve already hung so that the patterns match (remember that it’s easy to reposition it). Then repeat the trimming process as before.
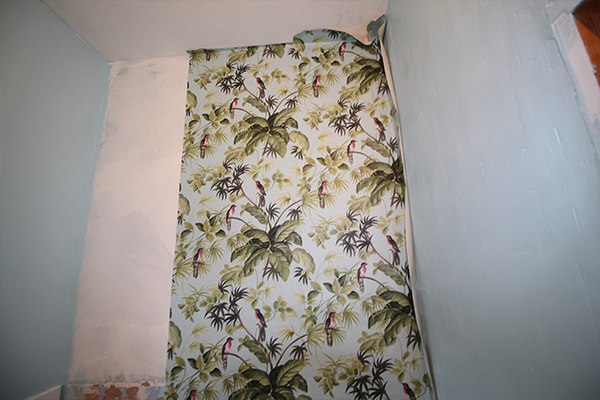
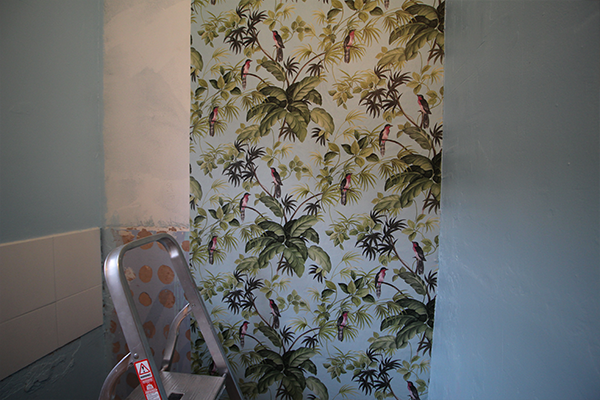
Repeat this process as many times as necessary until your wall has been covered. I only needed to hang three sheets in total: one in the centre, one to its right and one to its left. Both of the outer sheets were too wide for the wall so needed to be trimmed to size. To do this, you simply repeat the process you followed to trim the lengths of the sheets, just vertically rather than horizontally. So you need to hold your ruler or whatever straight, flat device you’re using at the point where the wall meets the one adjoining it and run your knife down the outside of this to trim the paper to size. Don’t worry about the excess paper touching the adjoining wall and getting paste on it, this is easy to clean off.
TOP TIP: Make sure the blade of your knife is nice and sharp. If not, you run the risk of tearing the paper when you go to cut it.
Finishing touches
Once you’ve hung and trimmed all of your wallpaper, use a clean damp cloth to wipe away any paste that may have gone on the paper, the ceiling or the adjoining walls.
Making the wallpaper bathroom-friendly
If you have a skirting board, you will trim your paper at the point where this meets the wall.
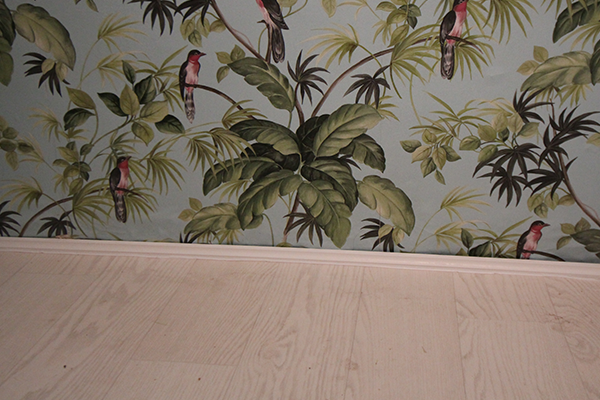
Mine was a little different: I didn’t have a skirting board, and as I was hanging my wallpaper in the bathroom, I didn’t want it to go all the way to the floor. The reason for this is that if the floor was wet and this made the bottom of the wallpaper wet, it would travel up the wall and this would spell disaster. Instead, I trimmed the wallpaper about half an inch above the floor and used wood glue to glue down scotia (or beading) that was left over from fitting my laminate floor. If you don’t happen to just have some scotia just knocking around, you can get some from a hardware store for a couple of quid.
I lined the scotia with wood glue and put it into place, holding it there with some heavy books and paint pots until the wood had dried.
Sealing the scotia
The last step to make it really bathroom friendly was so seal the bottom of the scotia, where it met the floor, with waterproof sealant. This is as simple as popping your sealant in a gun and squeezing out a line across the joint. It’s easiest to do if you use masking tape to tape lengthways just above the bottom of the scotia and again on the floor just a few millimetres away from where the scotia and the floor meet. I found it easiest to wear a disposable latex glove when working with sealant as it can be quite messy and really sticky! In order to get a perfect finish when using sealant, the steps to follow are:
- use making tape to tape off the parts you don’t want the sealant to extend to
- use your sealant gun to make a line of sealant along the joint you want to fill
- using a disposable glove, wipe your finger along the line of sealant you’ve just created
- pull off your masking tape, bin it alongside your glove and you’re done! Leave it to dry for up to 36 hours
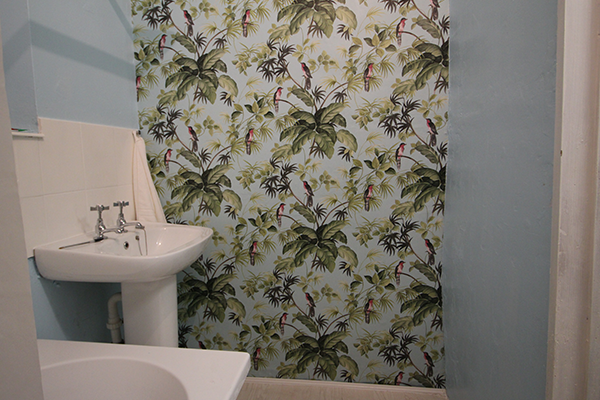
I’m so happy with my bathroom feature wall, after months of looking at the mess left behind by the old tiles. It’s given the bathroom a whole new lease of life, didn’t take long to do and cost just over £10!
Time taken: 1 hour
Cost: <£15 (my wallpaper was £10 including delivery from eBay. My paste and brush were from the pound shop)
Difficulty: 3/10
[…] Please note: This post is about how to use paste-the-wall wallpaper. For instructions on how to use paste-the-paper wallpaper, please see this post. […]
You’re really getting the hang of this!! Lovely job
Thanks Mum! 🙂