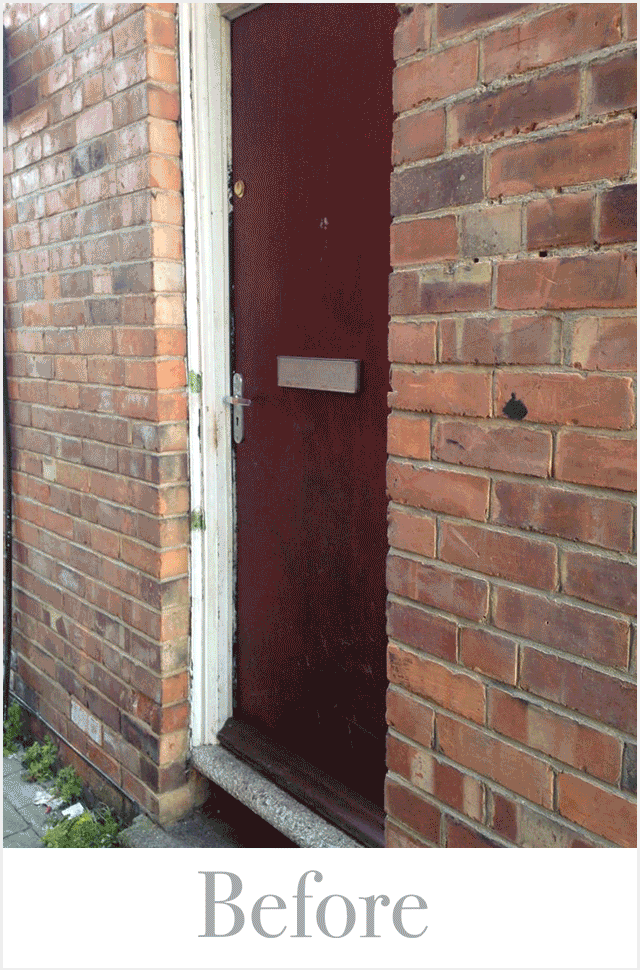
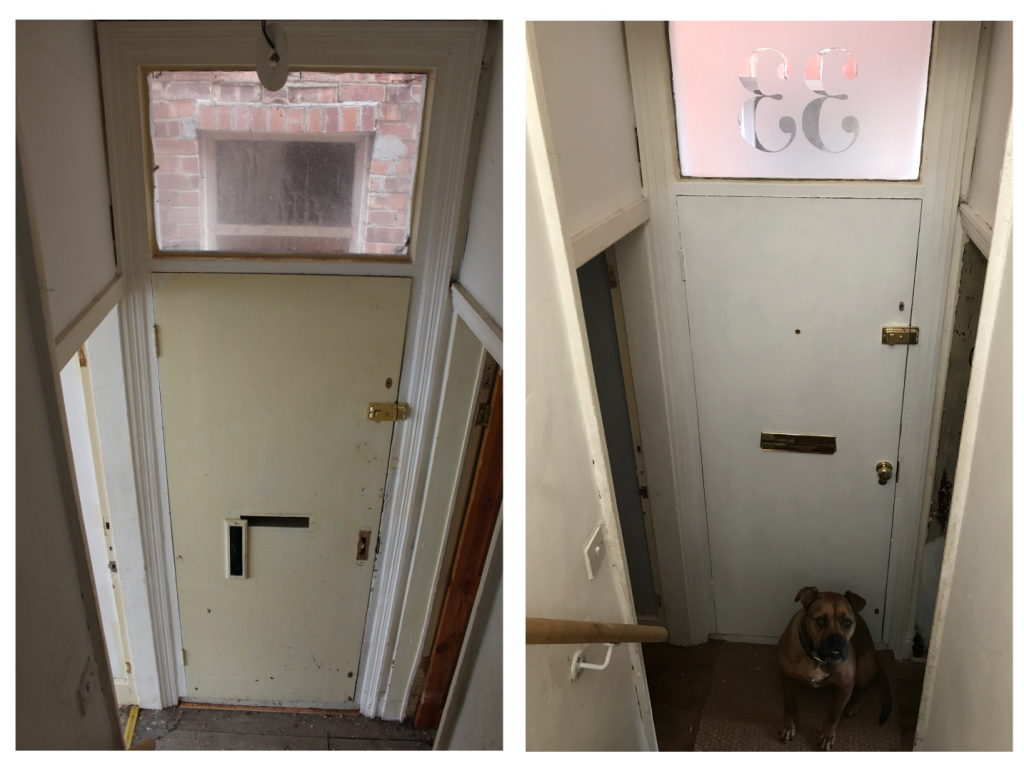
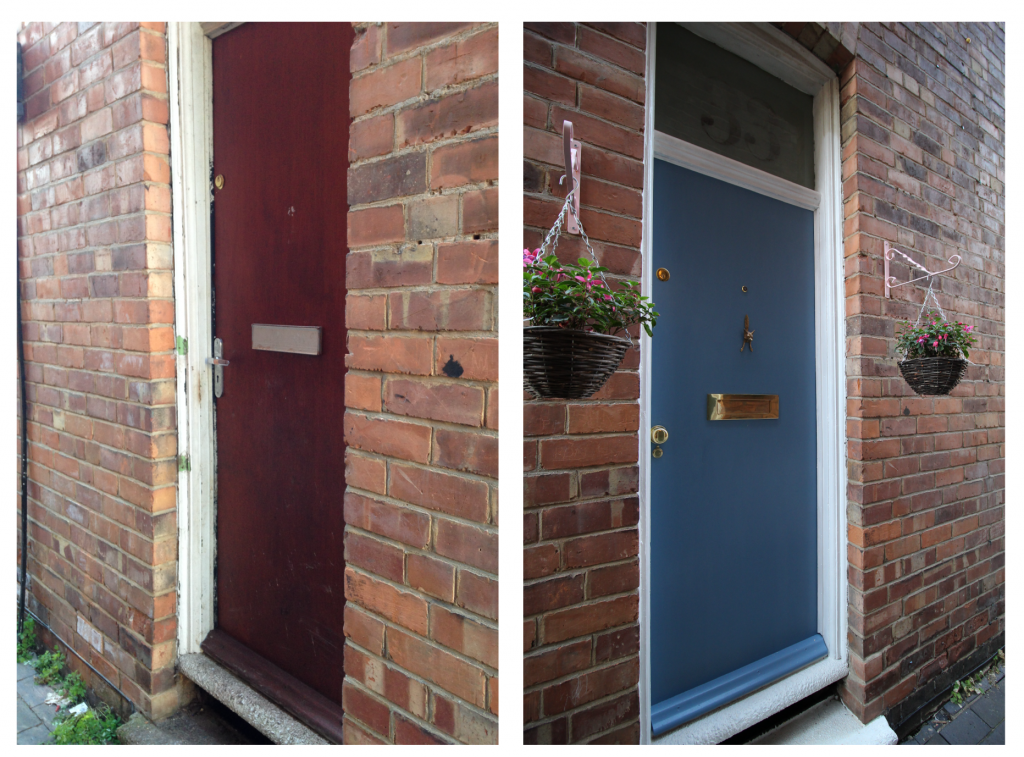
Your front door is pretty much the first impression somebody has of your house. When I first moved in, my front door wasn’t exactly making the impression I wanted. It was ugly wood, had random dirt and paint splatters and mismatching attachments. I decided that I needed a new door and asked a well known company around to quote me up. After getting a quote of almost £2,500, I quickly decided that I didn’t really need a new front door!
I then decided that all my front door needed was a facelift. I bought outdoor wood paint and attachments and set to work. Read the steps I took below.

Getting started
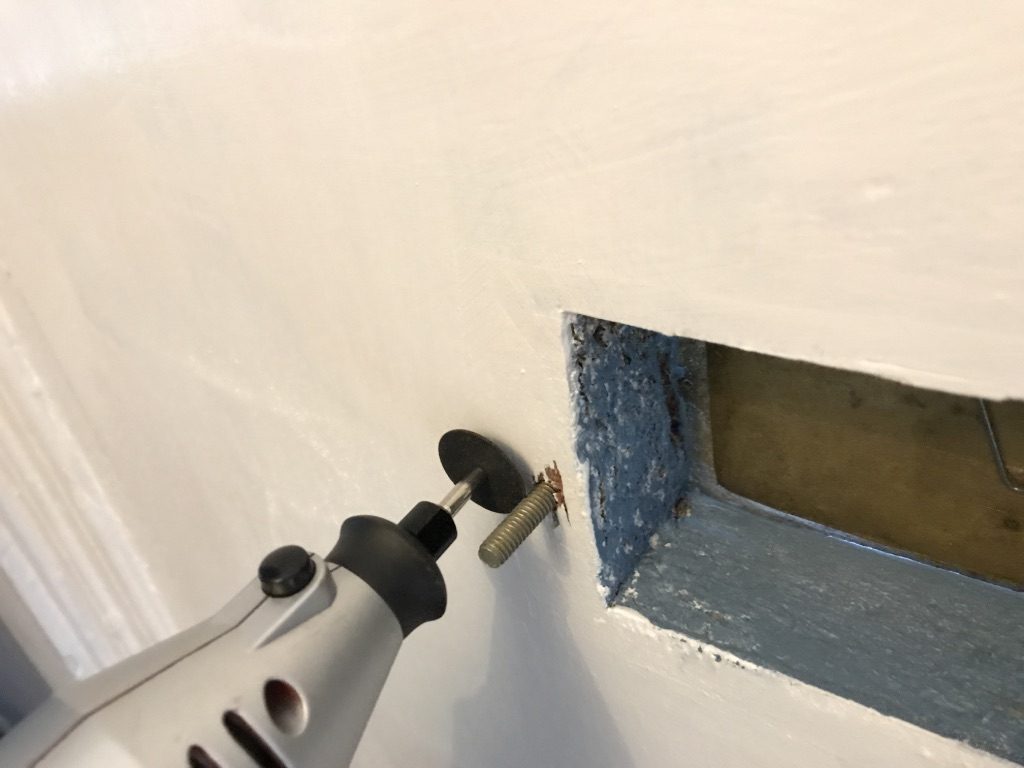
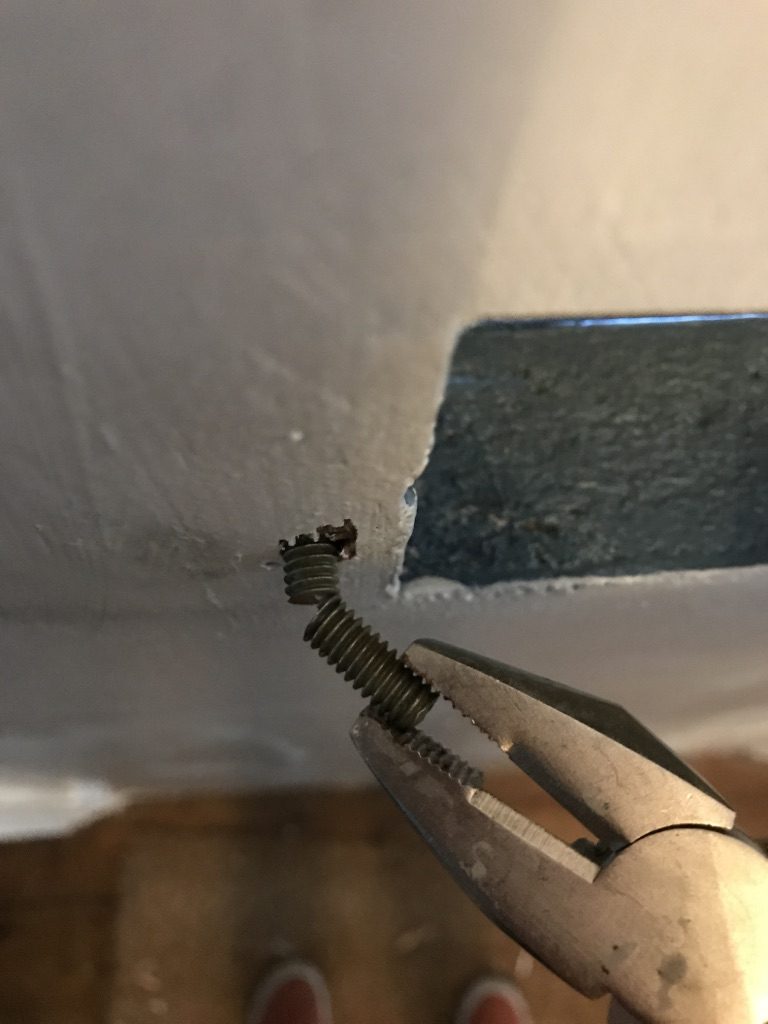
The first thing to do was remove all of the attachments and make sure my new ones fitted. The letter box flap I bought was slightly bigger than the previous one so I needed to chisel the hole a little bigger. If you haven’t done this before, don’t be scared to give it a go! All you need is a chisel and a hammer. Chisel away a little at a time until you get the letterbox to fit. I bought my chisels from a hardware store for a couple of pounds and they were perfect for the job.
I wanted to fit a peephole so I needed to drill the hole for this. I opened the front door, held the peep hole about level with where I wanted and looked through it to make sure it was at an okay height. Then I marked where to drill on the door. The peep hole was really easy to fit: it comes in two parts which screw together, one on the outside of the door and one on the inside. Use a measuring tape to measure the width of the widest bit that goes through the door and use a drill bit about a millimetre bigger than this measurement. Drill bits can be expensive, which is a pain when you need an obscure size you’re unlikely to use much. my top tip here is to have a look in a little local hardware store. Mine has a box of randomly sized drill bits for just a pound each – much cheaper than the £5+ you’ll spend at the likes of B&Q or Homebase.
The door originally had a handle on it which I wanted to replace with a knob and separate keyhole cover. Unfortunately when I removed the original handle I found a big hole in the wood underneath. I used an expanding foam to fill this in. Once it was dry, I used a knife to cut out the excess filler so I could fit my lock. On the surface of the door, I cut the foam down to just below the surface of the wood and used a wood filler to cover over it and give a smooth finish.
Before you start painting, make sure all the attachments are off the door so you can get a nice finish with the paint. I gave the door a sand using my Black and Decker Mouse, wiped it down and painted on a coat of primer.
Starting painting
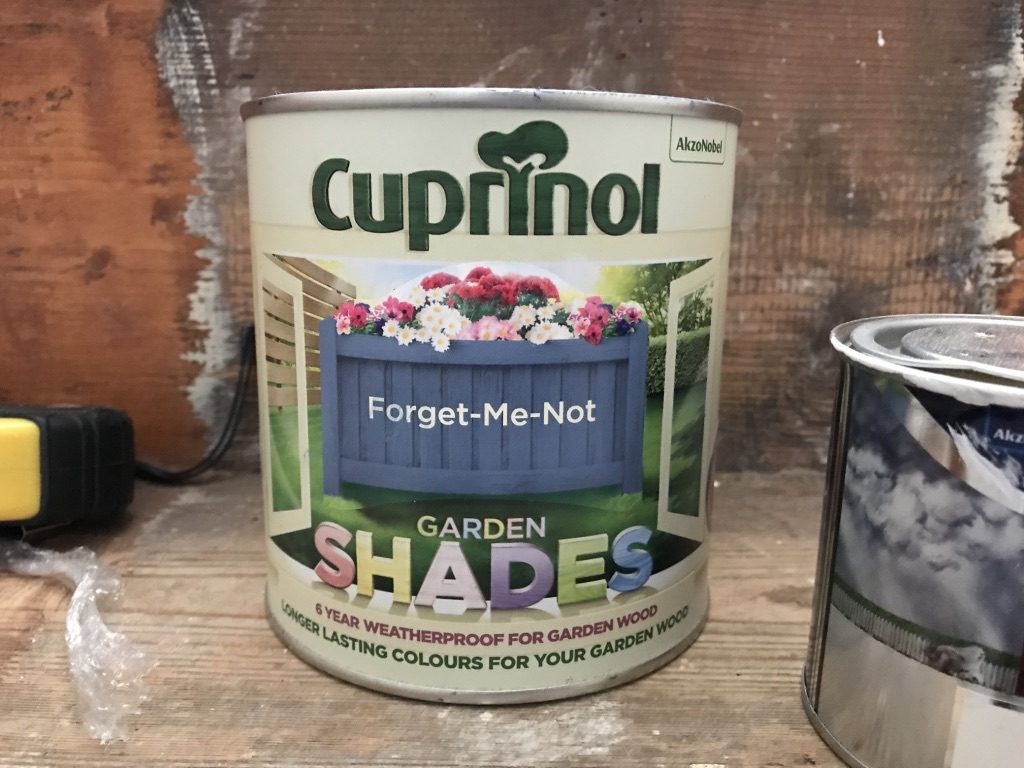
The paint I used was Cuprinol Garden Shades Matt Wood Paint, which I bought from B&Q. 2.5l was £16 and way more than needed. There’s a huge range of colours and after much deliberation I settled on Forget Me Not. I wasn’t convinced when I opened the tin… it seemed really thin and I wasn’t sure how good the coverage would be. Turns out it paints on like a dream because it’s nice and thin. Each coat was dry in about half an hour and I gave it four coats to get a nice even coverage.
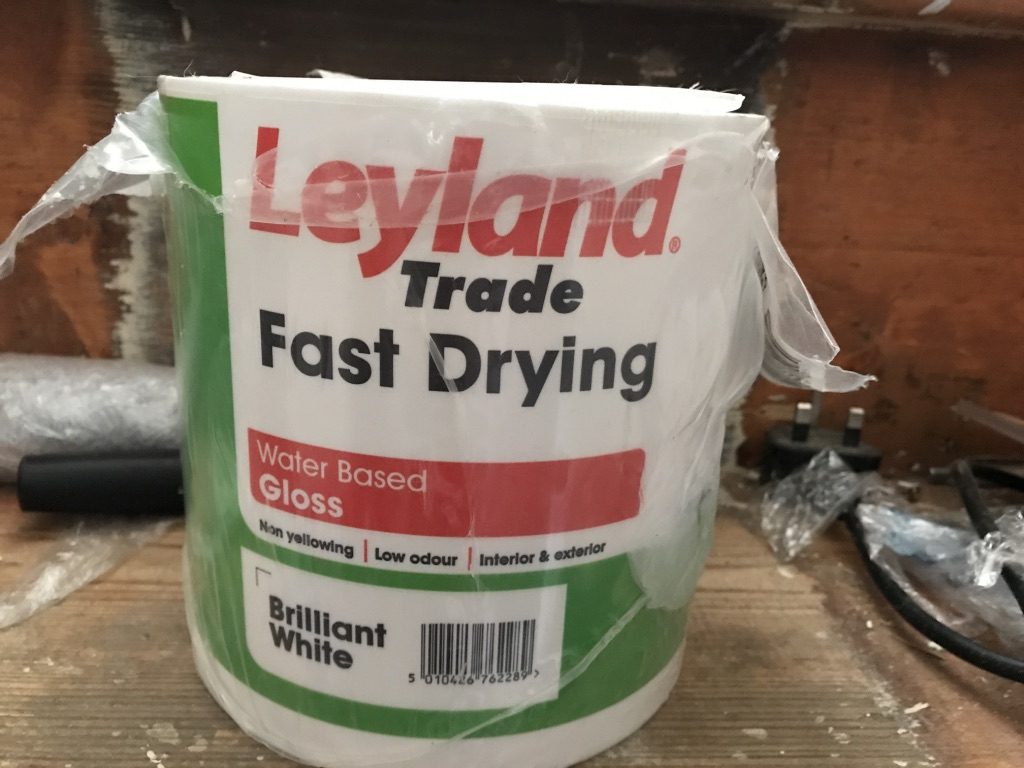
I painted the inside of the door white. I used Leyland Trade Fast Drying Water Based Gloss in Brilliant White, which I bought at Screwfix when I first moved in and has come in handy on multiple occasions! I originally bought it for skirting boards but I’m going to be using it for the interior doors too. I’ve said it before but I’ll say it again because it’s important… don’t buy white oil-based paint as over time the oil will rise to the surface and give your paintwork a horrible yellow look. The paint is for indoor and outdoor use so I also used it to repaint the front door frame outside.
Fitting the Attachments
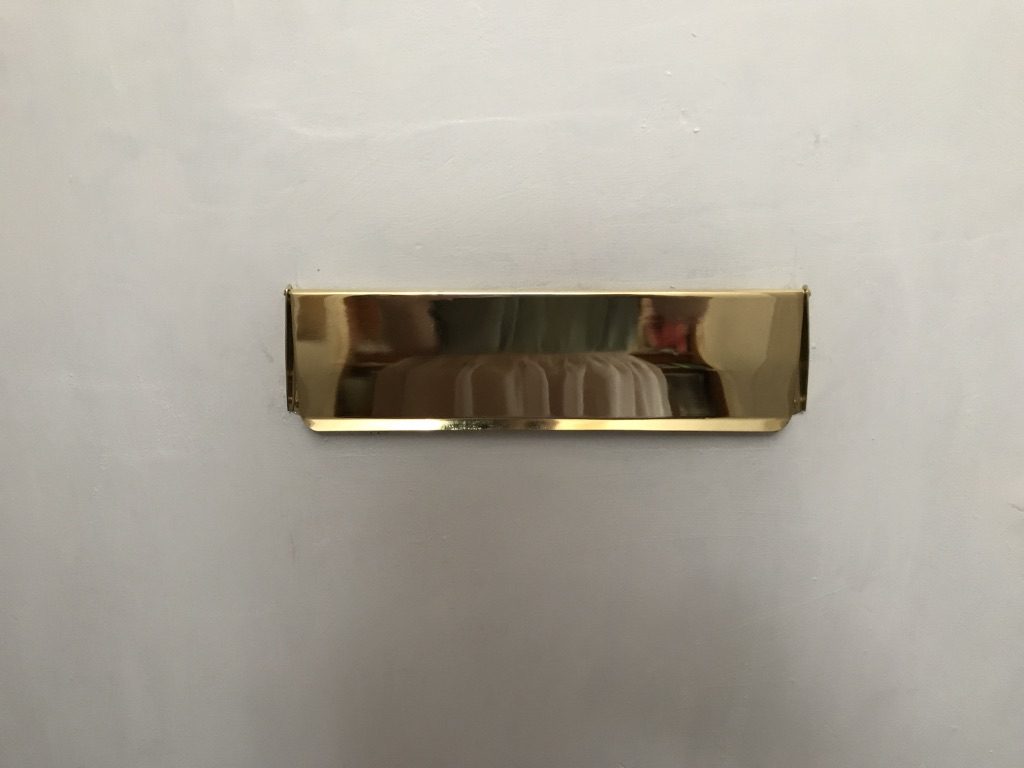
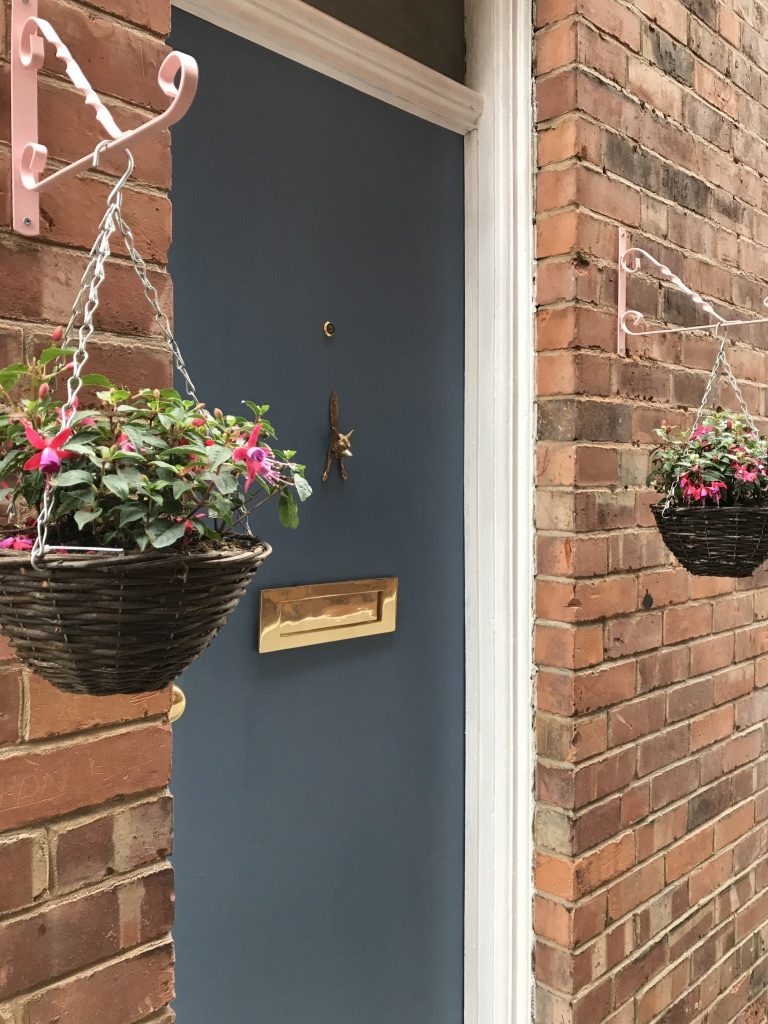
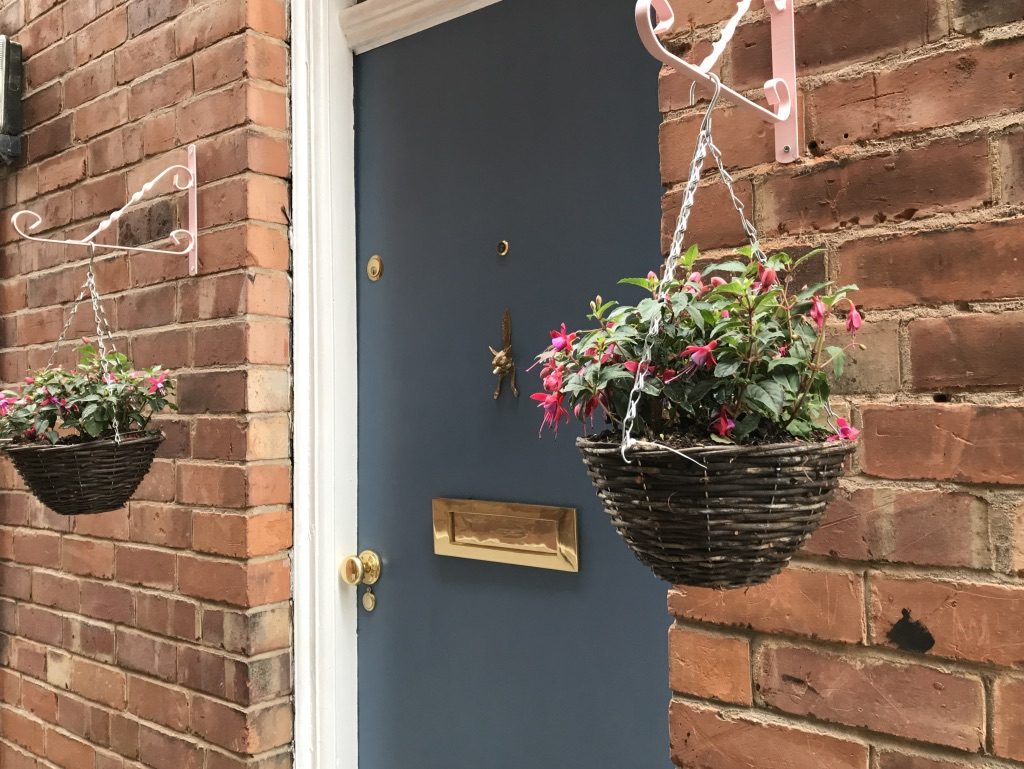
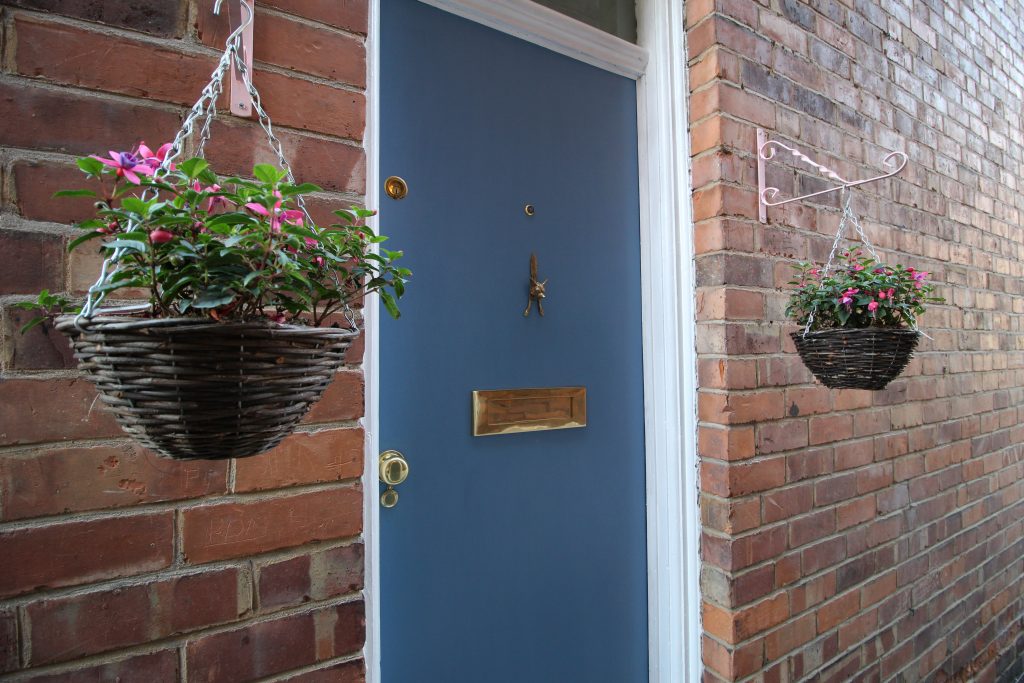
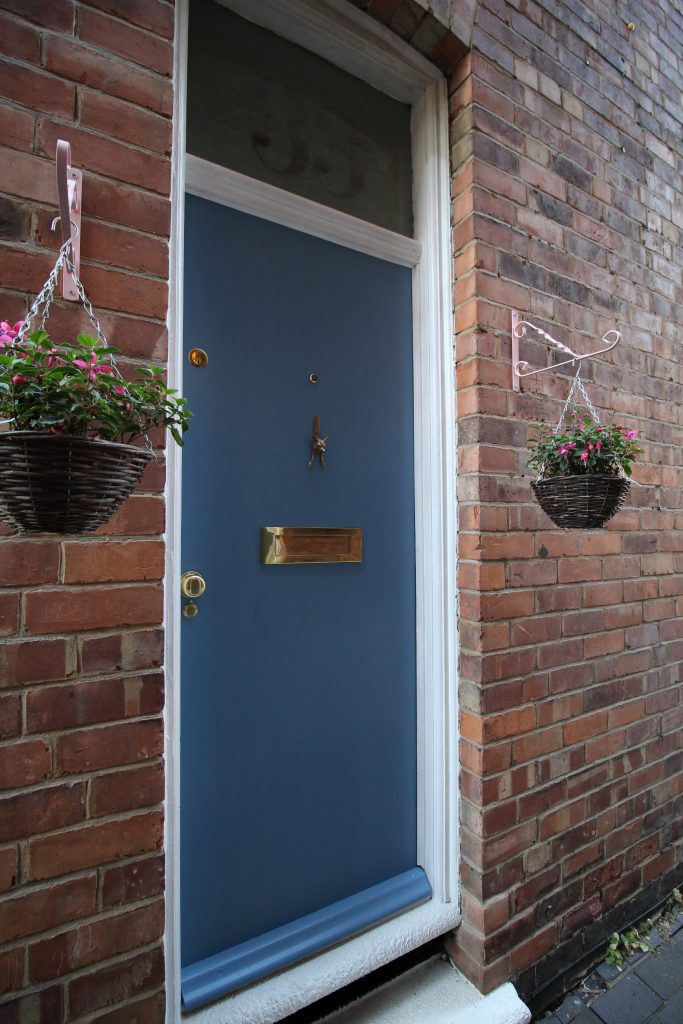
Once the paint had dried, it was time to put all my new attachments on. I bought my letterbox from eBay for £16.95, the brass knobs were £12.50 for the pair from Amazon, keyhole covers were £2.50 from Amazon, fox door knocker was £6.45 from eBay and the spy hole was £4.40 from Amazon. For the locks, I bought a Yale deadlock from B&Q for £20 and a Diall night latch for £15.40, also from B&Q.
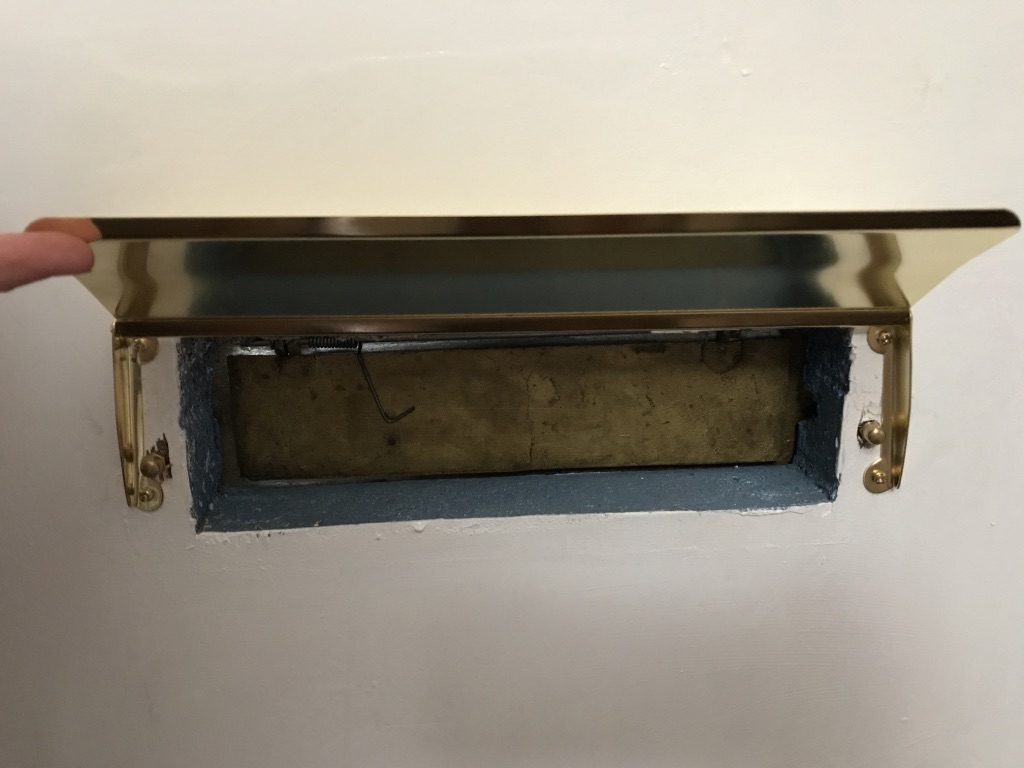
To fit the letterbox, you need to drill a hole on either side. This is as simple as holding it where you want to go and pushing it towards the door to make a slight impression where the holes should go – and then that’s where you need to drill! The screws were too long for my door and stuck out quite a bit on the inside so I cut them down. For this, I used my multi-tool which I highly recommend anyone to have – it’s come in handy on countless occasions since moving in. Mine was just a cheap-ish one which I bought from Amazon for £19.99 but it’s never let me down. Pop on your protective glasses, put the right attachment on and you can cut the screws down to size in seconds. Once they’re the correct size, you just need to screw the little end caps in place and your letter box is secure.
I bought an flap to cover the hole for the letterbox on the inside of the door for £6.85. It comes with two hinges and you just need to screw them into place on the door.
The fox knocker was as easy as screwing it straight into the wood of the door. It did actually become a little bit loose so I took it off, put a little all purpose glue in the holes made by the screws and popped it back on again.
Fitting the new locks, if you haven’t done it before, really is as simple as just slotting them into place and screwing them on. If they don’t quite fit, don’t be scared to pick up a chisel and hammer. It’s easy to just chisel away a little bit at a time.

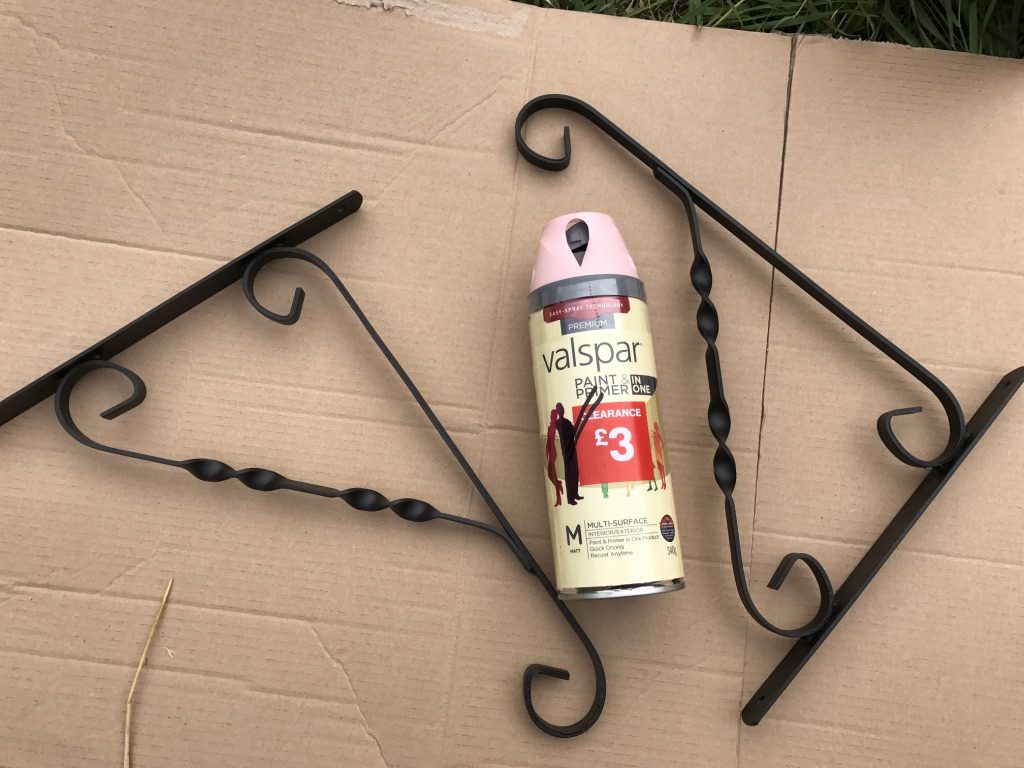
The Hanging Baskets
Once all of the attachments were on the door, I decided it needed a little extra to brighten it up. I bought hanging basket brackets from B&M Bargains for £2 each. They were black and a bit cold against the nice bright door, so I sprayed them with a coat of Valspar Paint & Primer In One. I picked it up in B&Q’s bargain bin for £3 a few weeks ago and knew it would come in handy! I just laid some cardboard down in the garden and gave the brackets a spray. It was dry within 30 minutes so I turned them over and did the other side.

To hang them, I marked on the wall where I wanted them to be, used a masonry drill bit to drill the holes, popped in a wall plug and screwed the brackets into place. The hanging baskets, I have to admit, came ready planted because I didn’t want to faff around with bags of compost. I bought the two for £12 from B&Q.
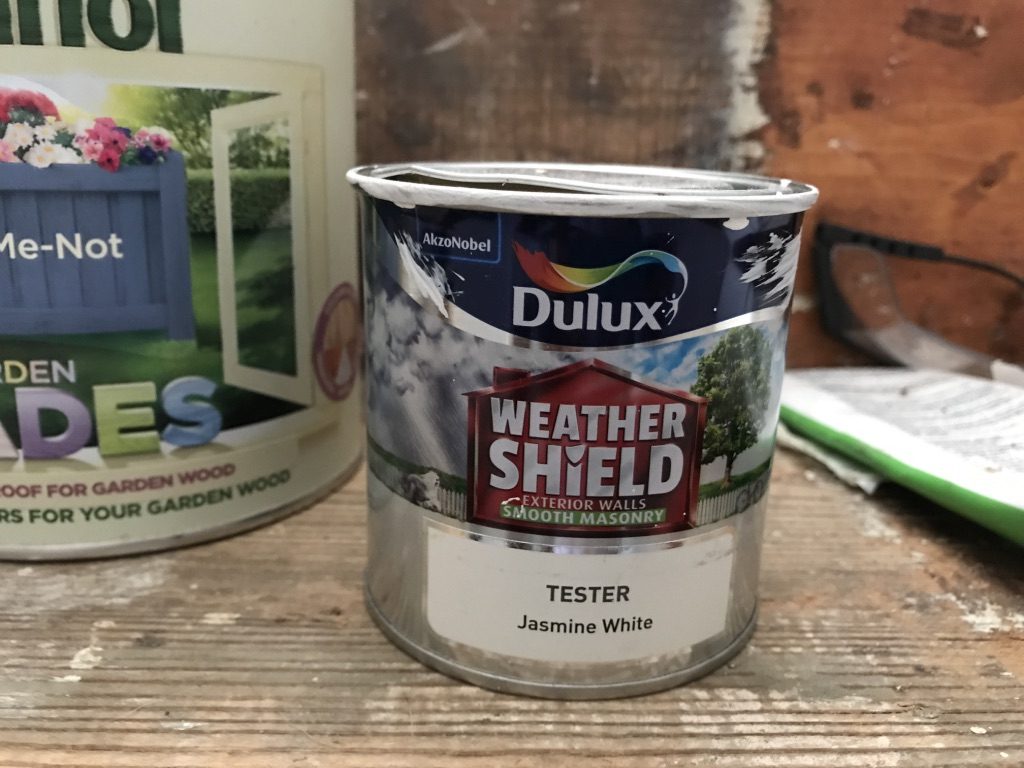
To freshen up my front door steps, I gave them a new coat of paint. I didn’t need much paint so didn’t want to buy a huge tin, which unfortunately most masonry paint comes in. However, you can get little sample pots which are the perfect size for just a couple of steps. I bought a Dulux Weathershield .25l sample pot for £3.97. I cleaned the steps and then gave them a quick coat of paint and they looked better than I’d ever seen them within minutes.
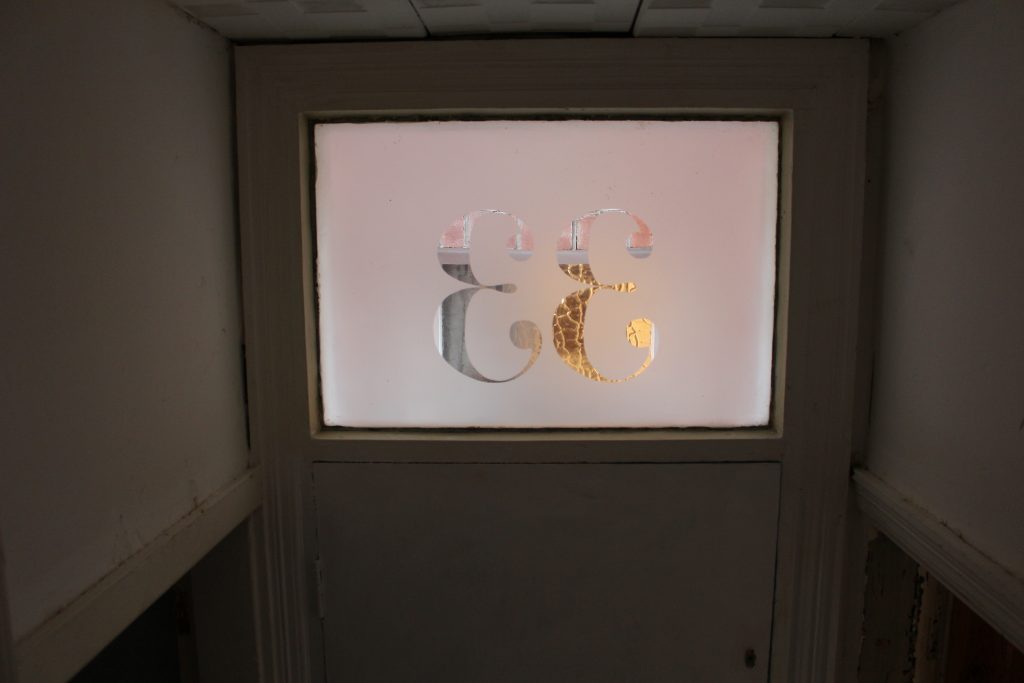
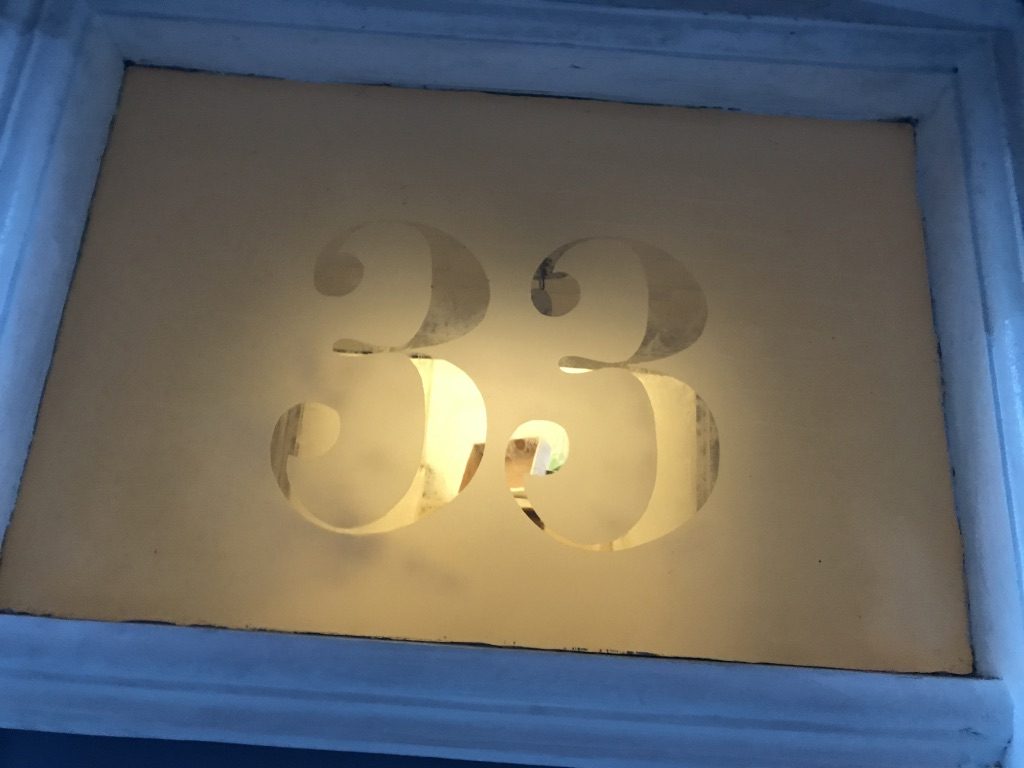
The number above the door
The final touch was the sheet of glass above the front door. I decided that I wanted to put the house number on this. I printed out the house number twice. I taped the first one to the outside of the glass, where I wanted the numbers to be positioned (top tip: make sure it’s facing the right way and not a mirror image!).
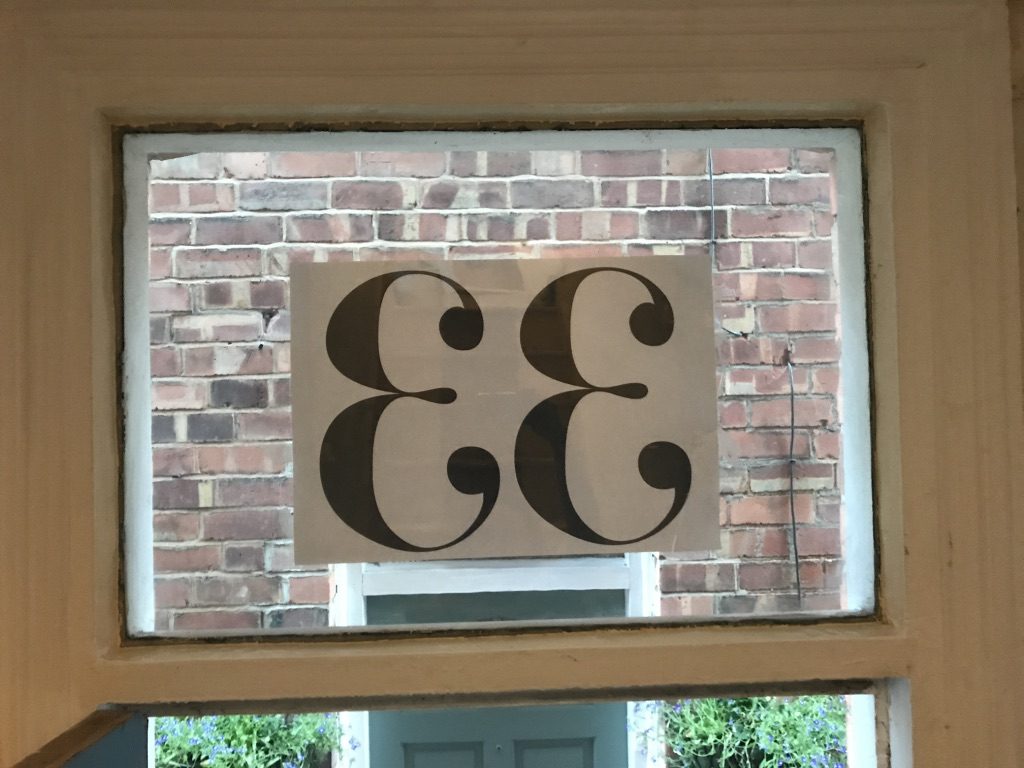
I cut out the numbers on the other sheet and sprayed them with spray mount. I then put them in place on the inside of the glass, using the sheet that I’d already stuck up as a guide.
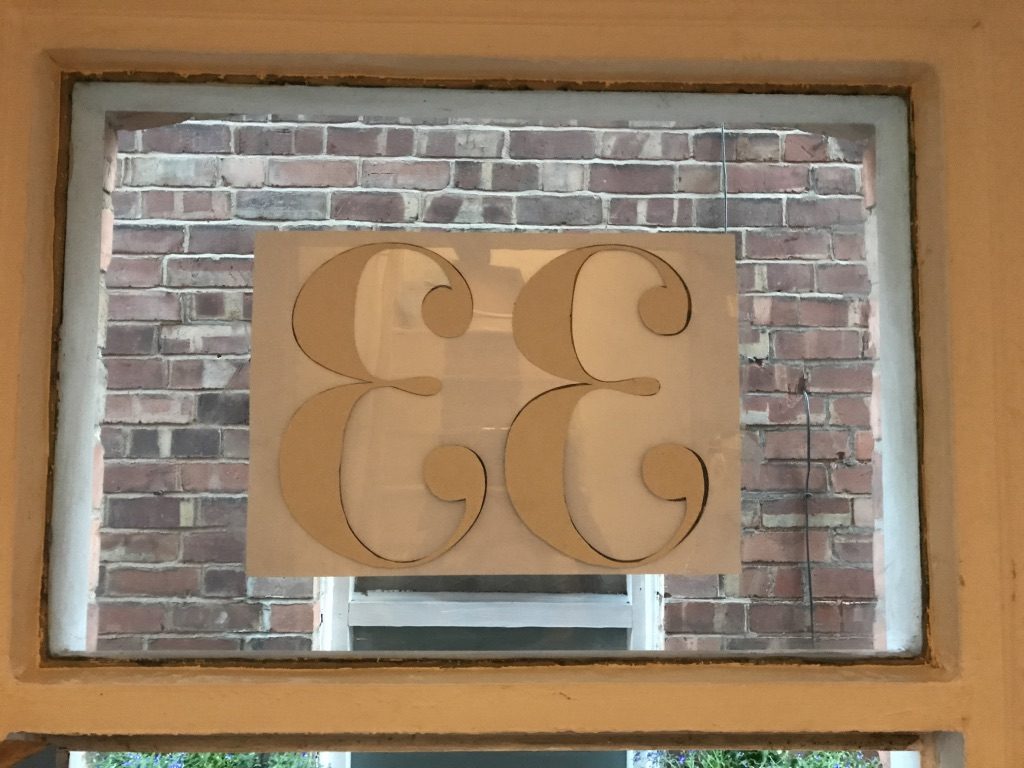
Then I sprayed the entire sheet of glass with frosting spray. I used the same spray and technique that I used in my earlier post How to Frost Windows.
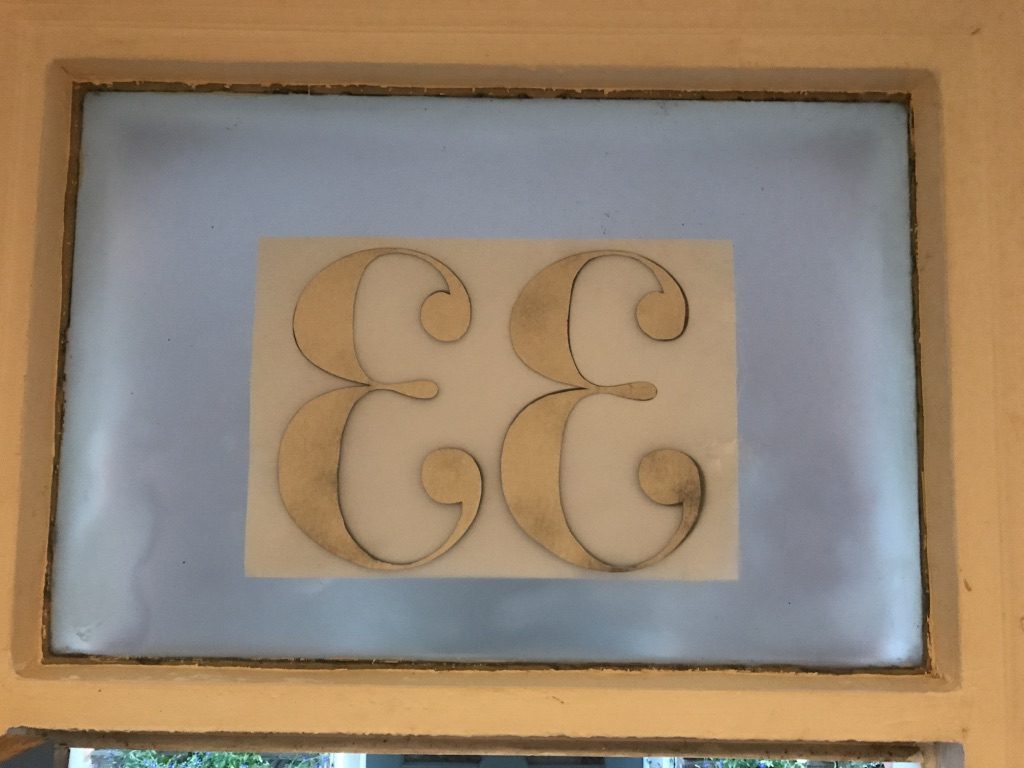
Once I had done a couple of coats of frosting spray, all that was left to do was peel off the printed numbers I’d stuck up and it was done! The whole thing took just minutes to do and gave a really nice effect – I love it!
Overall, revamping the front door took little skill and about a weekend’s worth of work. My best advice is to get everything you need in advance: I used quite a lot of things from paint to a door knocker to new locks, so it will really break up the project if you have to stop to get something you hadn’t considered at first. Adding up all the bits I used, it came to about £125, a huge saving of over £2,000 based on the quote I’d received for a new door! This includes the price of the hanging baskets and everything. I also bought way more paint than I needed, meaning that I’ve got loads left over for projects in the garden.
My “new” front door looks amazing now and I’m so happy with it! I can’t stress enough how satisfying it is when you see a project like this through to completion all by yourself.
Difficulty level: 3/10
Price: <£125

Looks amazing and I love the colour! The hanging baskets really add something extra.
Thank you! I can’t imagine being any happier with it if I had spent over £2,000 on a new one!
Fabulous Job………
Ann
Thanks! 🙂
[…] I’ve been using Leyland Fast Drying Gloss in Brilliant White, as you’ll know from other posts if you’ve been here before (if not, where have you been?!). I bought it when I first moved […]
[…] All the steps are on my blog, if you’re interested […]