Those of you who’ve been here before may know that I first posted Ted’s fireplace dog bed last year. But having made a few alterations and adding some lighting, I’ve now updated the blog post. Read on to find out how you can turn a crappy old fireplace into a dog bed fit for a furry king (or queen)!
WARNING: This post contains a lot of pictures of my dog because he looked way too cute to take any of them out!
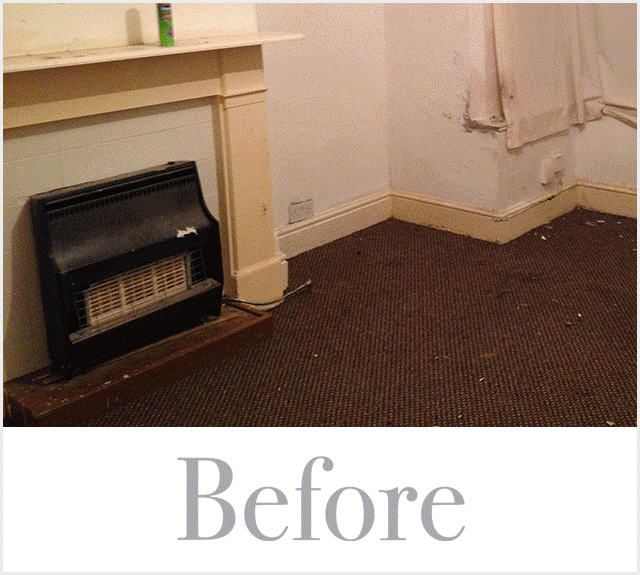
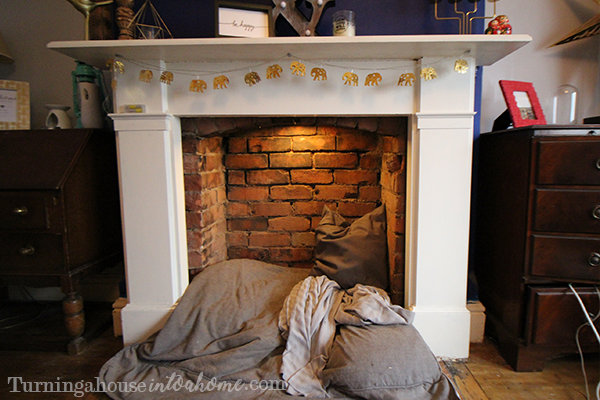
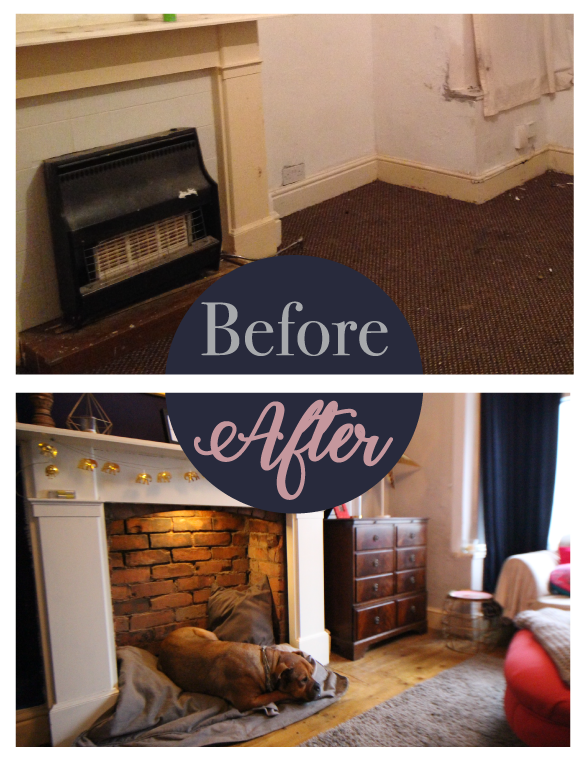
The fireplace in the living room of the house was old, ugly and taking up space. It was an old gas fire that wasn’t even connected to the gas and it had to go. Thus started a mini-demolition. Once the fire was removed, I realised how much extra space there was in the room and decided to turn it into a cosy fireplace dog bed for Ted.
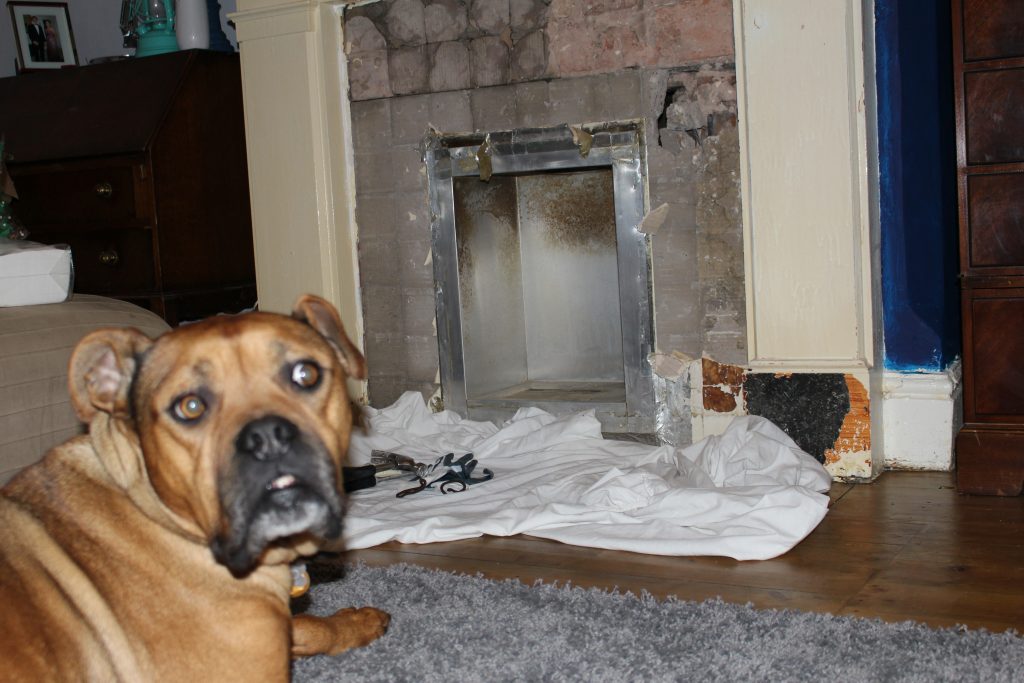
I started by chipping away at the bricks with a hammer and chisel, which opened the space up quite a lot more. This part was pretty easy: put down some dust sheets and chisel away at the mortar between the bricks. The bricks that remained were soot-stained and needed a good clean.
Stripping the paint from the fireplace
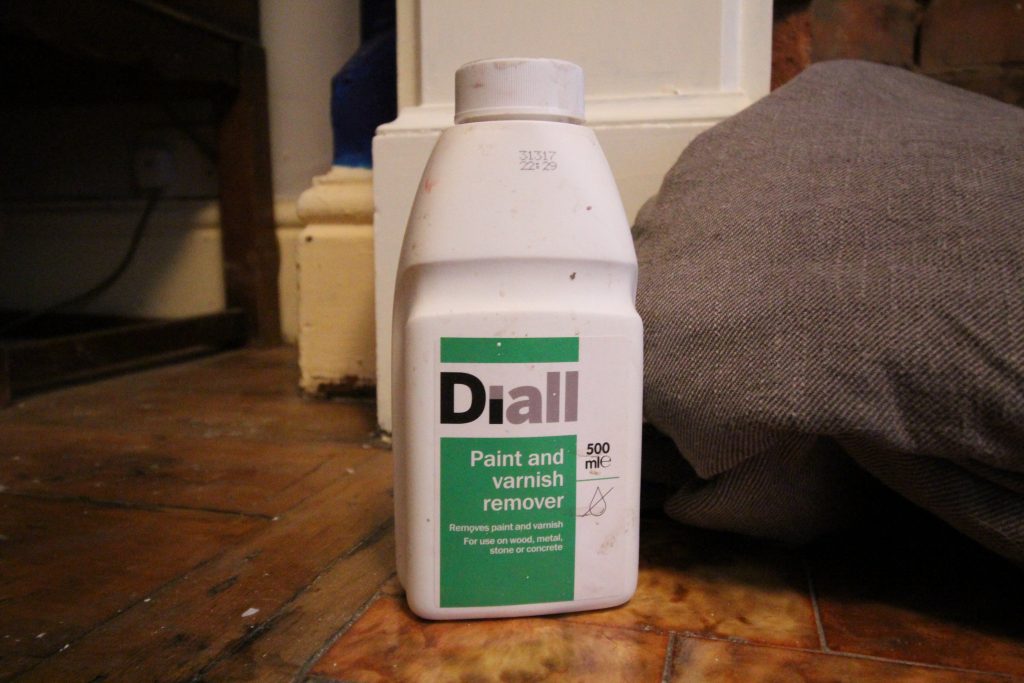
The paintwork on the fireplace was (I think) originally white but had faded to a dirty yellowish hue. Fun fact that I’ve learned recently: if you use an oil based paint, over time the oil will rise to the top of the paint job and discolour it. The paint was quite thick so I was able to scrape most of it off with a scraper, but because I wanted a good finish, I used paint stripper for the final remaining bits of paint. I hadn’t used paint stripper before but once I did, I wished I’d used it sooner. It made taking the rest of the paint off so much easier. I used Diall paint stripper. 500ml from B&Q was £3.27.
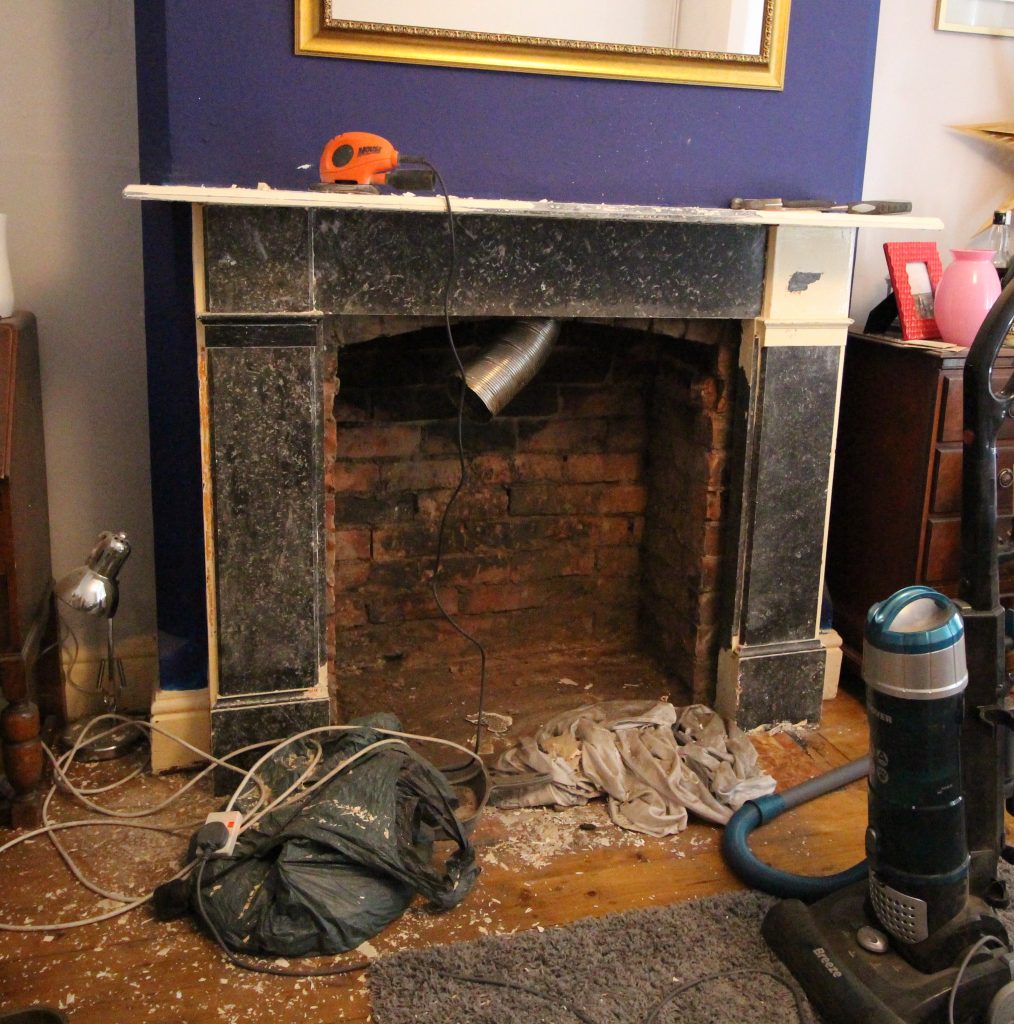
All you need to do is paint it on with a brush, leave it for about an hour and then scrape it off with ease. It only took the top layer of paint off, so once I’d removed that I repeated the process a couple of times to remove the other layers. Once all of the paint had been removed, I used warm soapy water and some wire wool to remove the last of the residue.
Cleaning the bricks
Starting at the top of the bricks, I used hot water and a wire brush to clean off the top layer of soot. I then made a paste of baking soda and washing up liquid, brushed this on to the bricks and left it for an hour to work its magic. After the hour had passed, I washed the paste off using a spray bottle filled with vinegar and scrubbed it all off with a wire brush. Make sure you’ve got plenty of dust sheets down to catch all the dirty water that runs down. It’s important to start at the top of the area you want to clean – if you start at the bottom, by the time you work your way up to the top, the bricks you’ve already cleaned will be filthy again from the dirty sooty water that runs down the wall.
Painting the fireplace
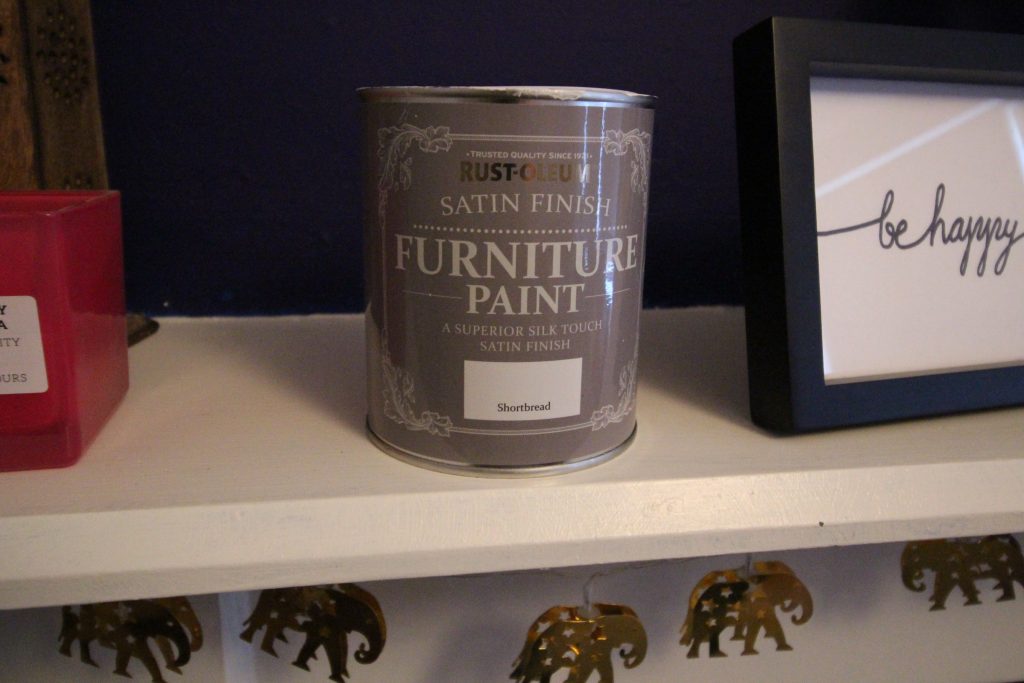
Once the fireplace had dried, I started painting it with Rustoleum furniture paint. I chose Shortbread in a satin finish. This was the second of two tins I bought for £24 from B&Q (see my post How to Revamp a Welsh Dresser to see how I used the other tin). Because I was painting on stone (and a much darker colour than I was painting it), this time it took 4 coats to get an even coverage. It dried pretty quickly so I was able to do the next coat after about half an hour… about the perfect amount of time to go pour and sip a G&T. I absolutely love this paint because it gives such a nice smooth finish! Because it’s a satin paint it eliminates the need to faff about with gloss or varnish on top too.
Insulating the fireplace
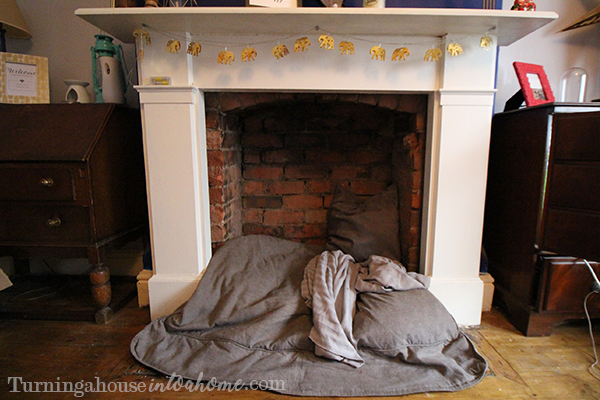
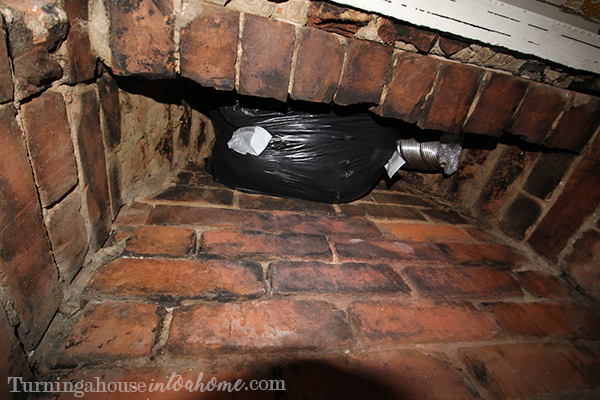
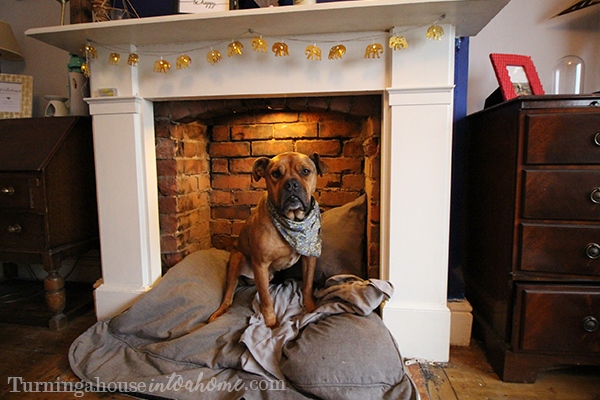
Because Ted’s bed is going to be in the fireplace, I needed to make sure I insulate it to keep it cosy for him. To do this, I popped some old cushions in a plastic bag and shoved them up the chimney to block any draughts and/or rain. Easy peasy!
Making the dog bed
Dog beds can be expensive, especially when your dog is the size of a small horse like mine is!! My top tip to get around this is to search in the fabric bin in Ikea’s bargain corner where they reduce ex-display and end of the line stock. I bought a huge sofa cover in the bargain bin there for £5. It’s perfect: big, rectangular, hard-wearing and has a big zip. I opened it up and stuffed it with cushions and hey-presto… you’ve got a nice big comfy dog bed! It works out way cheaper and less hassle than sewing one yourself, which was my initial plan before coming across the bargain of the century.
The finishing touches
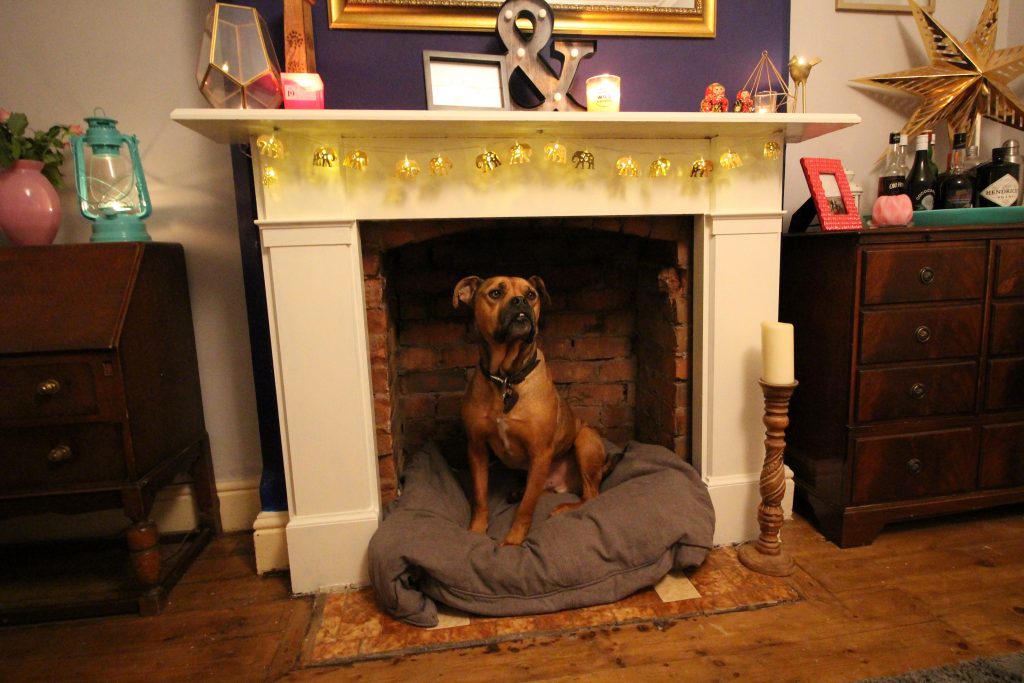
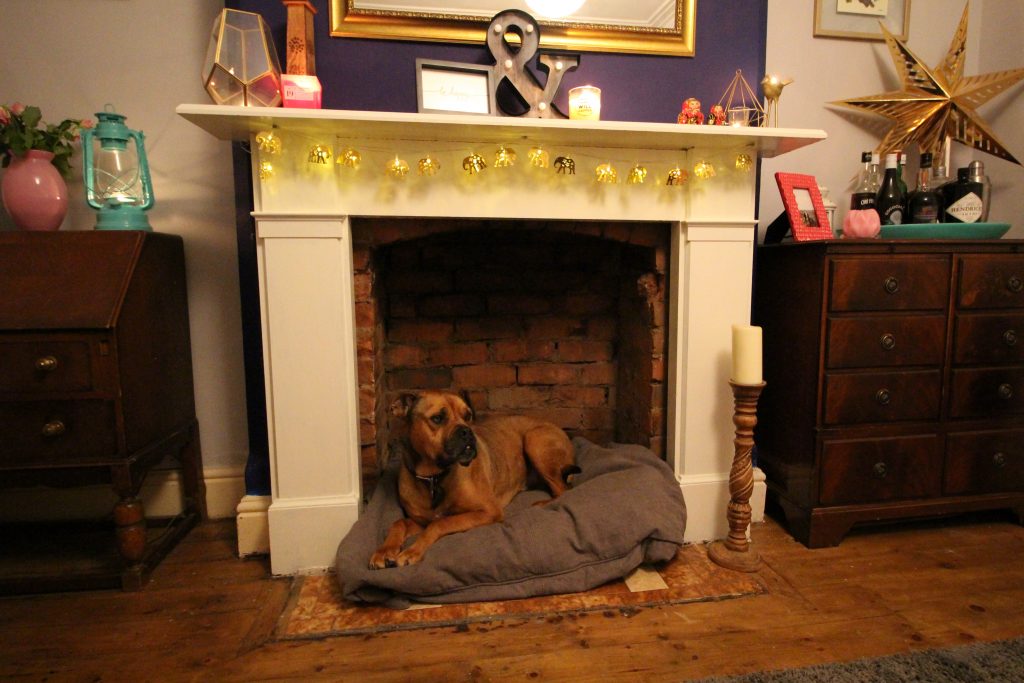
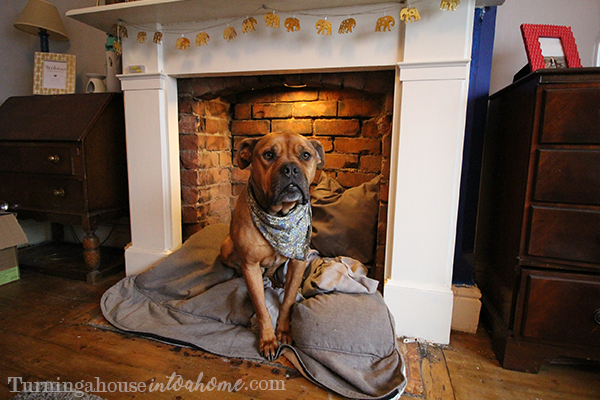
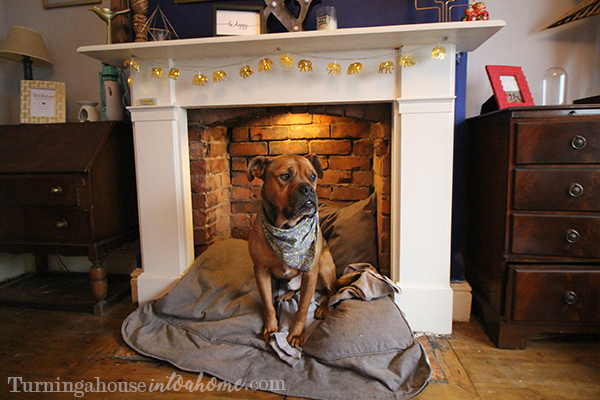
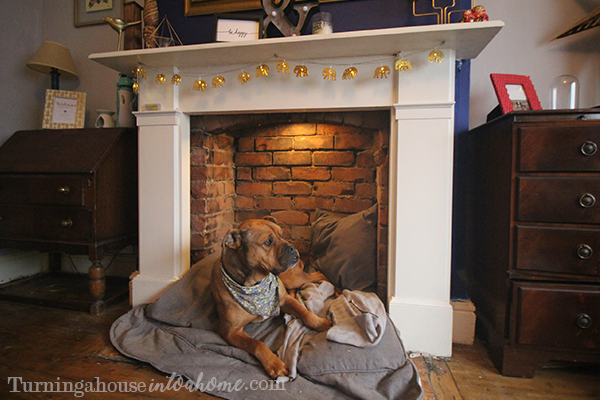
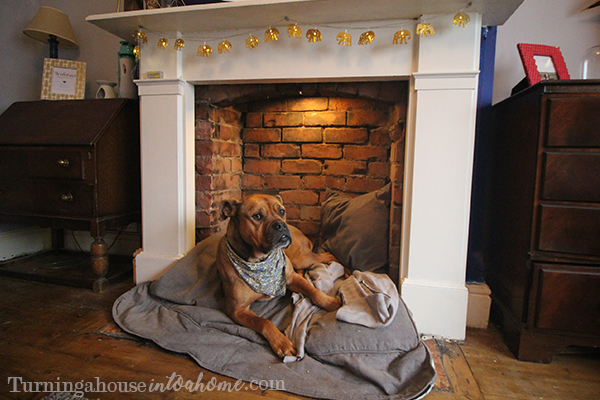
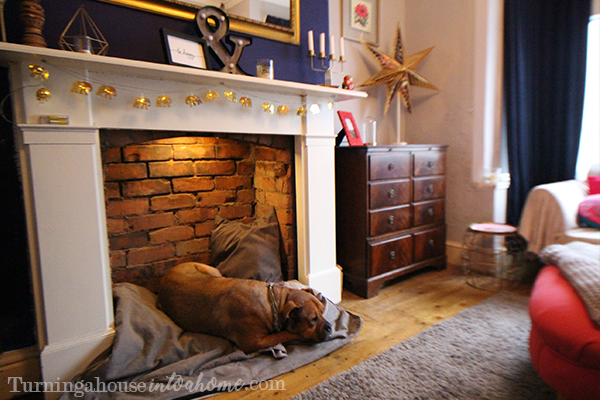
The finishing touch was hanging the fairy lights, which are beautiful brass elephant ones that I bought in Primark a couple of months ago. I superglued some hooks to the underneath of the fireplace to frame it and light up Ted’s bed for him. He’s now got a lovely big comfy bed in the living room which he loves and it keeps him and his slobber off my sofa so it’s win-win all round.
Scroll down for the update, including how to easily fit lighting into the fireplace pet bed!
Difficulty: 5/10 (I didn’t get the bricks quite as clean as I would have liked but even getting them to the point that I did took a lot of elbow grease)
Cost: <£20
What I’d do differently: Put down more dust sheets when using paint stripper! Even if bits of the paint that comes off with the stripper fall on wood floors, it will strip parts of the floor’s varnish!
*THE UPDATE*:
A few months on from making Ted his fireplace bed, it’s still one of my favourite features in the house. Ted loves it, it’s big enough for him to share with his friends and my sofa is practically free from dog hair!
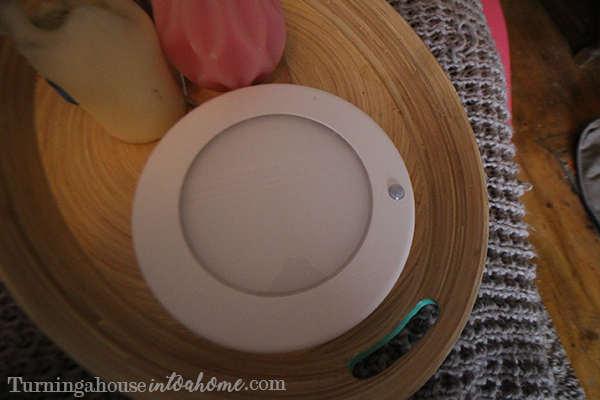
The only slight problem with it was that in the evenings it became pretty dark. I didn’t want Ted sitting in a dark little corner by himself when we’re in the living room so I decided to add some lighting to his bed.
I bought a battery-powered motion-activated “Stotta” light from Ikea for £9.
As I’ve already explained, I shoved a bin liner filled with old pillows up the chimney to stop the draft and make the dog bed cosier.
Stick the light to the bag using duct tape. The only thing to ensure is that you don’t cover the light’s sensor with the tape.
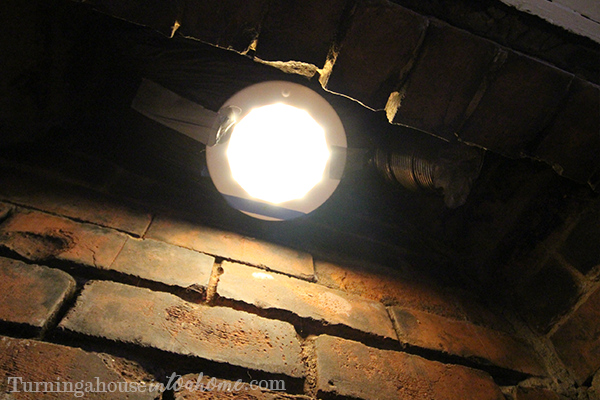
Fitting the light took less than a minute but made such a huge difference! Now if Ted sits in his bed, it lights up and makes it look much cosier. If he falls asleep, the light will turn off by itself so he can sleep in peace.
Thanks for reading! I’d love to know what you think!
Karla
Turning a House into a Home
Has he settled in ? Looks lovely!
Thanks! Yes he seems to love it… he can watch everybody from there!
Hope you are not working too hard cleaning up before our visit. We have Leinster match on Friday night!!
[…] of you who have read Turning a House into a Home before may recall the fireplace dog bed that I made for Ted. The original one was in the living room and it turned out to be really handy. […]