As well as being a great way of giving old furniture a new lease of life, painting furniture is also a great way to put your own stamp on a rented property (once you own the furniture that is!)
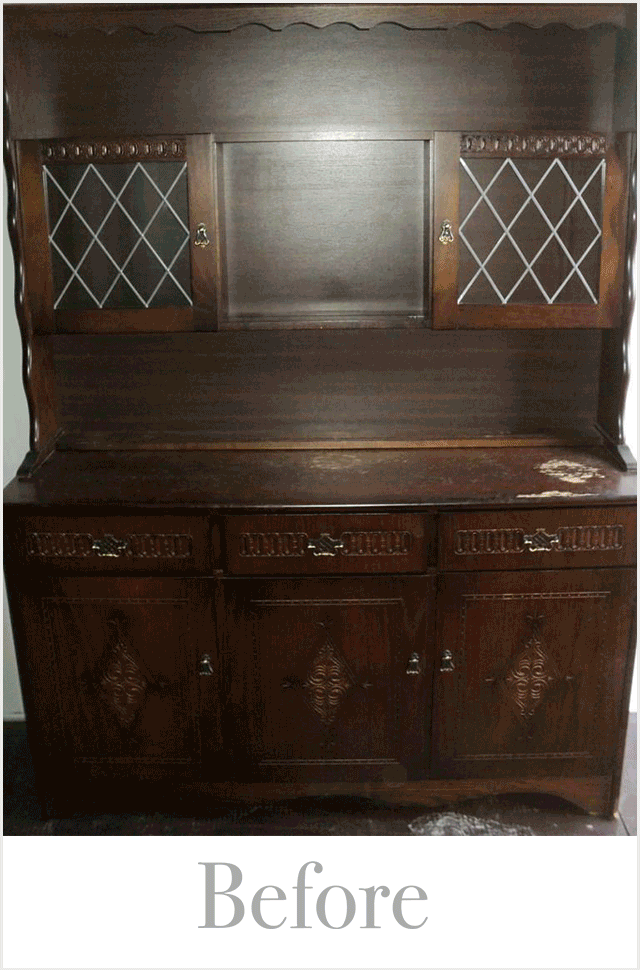
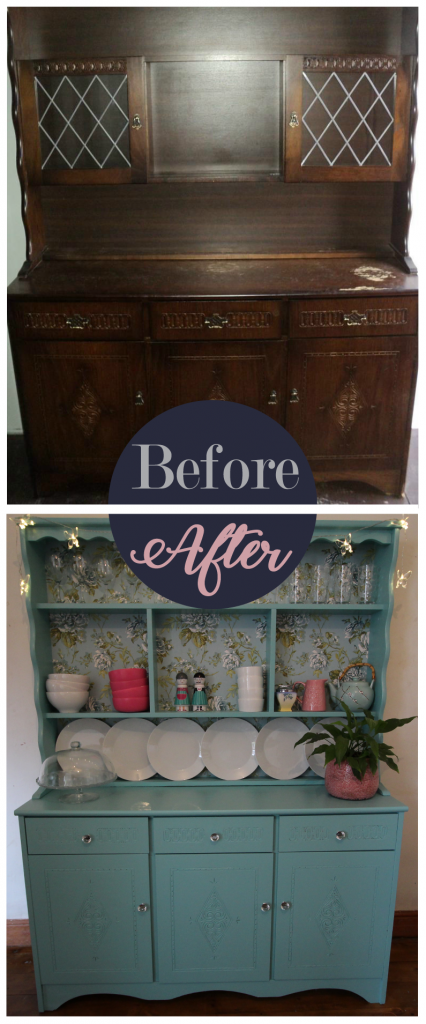
I bought a dresser for my dining room on eBay a couple of years ago and had a go at doing it up at the time. I didn’t do a great job of it and recently decided it was about time I finally gave it the facelift it so badly needed.
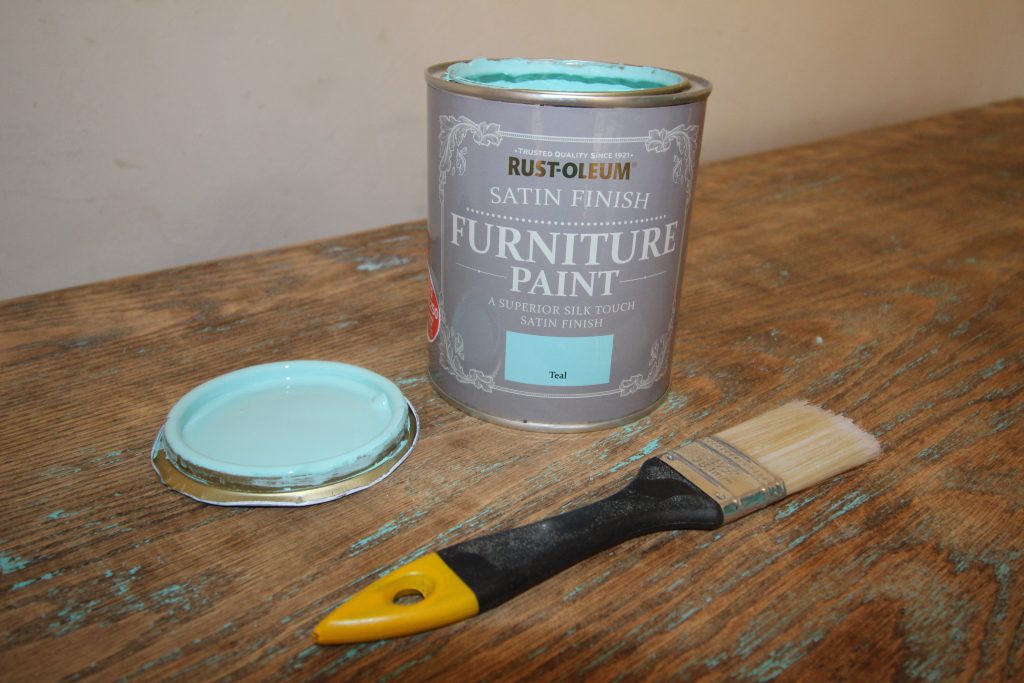
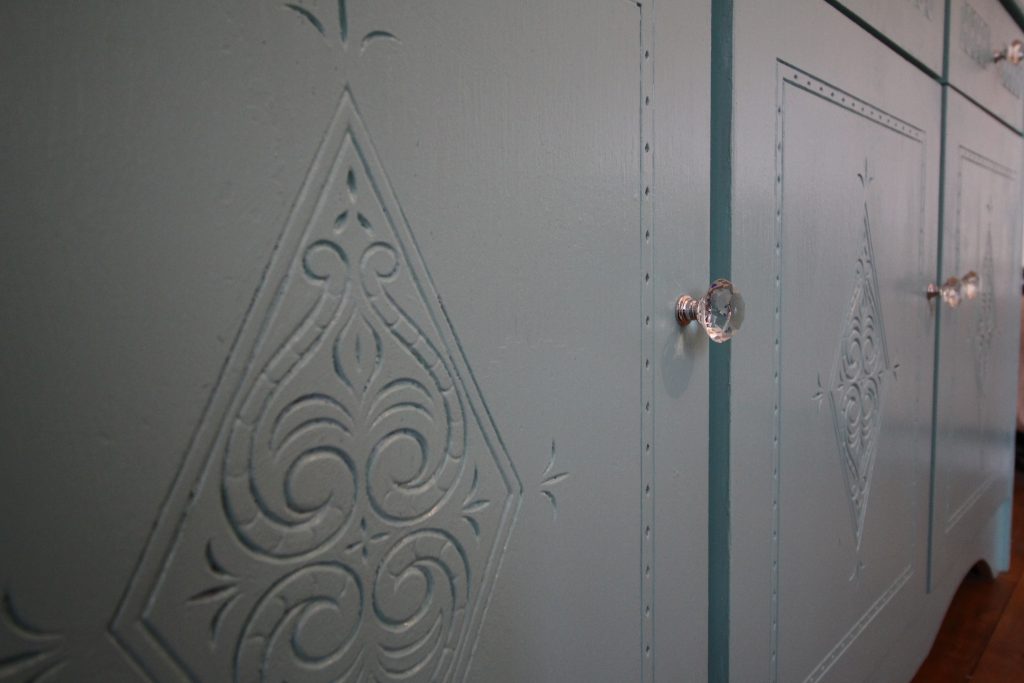
I had painted the dresser a teal colour but I hadn’t used the right type of paint and I hadn’t primed the wood properly so it chipped and generally just looked awful. I decided to paint it a similar colour as before and went with Rustoleum furniture paint. It’s similar to chalk paint in that you can paint on pretty much any surface and don’t need to prime it first, but it comes in satin as well as chalk. This meant I could get the finish I wanted straight after painting without having to varnish or wax it afterwards. The paint is £20 for a 750ml tin from B&Q, but they have a special offer on at the moment with 2 tins for £24.
Getting Started
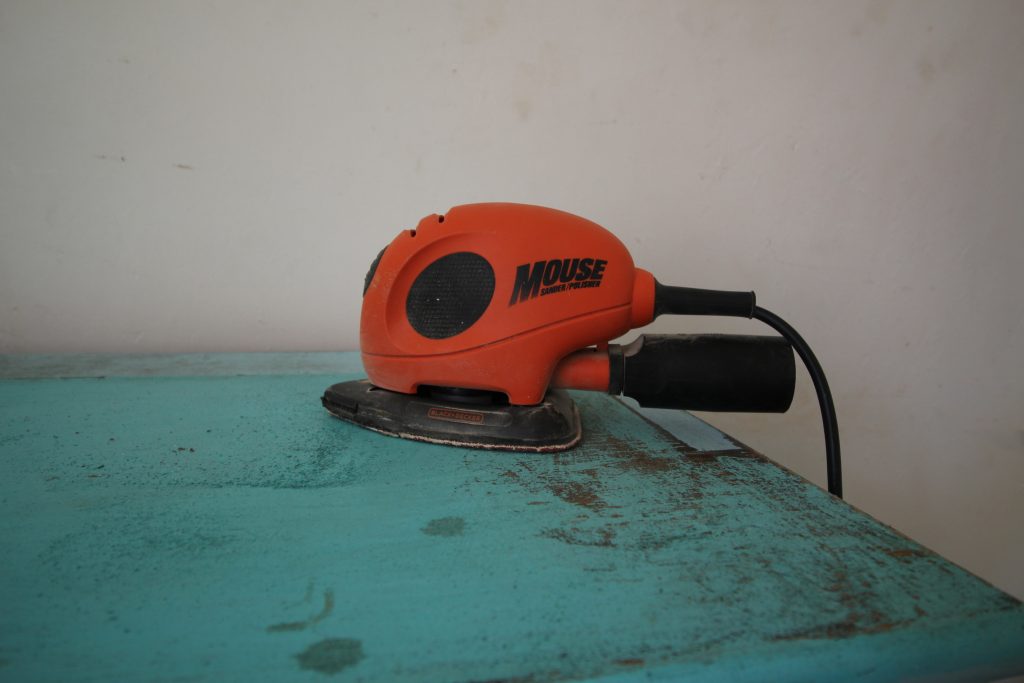
Because I hadn’t painted the dresser well the last time, I was determined to sand it down as best I could this time to give it a nice smooth finish. This time I used an electric sander and that made all the difference. It’s so much easier to use than just a sheet of sandpaper! I haven’t used any other electric sanders before so I don’t know how it compares, but I used the Black & Decker Mouse and it made sanding the dresser a dream.
I took the drawer fronts off and filled in the holes where the handles had been using a cheap bog-standard filler. Then I marked the centre of the drawer fronts and drilled through to fit a new handle and sanded down the dried filler.
Once I was happy that I had got rid of every last trace of the old rubbish paint job, I wiped down the surface with a damp cloth and was ready to start painting.
The paint was surprisingly thin but was easy to work with (I used a brush) and went on nice and evenly. It only took two coats to cover the whole unit despite it being a pretty dark wood and it only used two thirds of the 750ml tin. It dries pretty quickly too: once I was finished my first coat, I was able to go back to where I’d started and do the second coat right away.
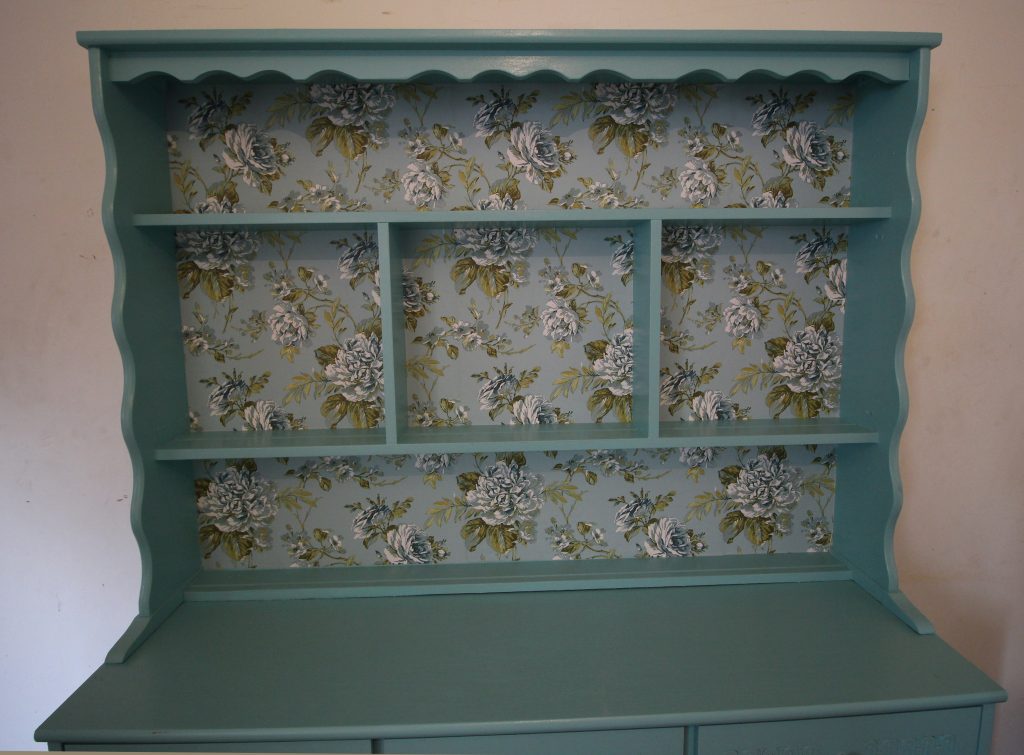
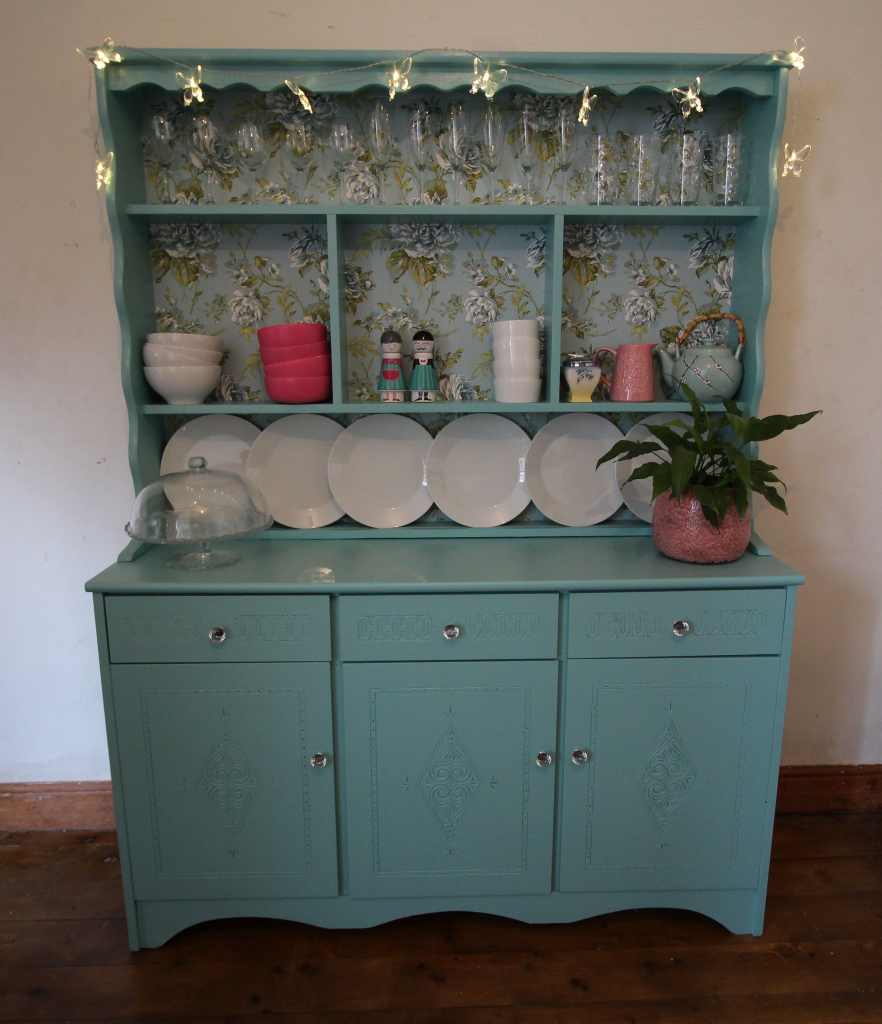
For the back of the dresser, I decided to give it a lift with some wallpaper. The wallpaper I chose was on clearance in Homebase for £3. It wasn’t my first choice but it matched the paint and was the cheapest choice by far so I went with it. I hadn’t wallpapered before but I’m happy with how it went. I measured all of the sections before cutting the paper in the right size, numbering the backs of each piece so they didn’t get mixed up and then pasted them on using Homebase’s own brand paste, which was less than £2 and way more than I needed.
The final touch was putting on the new knobs. I bought 16 for £10 from Amazon with my kitchen cupboards in mind but thought they’d look great on this dresser.
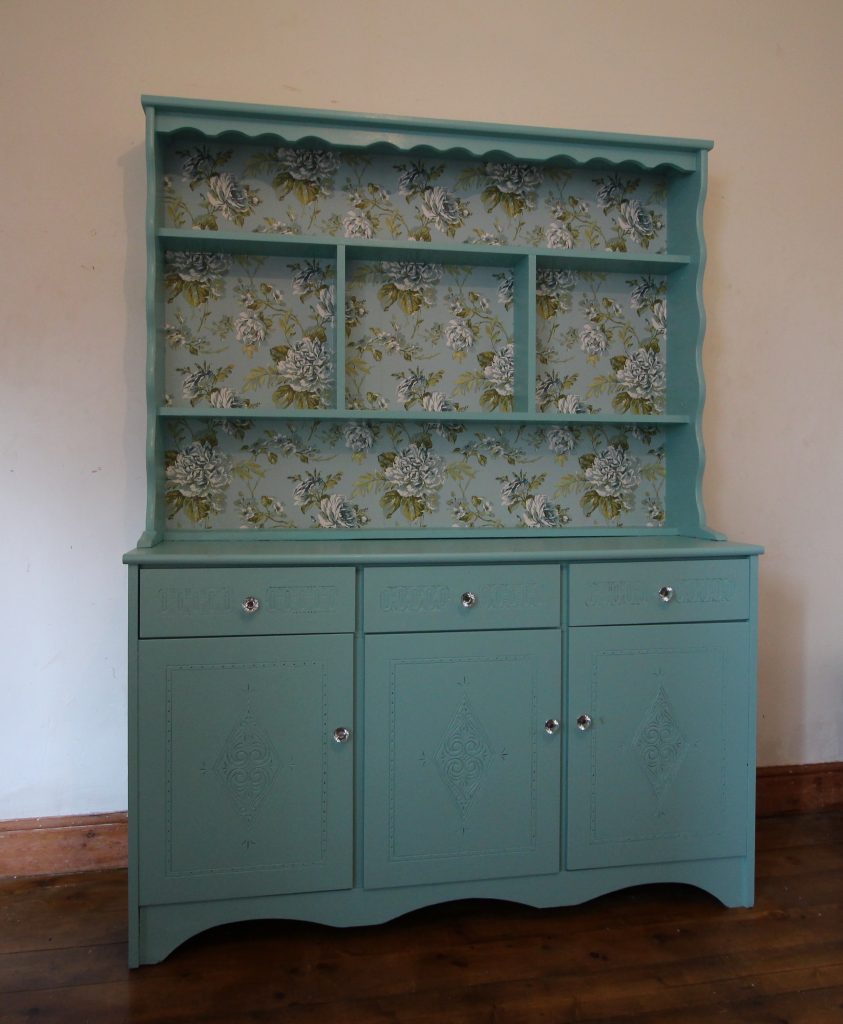
I’m finally really happy with the dresser. It really brightens up my dining room and the paint job this time around looks so much better. Time will tell how well it wears but I have high hopes so far.
Difficulty: 3/10
Cost: £20
Well done it really looks great. Looking forward to seeing it soon.
I love the dresser, ( what’s the saying… You get what you pay for!) all the hard work worth it.
[…] You can buy paste ready-mixed or mix your own. I mixed my own and it’s as easy as adding it to water and giving it a mix. I used a Homebase own brand paste that cost less than £2, which I had left over from wallpapering the back of the cabinet I upcycled recently. […]
[…] you’ve read my blog before, you may recall the dresser that I upcycled for my dining room. Although I liked it, it didn’t seem quite right for my […]
Hi Karla
I am the person who brought this and it has pride of place in my dining room – I love it so much. I I am now in the progress of painting my writing desk with display cabinet on top, following your guide which is most helpful.
many thanks susie
Hi Susie,
Thanks so much, I’m glad it’s got a good home! Hope your writing desk turned out well! 🙂
Karla